 Flux Art
To create a shoe-lacing detail image with GPT Image 2.5 in Flux Art, trace the real lace from its starting point to the knot and record the eyelet positions and lacing order. Matching eyelet counts do not guarantee the lacing is correct. The detail image must match the shoe currently for sale; do not mistake attractive crossings added by the model for the real lacing structure.
Set a Baseline for One Shoe and Its Real Lacing
Choose the current style and specify the left or right shoe. Photograph the upper, tongue, eyelets, and knot clearly. Samples of the same shoe may use different lacing, so have the product owner confirm which version to show. Do not mix two different lacing states. If the lace is hidden behind an eyelet or under the tongue, take additional close-ups. Mark any route that cannot be confirmed without disassembly as unknown; do not infer it from a common crisscross pattern.
Record Eyelet Numbers and Lace Paths Separately
On a copy of the reference, number the two columns of eyelets from toe to ankle. Keep these numbers off the final product image. Then trace each visible lace and record the eyelets it enters and exits. Check that no segment branches without cause, passes through the upper, or loops through a nonexistent eyelet. The over-and-under order at each crossing should also match the close-up. Correct eyelet counts are only a first check; they do not prove the path is right. An editor prepares the separate numbering chart; it is not an automatic structural check from the tool.
Keep the Lace Path Clear Before Adding Atmosphere
Choose an angle that makes the lacing area easy to see. Clearly preserve the tongue, eyelets, lace width, and real knot; for this pass, only clean up or standardize the background. Strong reflections, motion blur, and heavy occlusion are poor choices for the first lacing check. If you need to show another lacing method, tie it in practice and photograph a matching reference first. Do not let the model invent steps and present them as instructions. A standard product image also cannot prove how securely the laces hold or how comfortable the shoe feels.
Check the Full Path and Note What Cannot Be Seen
For the final check, trace the lace from one visible starting point to the knot, then follow the other end. Mark obscured sections as impossible to determine; do not assume that two similarly colored segments are the same lace. If you find an extra eyelet, a skipped eyelet, or an incorrect crossing, return to that area and check again after fixing it, including the tongue edge and eyelet counts on both sides. Deliver the full-shoe image, detail image, and internal path record. Do not add unsupported claims about lacing features or instructions to public-facing images.
Relevant Tools and Asset Preparation
An Attractive Upper Does Not Guarantee an Accurate Sole
Eyelets, sole tread, toe width, and heel height all affect whether the shoe matches the real style. Photograph these details clearly before choosing the main sales angle. If an on-foot image shows both shoes as the same shoe or makes the sole thinner, treat it as a structural failure rather than a natural pose.
| What to clarify | Details |
|---|---|
| Inputs or conditions | Real product photos and information about the shoe shape, toe, sole tread, lacing, material, and left and right shoes |
| Relevant actions | White-background hero image, detail close-up, lifestyle image, and on-foot image candidates |
| Required checks | Distorted sole tread, confused left and right shoes, changes in lace count, and foot-shoe intersections |
Check On-Foot Contact Separately
The ankle, sock opening, and shoe opening should meet naturally, and the sole should make natural contact with the ground. A generated image cannot prove shoe size or comfort. Before approving a dynamic pose, confirm the shoe shape in a simple standing pose, then expand to walking or side-view candidates.
Flux Art is operated by MORNING STAR INDUSTRY LIMITED. It is a multi-model AI visual creation and production platform. One account can access more than 50 third-party image and video models, along with ecommerce tools for product image sets, background replacement, retouching, and virtual apparel try-on. Model pages and ecommerce tools are separate entry points. If a task specifically requires GPT Image 2.5, confirm the selected model in its model page; do not attribute results from every tool to that model.
Turn the Shoe Image Workflow into Practical Steps
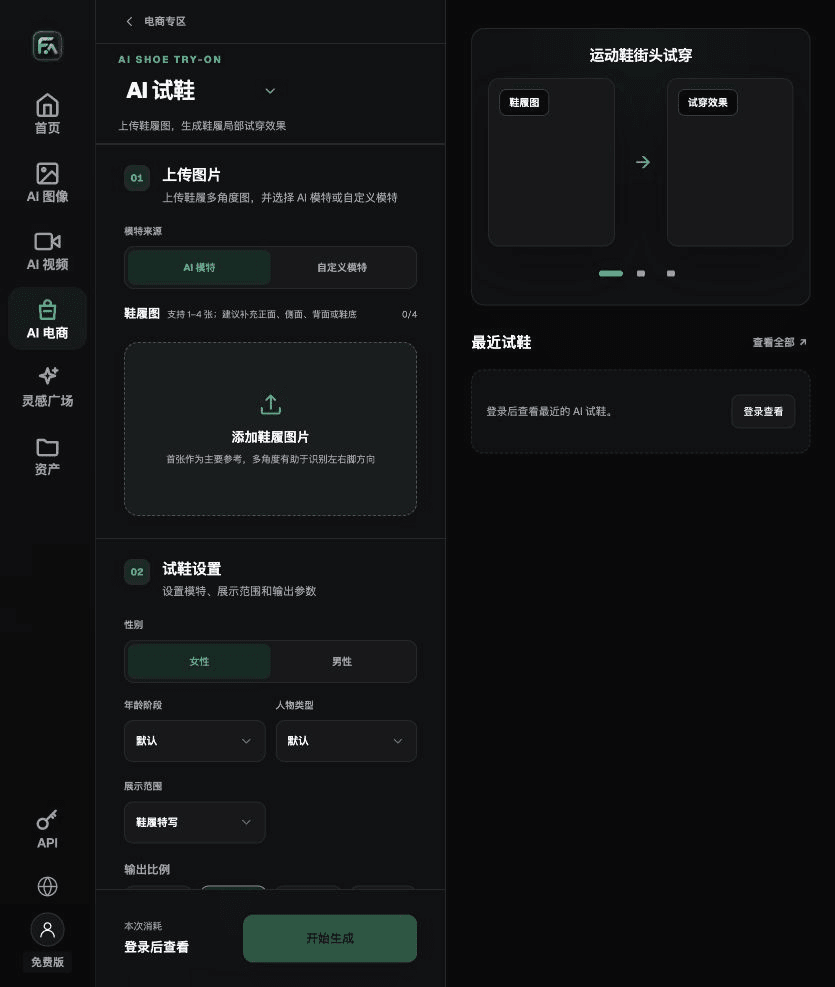
For shoe product images, complete the relevant steps in AI Shoe Try-On: upload 1–4 shoe images, set the first as the main image, and use the other angles to show the upper, heel, and sole. Choose an AI or custom model, then set the shoe close-up, pose, scene, socks, and bottoms.
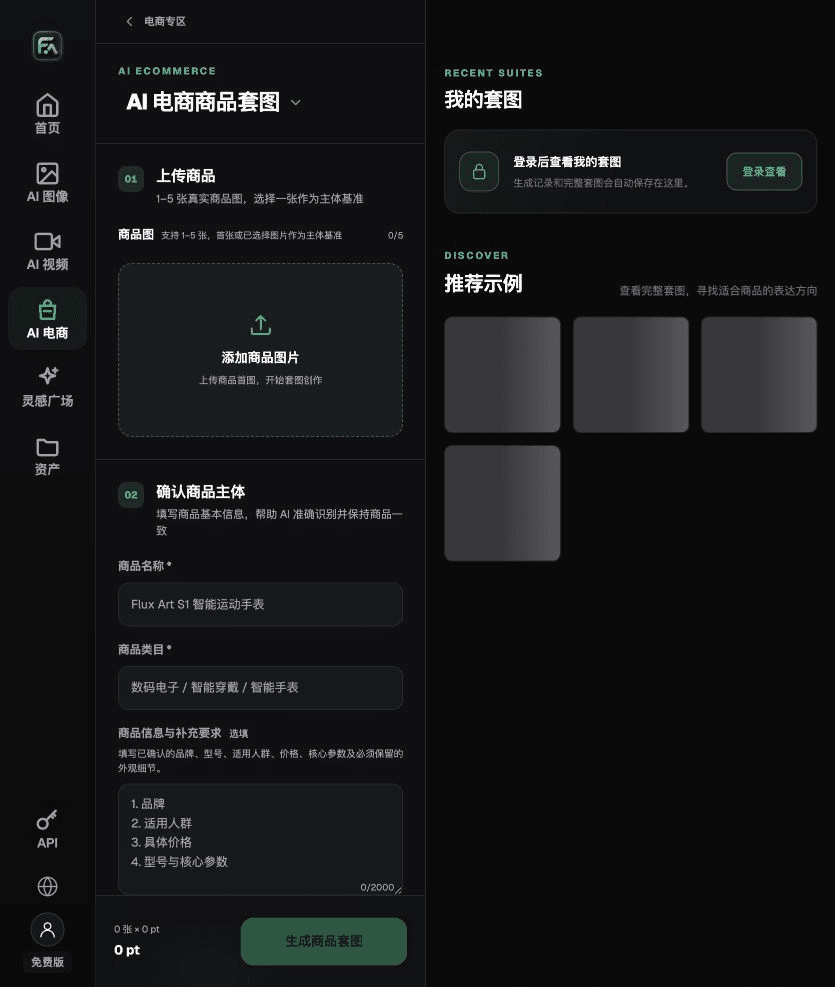
For shoe product images, complete the relevant steps in Product Image Suite: upload 1–5 real product images and enter the product name, category, factual details, and details that must be preserved. Choose modules such as the product hero image, white-background main image, key selling points, use scenes, and detail close-ups. Set the aspect ratio, resolution, and language.
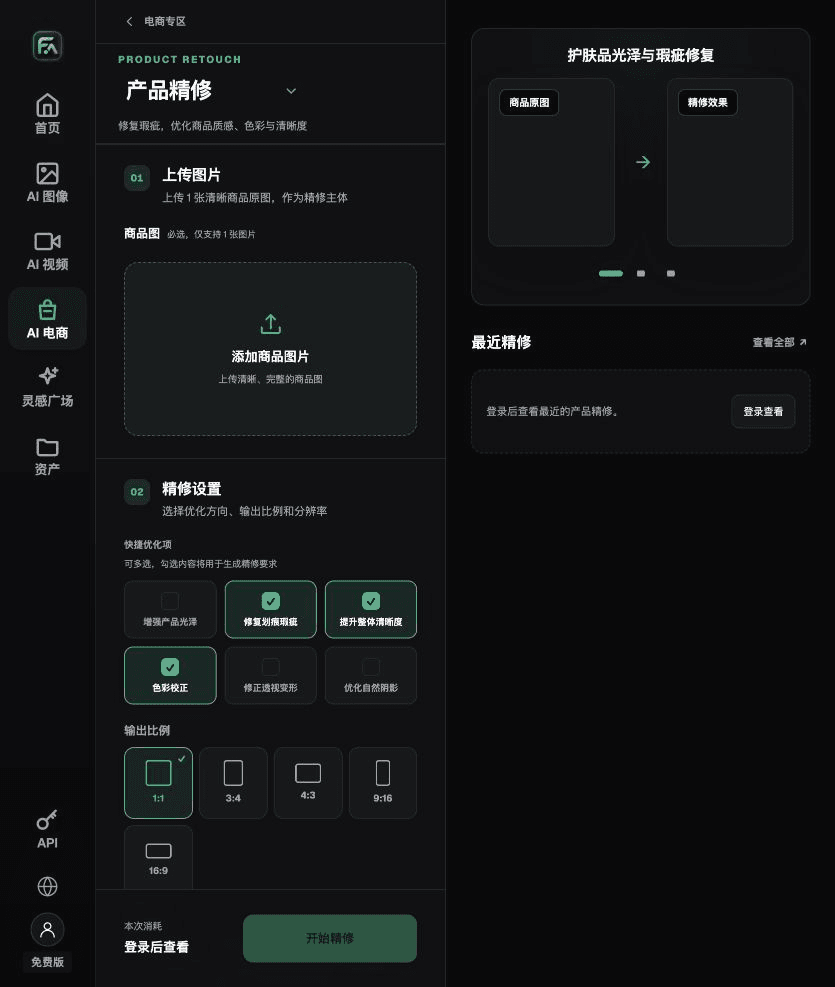
For shoe product images, complete the relevant steps in Product Retouch: upload one clear product image without severe occlusion. Select gloss, scratches or blemishes, clarity, color correction, perspective distortion, and natural shadows as needed; you do not have to enable every option.
For shoe product images, also check for distorted sole tread, confused left and right shoes, changes in lace count, and foot-shoe intersections. Review these items alongside the checks in “An Attractive Upper Does Not Guarantee an Accurate Sole.”
A Prompt to Try for This Task
Create ecommerce images of shoes. The subject must come from the uploaded real product image. Preserve the shoe shape, toe, sole tread, lacing, material, and left and right shoes. For this task, generate only one product display image that matches the status checklist in this article and the current real reference. Target audience: [fill in]; placement: [fill in]; lighting: [fill in]. Do not invent specifications, accessories, certifications, benefits, or structural details.

Check These Items Before Delivery
After creating shoe product images, check the final files for distorted sole tread, confused left and right shoes, changes in lace count, and foot-shoe intersections. If you continue with other modules or SKUs, reuse the approved product evidence and validate each new task separately. Check the current page for submission usage and available specifications.

From Production to Delivery Files
After completing this task, archive the original product images, approved copy, selected tool or model, input instructions, candidate versions, and final exports together. Keep the originals separate; revisions must not overwrite the product evidence. Include the style or task ID in filenames so the operations team can identify the sales version for each image. Before delivery, check resolution, cropping, captions, and links for each actual placement. Approval of one large image does not mean every placement has passed review.
Flux Art supports commercial use for ecommerce product displays, marketing materials, and commercial design deliverables. Handle input photos, people, trademarks, and product marketing information according to the project’s actual materials. Checking rights to input assets and product accuracy are separate delivery requirements from the platform’s commercial-use support.
Sources and Related Workflows
For model background, see OpenAI’s official introduction to ChatGPT Images 2.5, retrieved on 2026-10-01. Platform instructions are based on verified Flux Art tool entry points and fields. This article provides production steps and examples to carry out; it does not claim generation tests, pass rates, cost savings, or customer results.
Find the relevant tools in the Flux Art AI Ecommerce Workspace. For related tasks, read the product image production tutorial for more on production and review methods.
Related source link in the original: Related tool or source 1