 Flux Art
A product exploded view can look complete without matching the parts list. When arranging a structural presentation with Flux Art or creating a layout candidate with GPT Image 2.5, first assign identifiers from the approved list and actual part assets, then check counts, leader lines and omissions. A visual is not an engineering assembly drawing, and a model should not fill gaps in the list by inventing internal structure.
Distinguish Part-Type IDs from Each Depicted Item
Start with the approved parts list for the relevant model and revision. A type of screw may occupy one row in the list but appear multiple times in the image: use the part-type ID to link it to the part name, then add supplementary markers to the depicted items so one row is not mistaken for one piece. This article does not define the actual quantity; check the number supported by the source materials. If a marketing visual shows only some parts, list the omitted scope separately rather than implying that missing items are included.
Cross-Check Assets and the List Before Positioning Parts
Find a matching asset for every row in the list, and check each asset back against its approved ID. Do not match similar-looking washers, connectors or covers by color alone; request a close-up if the details are unclear. The layout may space parts farther apart for readability, but the caption should say it is illustrative and that the spacing does not represent actual installation dimensions. Do not force a complete exploded structure when actual internal assets are unavailable; instead, deliver exterior views and close-up details supported by evidence.
Recheck Leader-Line Endpoints and Counts at Final Size
Check the parts on the image without text first, then add IDs and leader lines. Each line should point to the corresponding physical item; avoid crossings that make it appear to connect to a neighboring part. Quantity labels for repeated parts should match the approved list and the scope shown. Check model-generated labels character by character, and keep editable annotation layers in the production file where possible. Review the image at the actual product-detail-page size. If an ID is obscured or two small parts merge into one, adjust the layout instead of changing the list to suit the image.
Record Unshown and Unknown Items Separately
The delivery sheet should distinguish at least three statuses: shown and verified, documented but omitted from this image, and not yet documented. Omissions can be noted in the caption or a supplementary page; unknown items must not be marked as complete. Keep the list revision, asset IDs, mapping to depicted items and final export so you can identify what needs review after a product revision. This article does not provide electrical wiring, disassembly, torque or assembly sequence instructions. Those belong in professional documentation for the relevant model and should not be inferred from the image layout.
Original Draft Context and Relevant Entry Points
Separate Presentation Images from Engineering References
Placing a connector on a workbench is a scene-design choice; changing its threads, hole spacing or flange structure changes the product. Clear photographs and engineering documents determine what must not be changed. Do not let a model complete an unclear area with plausible-looking but unverified structure.
| What This Task Must Clarify | Specific Details |
|---|---|
| Inputs or conditions | Actual product photos and details of interfaces, hole positions, screws, graduations, model numbers, dimensions, tolerances and materials |
| Relevant actions | White-background images, structural details, specifications, use scenarios and technical-detail modules |
| Required checks | Redrawn structure, incorrect model number or parameters, incorrect dimensional relationships, and concept art mistaken for an engineering drawing |
Flux Art is operated by MORNING STAR INDUSTRY LIMITED. It is a multi-model AI visual creation and production platform where one account can access more than 50 third-party image and video models, along with ecommerce tools for product image sets, background replacement, retouching and virtual try-on. Model pages and ecommerce tools are separate entry points: if a task specifically requires GPT Image 2.5, confirm that model in its designated entry point rather than attributing results from all tools to it.
Keep Technical Text Editable Where Possible
Check model numbers, dimensions, tolerances and units individually. Use professional layout software or CAD source files for dense annotations to avoid misleading text generated in an image. Use scenarios must also match the actual interfaces and connection methods; do not add fictitious parts to create an industrial look.
Put Industrial Product Images into Practice
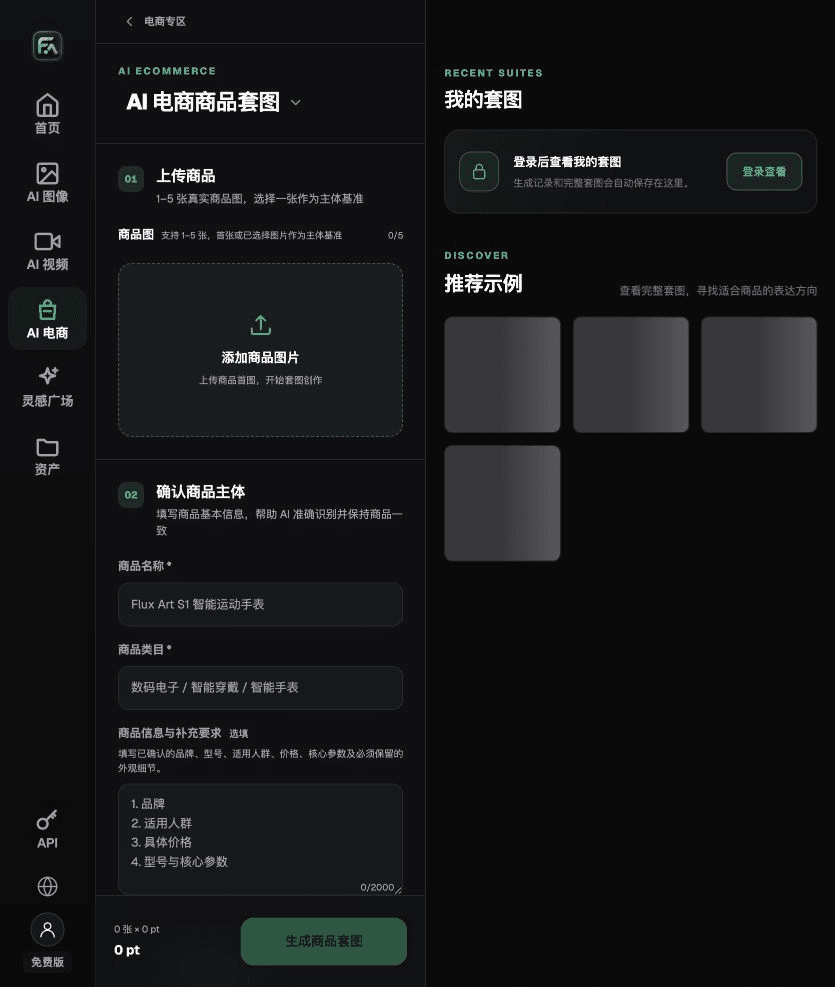
To create industrial product images, complete the relevant steps in Product Suite: upload 1–5 actual product photos, enter the product name, category, factual information and details that must be preserved; choose modules such as a product hero image, white-background main image, key selling points, use scenario or close-up details; then set the aspect ratio, clarity and language.
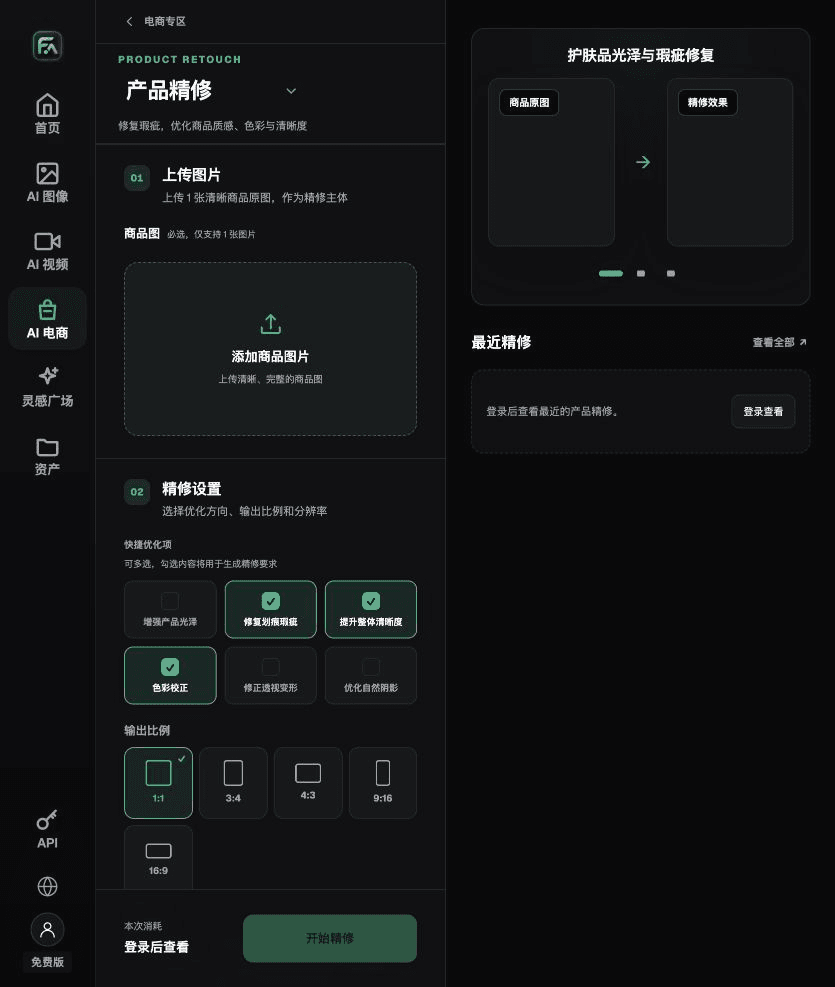
To create industrial product images, complete the relevant steps in Product Retouch: upload one product image with a clear subject and no severe obstruction; select gloss, scratches/defects, clarity, color correction, perspective distortion and natural shadow as needed. You do not need to enable every option.
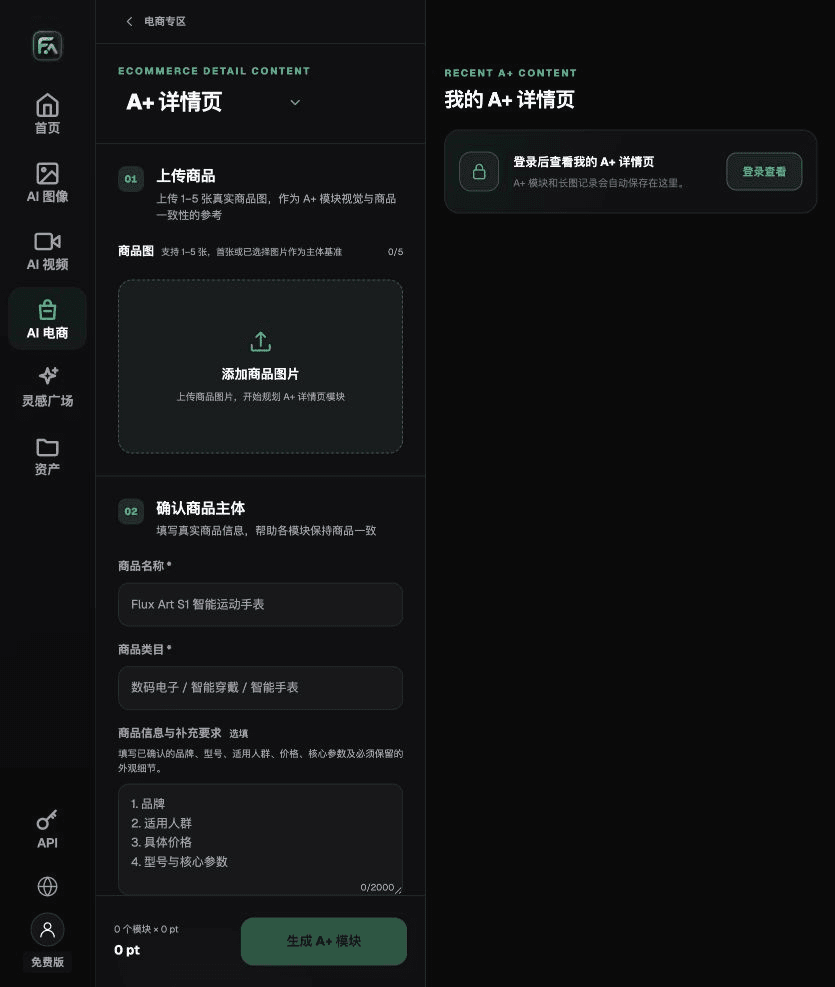
To create industrial product images, complete the relevant steps in A+ Content: upload 1–5 product images or consistency reference images, and enter product facts and selling points that have already been reviewed; choose the A+ content modules and output specifications you need, then check the headings, parameters, selling points and images in each section.
For industrial product images, also check for redrawn structure, incorrect model numbers or parameters, incorrect dimensional relationships, and concept art mistaken for an engineering drawing. Review this delivery checklist together with the earlier requirement to separate presentation images from engineering references.
A Prompt to Try for This Task
Create an ecommerce image of an industrial product. The subject must come from the uploaded photo of the actual product. Preserve the interfaces, hole positions, screws, graduations, model number, dimensions, tolerance annotations and material. Generate only one product presentation image that matches the status list in this article and the actual references provided. Target audience: [fill in]; placement: [fill in]; lighting: [fill in]. Do not invent parameters, accessories, certifications, performance claims or structure.

Check These Items Before Delivery
After creating industrial product images, inspect the final files for redrawn structure, incorrect model numbers or parameters, incorrect dimensional relationships, and concept art mistaken for an engineering drawing. If you continue with other modules or SKUs, reuse the approved evidence for the subject and verify each new task separately. Check the current page for submission consumption and available specifications.

From Creation to Deliverable Files
After completing this page's task, archive the original inputs, approved conditions, selected tools or models, instructions, candidate versions and final files together. Keep the original separate; do not overwrite it with retouching or diagnostic copies. Include the business task ID in filenames so recipients can find the input and output behind each conclusion. Before delivery, check every item against this task's checklist and leave unresolved questions open. Do not substitute interface screenshots, plans or a single summary number for actual results.
Flux Art supports commercial use for ecommerce product presentation, marketing materials and commercial design deliverables. Handle input photos, people, trademarks and product claims according to the project materials. Checking rights to input assets and verifying product authenticity are delivery responsibilities separate from the platform's commercial-use support.
Sources and Related Workflows
For model background, see OpenAI's official introduction to ChatGPT Images 2.5, retrieved on 2026-10-06. Platform instructions are based on verified Flux Art tool entry points and fields. This article provides production steps and examples to be carried out; it does not claim fabricated generation tests, pass rates, cost savings or customer outcomes.
Find the relevant tools in the Flux Art AI Ecommerce workspace. For related tasks, read the related workflow tutorial for more production and review guidance.
Related entry in the original draft: Related tool or source 1