 Flux Art
A pair of earrings does not always consist of two identical pieces. Before organizing product images in Flux Art or creating candidates with GPT Image 2.5, label the two actual pieces separately, then check their front and back, posts or clips, and wearing direction. The final deliverables should let you trace each piece in a paired photo back to its own original image, rather than mirror-copying one image to make a pair.
Label Them A and B Before Assigning Left and Right
Photograph the actual pair against the same background, keeping separate front, side and back views of each piece. Use left and right labels only if the product information explicitly distinguishes them; otherwise, temporary A and B labels are enough. Record visible differences in curves, drop direction, connecting rings, posts or clips. Do not erase natural asymmetry or design differences to make the layout look symmetrical. If you have an image of only one piece, photograph the other first; do not treat a generated copy as an item you have seen in person.
Match Each Front View to Its Backing
Create a front-and-back reference row for each piece, using stable decorative details, connecting structures and the photographed item label to check the match. Record the quantity of separately photographed earring backs or accessories and whether they are included; do not imply that each piece comes with one just by placing it nearby. Background cleanup and gloss adjustments should address confirmed presentation issues only. If the backing is unclear or covered by a hand, take another photo rather than asking the model to guess a different fastening structure. The images are for product identification and do not assess piercing, skin or wearing safety.
Check the Wearer’s Side and the Earring’s Direction
Label each wearing candidate with the wearer’s side; the left side of the image does not necessarily show the wearer’s left ear. Compare it with the corresponding real photo to confirm the decorative face’s direction, post or clip position and any occlusion. Also record perspective changes caused by the wearer turning their head. If the earring is directional, do not flip one side and place it on the other. If the design allows the pieces to be swapped, still follow the actual product information. Skin contact and proportions should look plausible, but a composite image is not a comfort or weight test.
Keep the Pair Labels Across All Three Image Types
Paired photos, single-item details and wearing images each serve a purpose. Link them in the delivery sheet using the same A/B labels. First check the sales list to confirm both pieces and any accessories are accounted for, then trace each image back to the piece it shows; similar color or sparkle is not enough to establish identity. If you retouch only the background for piece B, recheck whether the paired photo still uses the old image of B. Keep the originals, candidates, approved versions and matching checklist. Do not use one attractive wearing image as a substitute for checking the complete pair.
Source Image and Relevant Entry Point
Jewelry Shouldn’t Be Beautified into a Different Design
Check ring-band thickness, chain links, prongs and stone count against a clear original image. Do not let “more luxurious” turn an ordinary material gold-colored or add gemstones. If a close-up does not have enough pixels, take another photo instead of treating generated texture as a real macro photograph.
| What to Specify | Details |
|---|---|
| Inputs or conditions | Real product photos and information on gemstone facets, prong count, chain links, metal color, dimensions and reflections |
| Related actions | White-background images, macro details, wearing images, gifting scenes and product-benefit images |
| Required checks | Redrawn small structures, changes in gemstone count, distorted reflections and incorrect wearing proportions |
Flux Art is operated by MORNING STAR INDUSTRY LIMITED. It is a multi-model AI visual creation and production platform where one account can access more than 50 third-party image and video models, along with e-commerce tools for product image sets, background replacement, retouching and apparel try-on. Model pages and e-commerce tools are separate entry points. If the task specifically requires GPT Image 2.5, confirm the selected model in its dedicated model entry point; do not attribute results from every tool to that model.
Wearing Proportions Shape Credibility
For earrings, necklaces and watches, check contact points, size and occlusion. The lighting on the wearer’s skin should work with the metal reflections. Precious-metal purity, gemstone grade and dimensions must come from actual product information; visual candidates are not a substitute for appraisal.
Turn Jewelry Product Images into a Workflow
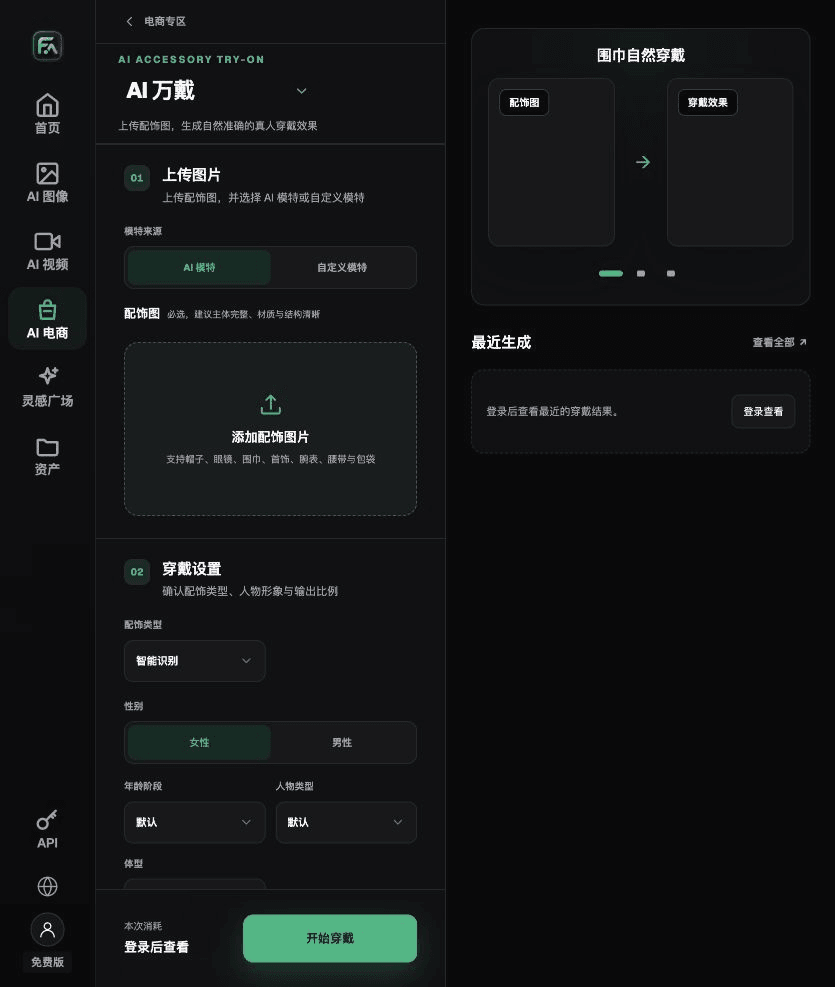
To create jewelry product images, complete the relevant steps in AI Accessory Try-On: upload accessory images such as hats, glasses, scarves, jewelry, watches, belts or bags, then choose an AI or custom model. Set the model’s appearance, body type, scene, styling and wearing instructions.
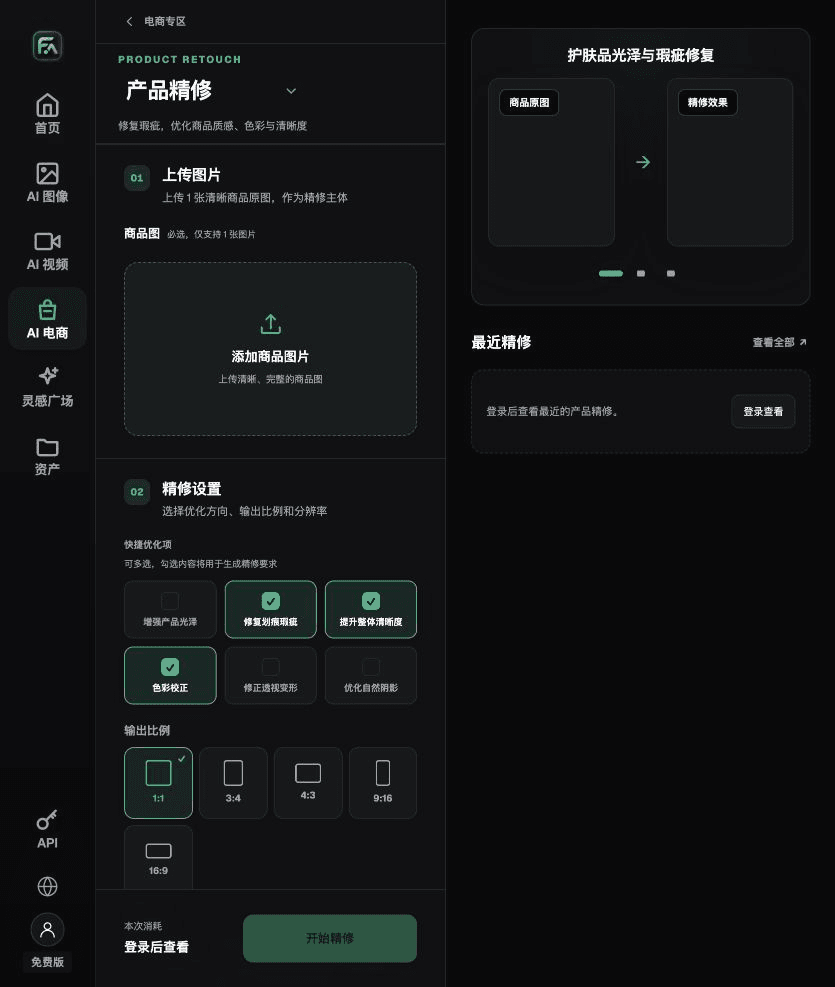
To create jewelry product images, complete the relevant steps in Product Retouching: upload one clear product image without major occlusion. Select gloss, scratches/imperfections, sharpness, color correction, perspective distortion and natural shadows as needed; you do not need to enable every option.
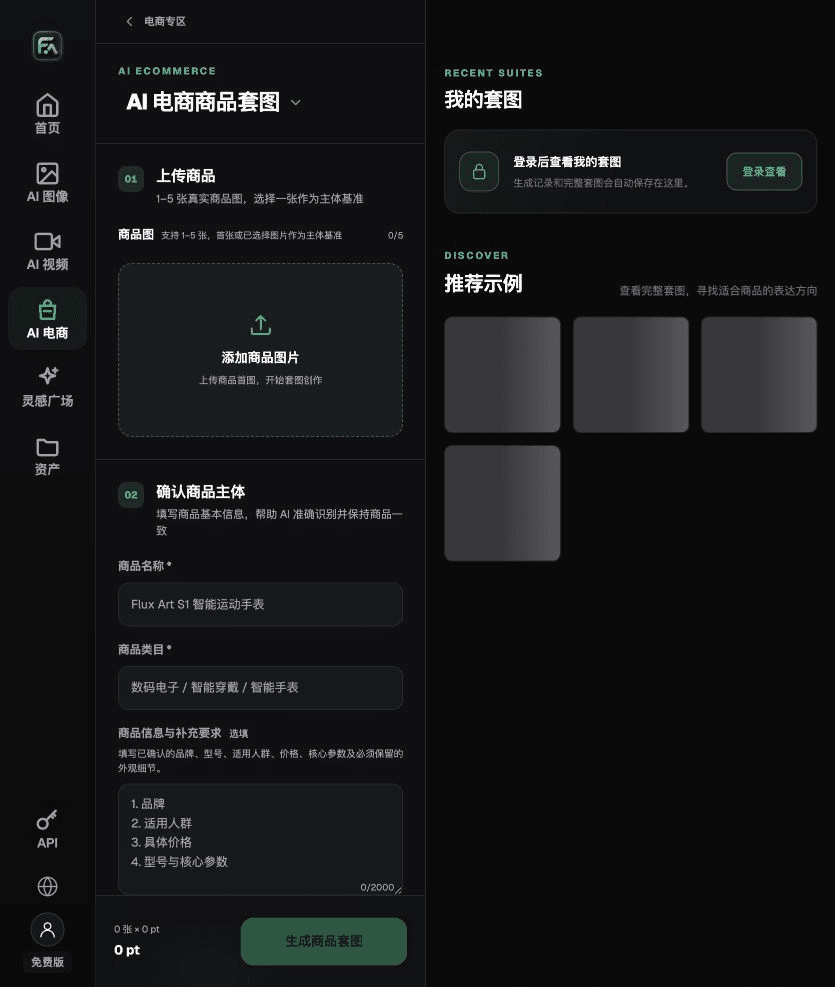
To create jewelry product images, complete the relevant steps in Product Image Set: upload 1–5 real product images and enter the product name, category, factual information and details that must be preserved. Choose modules such as the product hero image, white-background main image, key selling points, use scenes and close-up details, then set the aspect ratio, sharpness and language.
For jewelry product images, also check for redrawn small structures, changes in gemstone count, distorted reflections and incorrect wearing proportions. Review this delivery checklist together with the requirements above under “Jewelry Shouldn’t Be Beautified into a Different Design.”
A Prompt to Try for This Task
Create an e-commerce image of jewelry. The subject must come from the uploaded real product image. Preserve the gemstone facets, prong count, chain links, metal color, dimensions and reflections; generate only one product display image consistent with this article’s status checklist and the current real reference. Target audience [fill in], placement [fill in], lighting [fill in]. Do not invent specifications, accessories, certifications, claims or structures.

Check These Items Before Delivery
After creating jewelry product images, check the final files for redrawn small structures, changes in gemstone count, distorted reflections and incorrect wearing proportions. If you continue with other modules or SKUs, carry forward the evidence for the approved subject and verify each new task separately. Submission costs and optional specifications are shown on the current page.

From Creation to Deliverable Files
After completing this page’s task, archive the original inputs, approved conditions, selected tool or model, instructions, candidate versions and final files together. Keep originals separate; revisions and diagnostic copies must not overwrite them. Link filenames to the business task ID so recipients can find the input and output for each conclusion. Before delivery, check each item against this task’s checklist and leave unresolved issues marked as unresolved. Do not substitute interface screenshots, plans or a single summary figure for actual results.
Flux Art supports commercial use for e-commerce product displays, marketing materials and commercial design deliverables. Handle input photos, people, trademarks and product promotional information according to the actual project materials. Checking rights to input materials and verifying product authenticity are separate delivery tasks from the platform’s commercial-use support.
Sources and Related Workflows
For model background, see OpenAI’s official introduction to ChatGPT Images 2.5, retrieved on 2026-10-06. Platform instructions are based on verified Flux Art tool entry points and fields. This article provides production steps and examples to be carried out; it does not invent generation tests, pass rates, savings or customer results.
You can find the relevant tools in the Flux Art AI E-commerce Workspace. Read the related workflow tutorial for more information on creating and checking images.
Relevant source entry: Relevant tool or source 1