 Flux Art
A clean chandelier scene should not come at the cost of removing real suspension wires or the canopy. When using Flux Art to change backgrounds, create product image sets, or prepare editing candidates with GPT Image 2.5, first mark the canopy, stem, suspension wire, and fixture connection points against real photos, then check that each path is continuous. This is a product image review method, not load-bearing, electrical, or installation guidance.
Prepare the Complete Fixture and Connection Details for Each Configuration
For each model, first save the original photo showing the complete fixture, canopy, and visible suspension structure, then add close-ups of the connections. Assign separate identifiers to multi-light and single-light versions, different stem lengths, and different canopies; without reference materials, do not combine a ceiling mount from another model. Distinguish power cords, decorative wires, and support components using confirmed information; do not guess their purpose from apparent thickness alone. This article checks whether the image matches real references; it does not determine which components can bear weight or how to connect power.
Trace the Visible Path in Segments from Ceiling to Fixture
On a copy of the original, mark the starting point, bends, where the wire goes behind an object and reappears, and its connection endpoint. Then compare the candidate image segment by segment. A wire temporarily hidden behind an object is not necessarily broken, but it should not reappear elsewhere as an extra wire without supporting evidence. A stem should not pass through a lampshade or hang from a point with no connection. These markings are for external team review; they do not mean Flux Art automatically checks path continuity. If a path is unclear, return to the original instead of inventing structure from lighting and shadows.
Check the Ceiling and Occlusion Boundaries When Changing the Room
When a composite changes the ceiling angle, check the projected positions of the canopy, stem, and fixture from the same viewing angle. Do not let the model design a new connector just to fit a sloped ceiling; use an authentic, approved reference for special installation configurations. Ceiling crops can follow the layout, but if the image is meant to show the complete structure, keep the relevant connections visible. Do not hide missing parts with overexposure or ceiling decorations. Review the fixture's lighting effect separately from this structural check.
Document the Displayed Scope and Configuration Source
Use the same model and configuration identifiers for the full scene, canopy close-up, and fixture details. State wire length, quantity, and installation configuration in sales images only when clear documentation supports them; visual perspective is not a measurement. Check whether a phone thumbnail makes a fine suspension wire disappear. If needed, add a separate detail image instead of arbitrarily thickening the wire. Archive the authentic references, marked copies, candidates, and approved versions together. Source any engineering specifications from the corresponding manufacturer documents; do not infer them from generated images.
Source Context and Related Entry Points
Lighting Effects Can Most Easily Imply a Feature
The soft halo rendered by a model may look more even and brighter than the actual fixture. Promotional technical specifications must come from approved materials, and lit images should avoid exaggeration. Do not remove the shade, wires, or support structure to make the image look cleaner.
| What This Review Must Clarify | Details |
|---|---|
| Inputs or conditions | Authentic product photos and information on fixture structure, shade material, light source position, color temperature, wiring, and installation method |
| Related actions | White-background images, lit scenes, dimensions, material images, and installation feature images |
| Items to check | Fixture distortion, incorrect number of light sources, misleading color temperature, and impossible shadows |
Flux Art is operated by MORNING STAR INDUSTRY LIMITED. It is a multi-model AI visual creation and production platform that provides access to 50+ third-party image and video models under one account, along with e-commerce tools for product image sets, background changes, retouching, and virtual try-on. Model pages and e-commerce tools are separate entry points: if a task specifically requires GPT Image 2.5, confirm the selected model in its corresponding model entry point; do not attribute results from every tool to that model.
Check That Shadows and Installation Relationships Make Sense
Check a chandelier's suspension point, a table lamp's contact with the tabletop, and how a wall light is fixed in place. The number and position of light sources should match the actual product, and shadows should not come from nonexistent lights. When showing different color temperatures, use actual sales configurations with clear labels.
Turn Lighting Product Images into Practical Steps
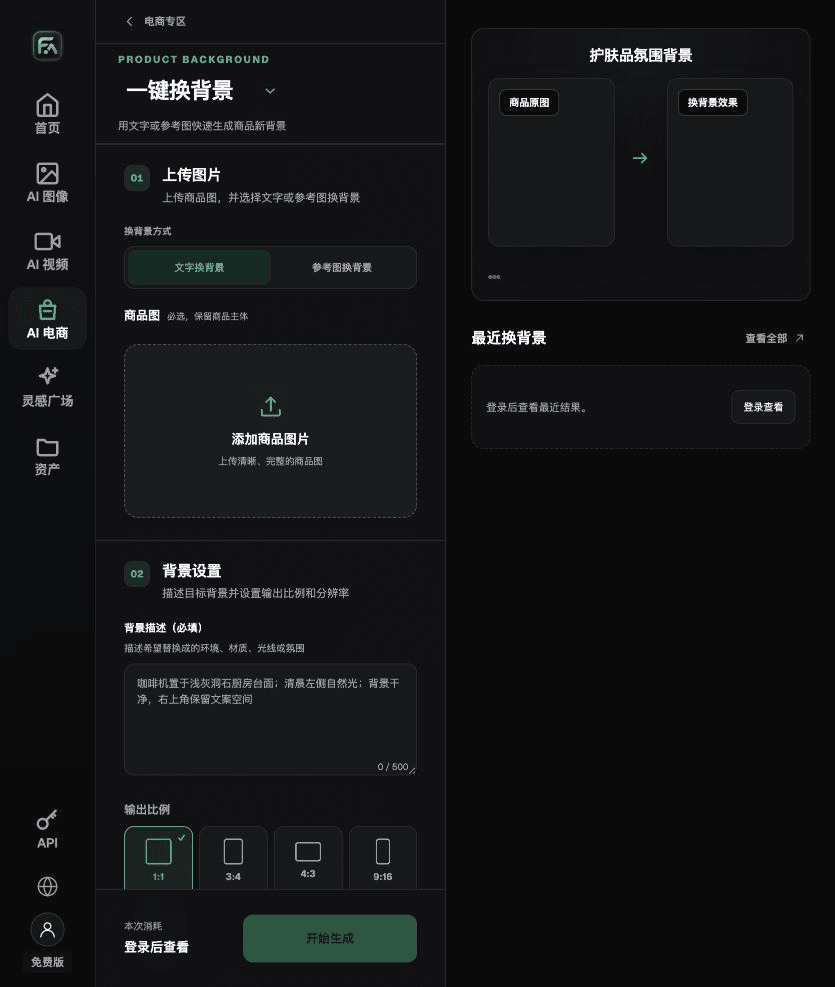
For lighting product images, complete the relevant step in Change Background in One Click: upload a product image, describe the background in text, or upload a background reference image you have permission to use. Describe the setting, tabletop material, direction of light, mood, and contact shadows, and list the product details that must not change.
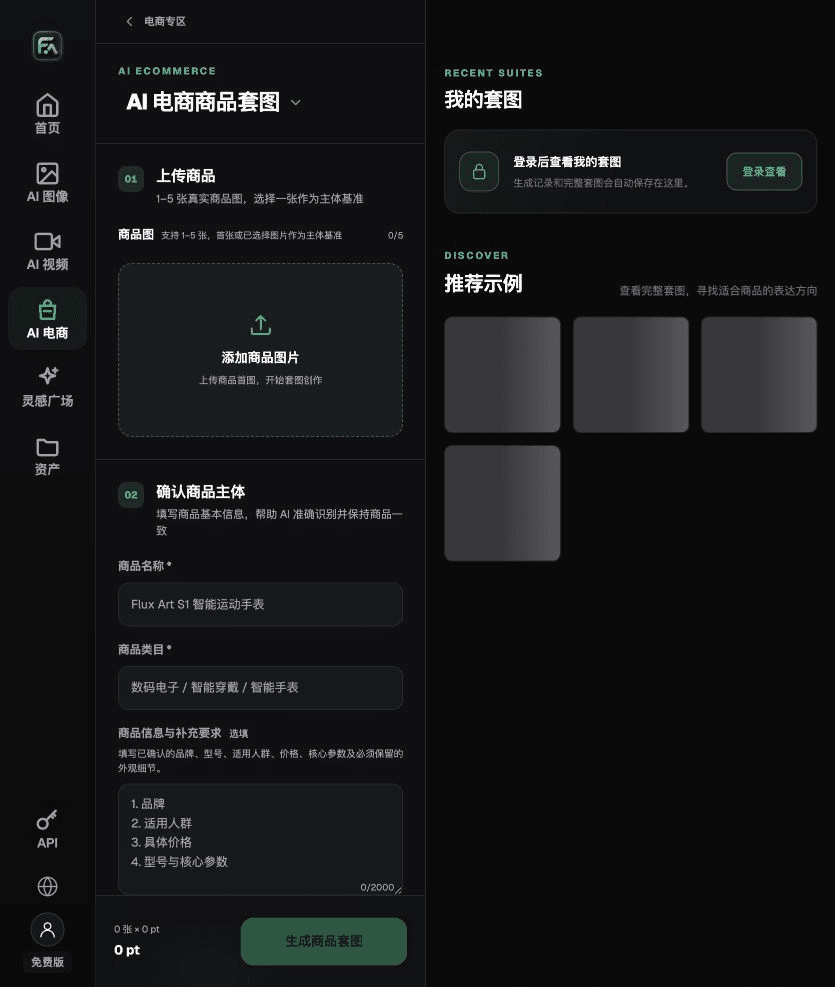
For lighting product images, complete the relevant step in Product Image Set: upload 1–5 authentic product photos, then enter the product name, category, factual details, and details that must be preserved. Choose modules such as the product hero image, white-background main image, key selling points, usage scenes, or detail close-ups, then set the aspect ratio, resolution, and language.
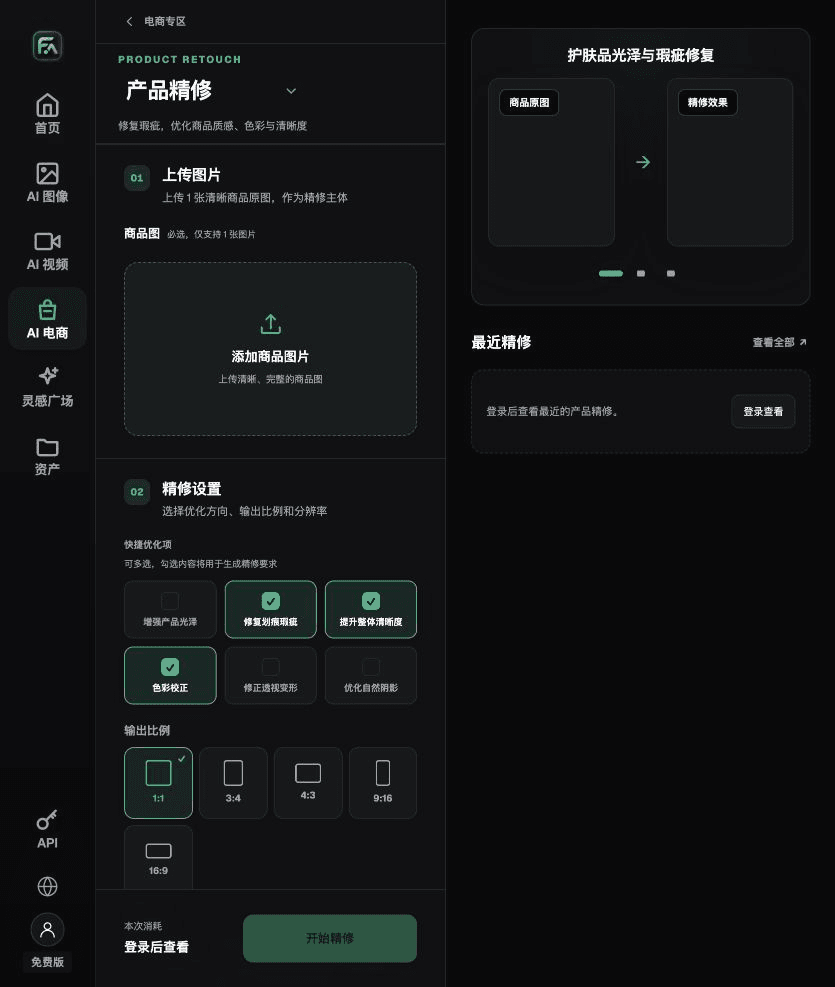
For lighting product images, complete the relevant step in Product Retouching: upload a product photo with a clear subject and no severe occlusion. Select gloss, scratches/blemishes, clarity, color correction, perspective distortion, and natural shadows as needed; you do not have to enable every option.
For lighting product images, also check for fixture distortion, the wrong number of light sources, misleading color temperature, and impossible shadows. Review this delivery checklist alongside the requirements above in “Lighting Effects Can Most Easily Imply a Feature.”
A Prompt to Try for This Task
Create e-commerce images for a lighting product. The subject comes from the authentic product image I uploaded. Preserve the fixture structure, shade material, light source position, color temperature, wiring, and installation method. Generate one product display image that matches the status checklist in this article and the current authentic references. Target audience: [fill in]. Placement: [fill in]. Lighting: [fill in]. Do not invent specifications, accessories, certifications, benefits, or structure.

Check These Items Before Delivery
After completing lighting product images, check the final files for fixture distortion, incorrect number of light sources, misleading color temperature, and impossible shadows. If you continue with other modules or SKUs, carry forward the approved evidence for the product itself, then validate each new task separately. Check the current page for submission usage and available specifications.

From Creation to Deliverable Files
After completing the task on this page, archive the original inputs, approved conditions, selected tools or model, instructions, candidate versions, and final files together. Keep originals separate; revisions and diagnostic copies must not overwrite them. Include the business task ID in filenames so recipients can locate the input and output behind each conclusion. Before delivery, check every item on this task's checklist and leave unresolved questions open. Do not substitute interface screenshots, plans, or a single aggregate number for actual results.
Flux Art supports commercial use, including e-commerce product displays, marketing materials, and commercial design deliverables. Handle input photos, people, trademarks, and product claims according to the project materials. Verifying rights to input assets and product authenticity remains a separate delivery task from the platform's commercial-use support.
Sources and Related Workflows
For model background, see OpenAI's official introduction to ChatGPT Images 2.5, accessed on 2026-10-06. Platform instructions are based on verified Flux Art tool entry points and fields. This article provides production steps and examples to be carried out; it does not claim generation tests, pass rates, cost savings, or customer results.
Find the relevant tools in the Flux Art AI E-commerce Workspace. For related tasks, continue with the related workflow tutorial to learn more about production and review methods.
Related entry in the original: related tool or source 1