 Flux Art
A GPT Image 2.5 product image may look clear at full size yet make it hard to tell which model is for sale when reduced to a small listing thumbnail. When setting the composition in Flux Art, identify details such as the handle and opening first, then check the full image, thumbnail, and actual crop separately. This article provides a practical thumbnail checklist; it does not treat visual preference as a click-through-rate test.
Choose three details that distinguish the model
Using a lidded handled cup as a hypothetical example, mark the handle opening, lid, and body outline. These identifying details should come from the real product; do not ask the model to invent a conspicuous accessory. Add all three to the checklist, then choose an original photo that shows them together. If a feature on the back was not photographed, take another angle instead of using a rotated generated image to claim that it shows the actual structure. The team maintains this checklist; it is not an automatic platform recognition result.
Check thumbnails at their actual display width
Place the export candidate in a preview of the target listing and note the frame dimensions and crop method. At full size, inspect text, edges, and material; at thumbnail size, check only whether the identifying details remain discernible. If the handle disappears into the background, adjust the composition or the contrast between the background and product. Do not simply make the handle thicker. Use the display width of your own placement; do not present one pixel value as a standard for every platform.
Separate cropping issues from generation issues
If the lid is intact in the original but gets cut off in the listing thumbnail, first check the image container and crop position; there is no need to regenerate the product. If the lid is already missing from the original, return to the input or editing step. Save the full product image and channel-specific crop separately, and record file versions and display slots so the operations team does not use the wrong output. You can adjust how much of the frame the product occupies, but do not change the proportions between the product and its real accessories.
Record only what you can observe during review
For each candidate, mark three statuses: full-size check passed, thumbnail recognition passed, and crop check passed. Attach the corresponding previews. Only run a live placement test after these checks; click-through rate, traffic, and orders are separate data points and cannot be inferred from looking at an image. If the example checks have not been performed, leave their status as pending. For failures, note the specific identifying detail and corrective action so the next designer can pick up the work directly.
Relevant tools and asset preparation
The primary selling angle matters more than decoration
For a handled cup, for example, the front view must show the handle and lid rather than hide these parts behind oversized copy. Choose the primary selling angle from actual photos, check that the product is complete, then decide where to place the product and how much negative space to leave. Do not use a newly generated angle as a depiction of the real product if the original photos do not support it.
| What this task needs to clarify | Details |
|---|---|
| Inputs or conditions | A clear photo of the real product, the intended use of the main image, and negative-space requirements |
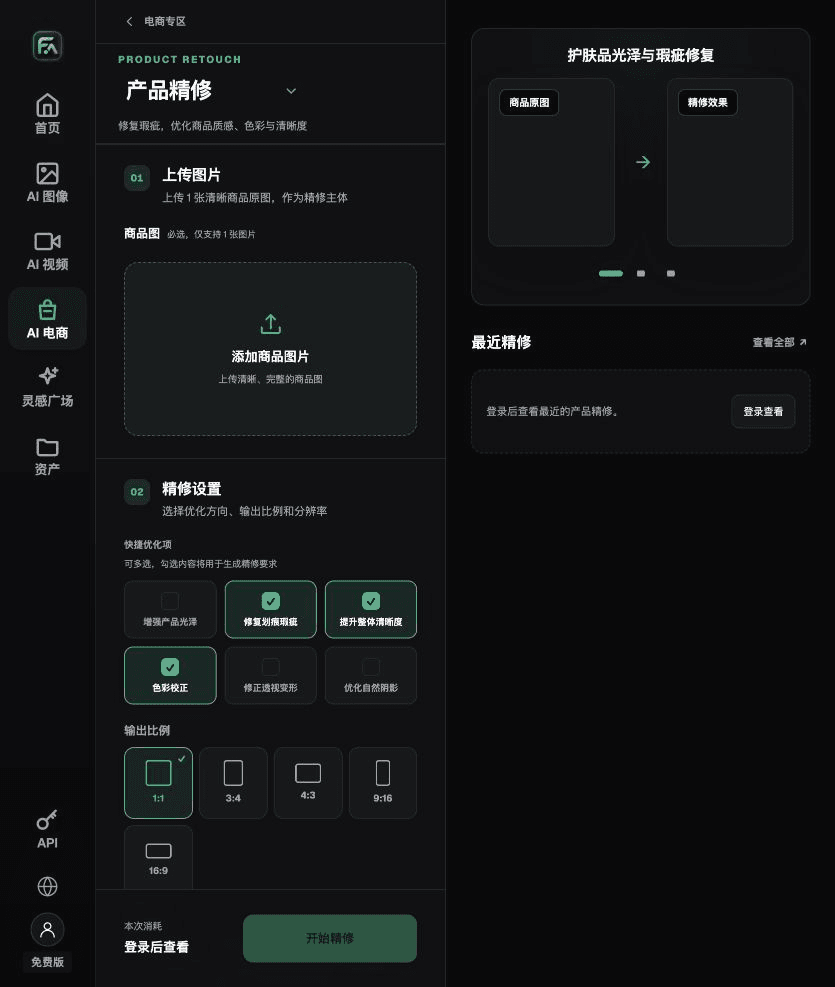
| Action | Select the lead image or white-background module in Product Suite; if needed, retouch only exposure, perspective, and natural shadows |
| Required checks | Product occupancy, outline, edges, shadows, text, and platform-prohibited elements |
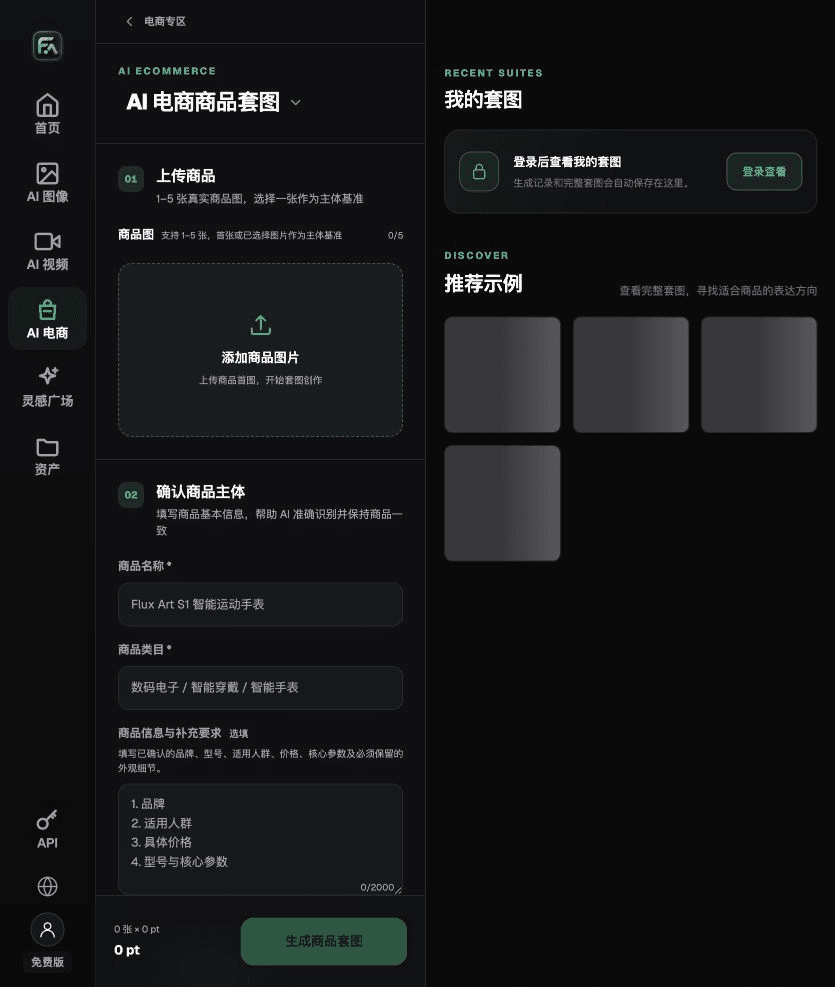
Flux Art is operated by MORNING STAR INDUSTRY LIMITED. It is a multimodel AI visual creation and production platform. One account can access more than 50 third-party image and video models, along with ecommerce tools for product image sets, background changes, retouching, and apparel try-on. Model pages and ecommerce tools are separate entry points. If a task specifically requires GPT Image 2.5, confirm the selected model in its model page; do not attribute every tool result to that model.
Check at both thumbnail and full size
At full size, inspect edges, logos, and materials. Then reduce the image to a typical platform display width and check whether the product is still recognizable. Both checks must pass. Retouch only defects in exposure, perspective, or shadows; do not inadvertently make the product slimmer or rounder.
Put the product image workflow into practice
To create a product image, complete the relevant steps in Product Suite: upload 1–5 photos of the real product; enter the product name, category, factual details, and features that must be preserved; select modules such as lead product image, white-background main image, key selling points, use case, or detail close-up; and set the aspect ratio, resolution, and language.
For product retouching, complete the relevant steps in Product Retouch: upload one clear product photo without major obstructions; select only the needed options, such as gloss, scratches or imperfections, clarity, color correction, perspective distortion, and natural shadows. You do not need to enable every option.
For the product image, also check product occupancy, outline, edges, shadows, text, and platform-prohibited elements. Review this delivery checklist together with the requirement above that the primary selling angle matters more than decoration.

A prompt to try for this task
Create a product image based on the uploaded real product. Preserve its outline, number of components, packaging text, logo, actual color, and material. Image use: [enter channel and placement]; aspect ratio: [enter ratio]; exact copy: “[enter copy]”. Do not add products, accessories, certification marks, or promotional claims.

Check these items before delivery
Once the product image is complete, check the final file for product occupancy, outline, edges, shadows, text, and platform-prohibited elements. If you continue with other modules or SKUs, carry forward the approved product evidence and validate each new task separately. Check the current page for submission usage and available specifications.

From production to delivery-ready files
After completing this page’s task, archive the original product photos, approved copy, selected tool or model, input instructions, candidate versions, and final exports together. Keep the originals separate; revisions must not overwrite the product evidence. Include the SKU or task number in filenames so the operations team can find the sales version associated with each image. Before delivery, check resolution, crops, captions, and links for the actual placements. Passing one large image does not mean every placement has passed.
Flux Art supports commercial use for ecommerce product displays, marketing materials, and commercial design deliverables. Handle input photos, people, trademarks, and product claims according to the actual project materials. Verifying rights to input assets and the accuracy of product depictions is a delivery task separate from the platform’s commercial-use support.
Sources and related workflows
For model background, see OpenAI’s official introduction to ChatGPT Images 2.5, accessed on 2026-09-30. Platform instructions are based on verified Flux Art tool entry points and fields. This article provides production steps and examples to carry out; it does not claim generation tests, pass rates, savings, or customer results that were never established.
Find the relevant tools in the Flux Art AI Ecommerce workspace. For related tasks, continue with the related product creation tutorial to learn more about production and review methods.
Related link in the original draft: Related tool or source 1