 Flux Art
When using GPT Image 2.5 to create white-background images of white products such as bottles and cups, check product exposure, edge transitions, and background color separately. Flux Art can create white-background candidates. During review, preserve the product’s original tonal shading to show its volume; don’t gray the entire product to make its edges visible, and don’t confuse a white background with a transparent one.
First Check Whether the Source Image Has Recoverable Edges
Use a white ceramic cup as the example. Inspect the rim, the inside of the handle, and the base. If these areas are already overexposed into continuous white patches in the source image, take another photo with suitable exposure first; don’t expect the model to restore a real cup edge that was never captured. If the edges are visible in the source but missing from the candidate, return to the source and constrain the background task. Save two small comparison images to keep photography issues separate from editing issues.
Sample the Product, Transition Zone, and Empty Background Separately
In image editing software, mark the product interior, the edge transition, and empty background well away from the product. Sampling the background can reveal a warm tint or texture, but don’t require every antialiased edge pixel to be pure white, or you may trim fine edges. Confirm the exact background standard for the target placement, and record the sample coordinates and values instead of relying only on how white it looks on your monitor.
Preserve Edges with Tonal Shading, Without Tinting the Product
Ask the editing tool only to clean up the background while preserving the cup’s original transition from highlights to shadows. Don’t use a gray outline around the entire product or a dark outer glow to rescue its edges. The inside of the handle and the inside of the cup rim may naturally have deeper shadows; compare and handle each area against the source image. For placements that allow contact shadows, check that each shadow comes from a real contact point. If shadows aren’t allowed, create a separate shadow-free version and label its intended use.
Look for Lost Edges Against Both Light and Dark Check Backgrounds
For a transparent candidate, switch between light and dark backgrounds in editing software to inspect the edges. For a finished white-background image, check its actual white background and target page. Name the two file types separately; don’t bake a checkerboard pattern into a finished image as a substitute for an alpha channel. The final delivery should include the source image, the white-background file, a transparent file if needed, and sample records. Check each format independently; approval of one version doesn’t mean they all pass.
Relevant Tools and Asset Preparation
White Products Still Need Complete, Visible Edges
White shoes and bottles can lose their outlines against a white background. Preserve the original dimensional lighting and natural contact shadows instead of turning the product gray. For transparent bottles, also check for traces of the old background showing through the bottle; a clean outer edge alone isn’t enough.
| What to Specify | Details |
|---|---|
| Input or conditions | A front or primary sales angle product image, plus references for the real color and outline |
| Action | First select a white-background hero image in Product Suite, or specify a pure white background with no props and natural contact shadows in One-Click Background Replacement |
| Must-check items | Whether the background is clean, the edges look gray, or transparent parts and white products are lost |
Check the Background Color; Don’t Guess RGB by Eye
If the placement requires pure white, sample empty areas in the corners and around the product using image editing software. A gradient, warm tint, or white texture may not meet that placement’s requirements. Let the target category rules determine whether natural shadows are allowed.
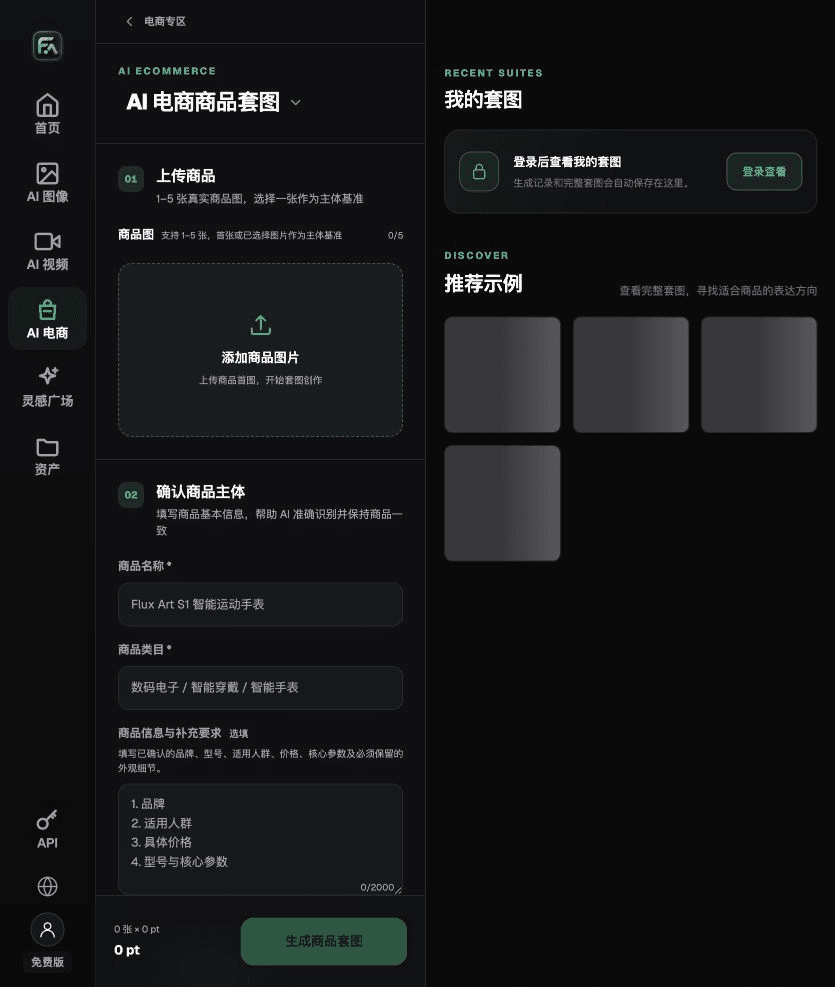
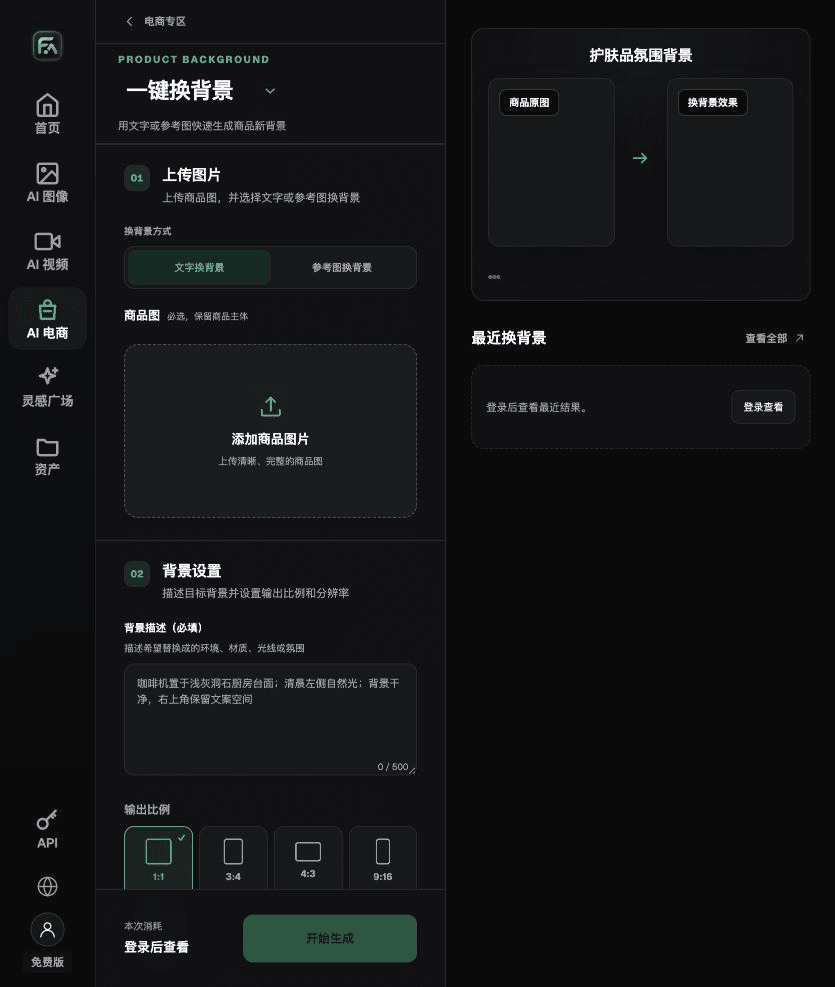
Flux Art is operated by MORNING STAR INDUSTRY LIMITED. It is a multi-model AI visual creation and production platform. One account can access 50+ third-party image and video models, along with e-commerce tools for product image sets, background replacement, retouching, and virtual try-on. Model pages and e-commerce tools are separate workflows. If the task specifically requires GPT Image 2.5, confirm the selected model in its dedicated model workflow; don’t attribute results from every tool to that model.
Put the White-Background Product Workflow into Practice
To create white-background product images, complete the relevant steps in Product Suite: upload 1–5 real product images, then enter the product name, category, factual details, and details that must be preserved. Select modules such as product hero image, white-background main image, key selling points, use scenarios, and detail close-ups. Set the aspect ratio, resolution, and language.
To create white-background product images, complete the relevant steps in One-Click Background Replacement: upload a product image, describe the background in text, or upload a background reference image you have permission to use. Specify the setting, surface material, light direction, mood, and contact shadows, and list details of the product that must not be changed.
For white-background product images, also check whether the background is clean, the edges look gray, or transparent parts and white products are lost. Review this delivery checklist alongside the requirements in “White Products Still Need Complete, Visible Edges” above.

A Prompt to Try for This Task
Turn the uploaded real product into a pure white hero image. Preserve the complete product outline, components, packaging text, logo, real colors, and material. Use a clean pure white background; add no copy, watermark, props, or accessories not included for sale. Keep natural contact shadows. Output: [enter aspect ratio and pixel dimensions].

Check These Items Before Delivery
After creating a white-background product image, inspect the final file for background cleanliness, gray edges, and lost transparent parts or white products. If you continue with other modules or SKUs, carry forward the approved product reference and validate each new task separately. Submission usage and available specifications are shown on the current page.

From Production to Delivery-Ready Files
After completing this workflow, archive the original product image, approved copy, selected tool or model, input instructions, candidate versions, and final exports together. Always keep the original image separate; revisions must not replace the product reference. Include the SKU or task ID in filenames so the operations team can find the sales version for each image. Before delivery, check resolution, cropping, captions, and links against each actual placement. Approval of one large image doesn’t mean every placement is approved.
Flux Art supports commercial use and can be used for e-commerce product displays, marketing materials, and commercial design deliverables. Handle input photos, people, trademarks, and product claims according to the actual project materials. Verifying rights to input assets and product authenticity is a separate delivery responsibility from the platform’s commercial use support.
Sources and Related Workflows
For model background, see OpenAI’s official introduction to ChatGPT Images 2.5, checked on 2026-09-30. Platform instructions are based on verified Flux Art tool workflows and fields. This article provides production steps and examples to try; it does not claim generation tests, pass rates, savings, or customer results.
Find the relevant tools in the Flux Art AI E-commerce Workspace. For related tasks, read the related product production tutorial for more on production and review.
Original source link: Related tool or source 1