 Flux Art
After generating GPT Image 2.5 product page modules, check the reading order and slice boundaries at the actual display width on mobile. Flux Art can create feature, lifestyle, and detail modules. This page provides a separate checklist for reviewing how modules fit together across screens, so you do not approve them based only on a thumbnail of the full long image.
Arrange Buyer Questions as Cards
Turn each module into a question, such as what the product is, what its key details are, how to check its dimensions, and what is included. Each card should answer one question; then arrange the images in order. Do not stretch the same selling point across multiple long screens. Use approved copy and specifications from the source materials; this step reorganizes information without adding product features or marketing promises.
Preview at the Actual Content Width
Use your own test page or design preview frame to display the content area at the target phone width, and note the width, cropping, and scaling. Check whether headings, small text, and units remain legible; desktop readability does not guarantee mobile readability. Preview each target placement separately rather than treating one phone size as a standard for every platform. If needed, reduce the text in each module instead of continually lengthening the image.
Do Not Slice Through Key Relationships
Keep a heading and the product detail it explains in the same reading segment. Do not separate dimension figures, units, and arrows into nonadjacent slices. Avoid placing slice edges through packaging text, key components, or qualifying statements. If a web page might temporarily separate modules while loading, make sure each slice still identifies its own content. Do slice and loading checks on your own page; these are not new Flux Art web publishing features.
Review the Full Export in Scroll Order
Review the page once from top to bottom in the order buyers will see it, without skipping any modules. Check for repeated headings, missing images, incorrect order, abrupt color changes, and gaps where one module raises a question that the next does not answer. Include module numbers, filenames, and an order list in the delivery. After changing a module, check the transitions between it and the two neighboring modules so the operations tracker does not retain the old order after a file is replaced.
Prepare the Relevant Tools and Assets
Use the Product Data Sheet; Do Not Guess from Images
The ports, power rating, and compatible devices for a charger must be supported by approved information. Materials provided to the model should distinguish facts, marketing language, and promises that must not appear. Do not automatically invent selling points about certifications, durability, or safety conclusions that cannot be seen in the images.
| What to Specify | Details |
|---|---|
| Inputs or conditions | Approved specifications, selling points, use cases, and product images |
| Corresponding action | Use A+ product page content to divide information into modules, then supplement the product image set with white-background, feature, lifestyle, and detail assets |
| Required checks | Specification accuracy, feature claims, units, promotional information, module order, and mobile readability |
Flux Art is operated by MORNING STAR INDUSTRY LIMITED. It is a multi-model AI visual creation and production platform. One account can access 50+ third-party image and video models, along with e-commerce tools for product image sets, background replacement, retouching, and virtual apparel try-on. Model pages and e-commerce tools are separate entry points. If a task specifically requires GPT Image 2.5, confirm the selected model in its dedicated model interface; do not attribute every tool's output to that model.
Review Mobile Readability Separately
The opening introduction, key selling points, specifications, details, and lifestyle scenes can be created as separate modules. After assembling them into a long page, check the module order and font size on a phone. For specification tables packed with small text, standard layout software is often easier to maintain than regenerating the entire page.
Turn the Product Page into a Practical Workflow
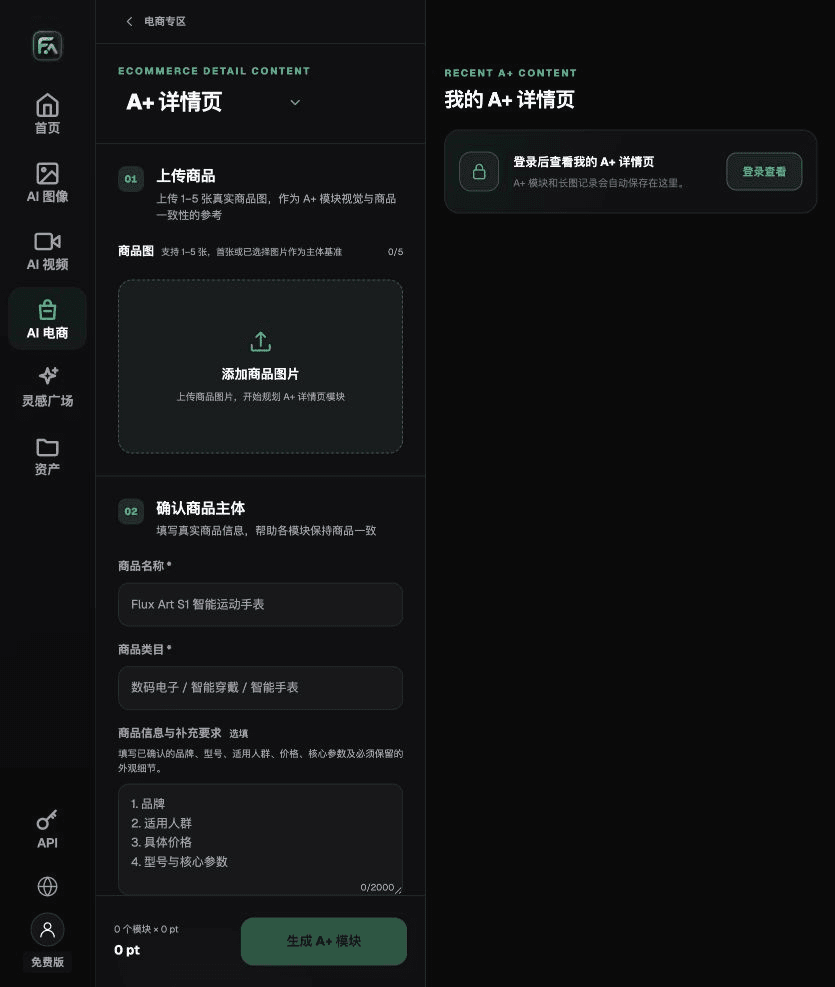
To create a product page, use the A+ Content Page for the relevant steps: upload 1–5 product images or consistent reference images, and enter approved product facts and selling points. Choose the A+ content modules and output specifications you need, then review the headings, specifications, selling points, and images in each module.
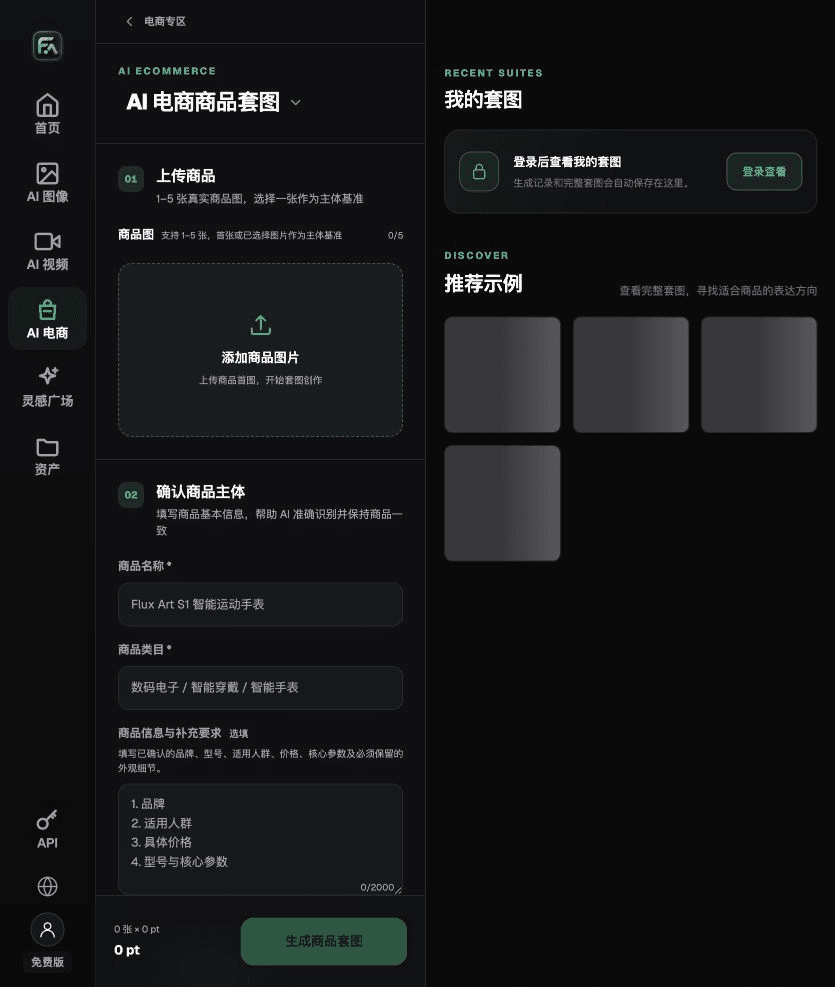
To create a product page, use Product Image Set for the relevant steps: upload 1–5 real product photos, and enter the product name, category, factual information, and details that must be preserved. Choose modules such as a product hero image, white-background main image, key selling points, use cases, and detail close-ups, then set the aspect ratio, resolution, and language.
For a product page, also check specification accuracy, feature claims, units, promotional information, module order, and mobile readability. Review this delivery checklist alongside the earlier requirement to use the product data sheet rather than guess from images.

A Prompt to Try for This Task
Create a first draft of product page modules for the uploaded product. Use only approved facts [specifications, selling points, use cases]. Include these modules: [fill in]. The exact copy should be only: “[fill in]”. Do not add claims about benefits, certifications, comparisons, or promotional promises.

Check These Items Before Delivery
After completing the product page, check the final files for specification accuracy, feature claims, units, promotional information, module order, and mobile readability. If you continue with other modules or SKUs, reuse the approved product evidence and verify each new task separately. Submission credits and available options are shown on the current page.

From Production to Delivery-Ready Files
After completing this task, archive the original product photos, approved copy, selected tool or model, input instructions, candidate versions, and final exports together. Always keep the originals separate; revisions must not overwrite the product evidence. Include the SKU or task number in filenames so the operations team can find the sales version associated with each image. Before delivery, check resolution, cropping, captions, and links for the actual placements. Passing review for one large image does not mean every placement has passed.
Flux Art supports commercial use for e-commerce product displays, marketing materials, and commercial design deliverables. Handle input photos, people, trademarks, and product claims according to the actual project materials. Verifying the rights to input assets and the accuracy of product information are delivery checks separate from the platform's commercial-use support.
Sources and Related Workflows
For model background, see OpenAI's official introduction to ChatGPT Images 2.5, accessed on 2026-09-30. Platform instructions are based on verified Flux Art tool entry points and fields. This article provides production steps and examples to carry out; it does not claim generation tests, pass rates, savings, or customer results.
Find the relevant tools in the Flux Art AI E-commerce Workspace. For related tasks, read the product production tutorial for more on creation and review methods.
Related link from the original: Related tool or source 1