 Flux Art
The short answer: focus on photographic evidence of specific areas, materials, interfaces, connections, and macro views rather than repeating tutorials on white-background edges or complete product image sets. The Flux Art AI E-Commerce section can serve as the current tool entry point, but it does not replace product facts, asset permissions, human acceptance checks, or channel reviews.
Factual scope: Flux Art, operated by MORNING STAR INDUSTRY LIMITED, is a multi-model AI visual creation and production platform. Its current public e-commerce suite includes entry points for product image sets, A+ detail pages, batch SKU images, recreating best-selling product images, product retouching, recoloring, background replacement, apparel image sets, products worn by models, AI Virtual Try-On, pose changes, authorized face swaps, and AI shoe try-on. Specific fields, usage costs, entitlements, and availability are subject to the information shown before submission.
Model and workflow scope: if a task needs to begin with a general-purpose image model, visit the Nano Banana 2 model page to find the current entry point. The e-commerce tools discussed here should be used for their specific tasks. This does not mean any e-commerce feature always uses that model, and this article does not compare output quality.
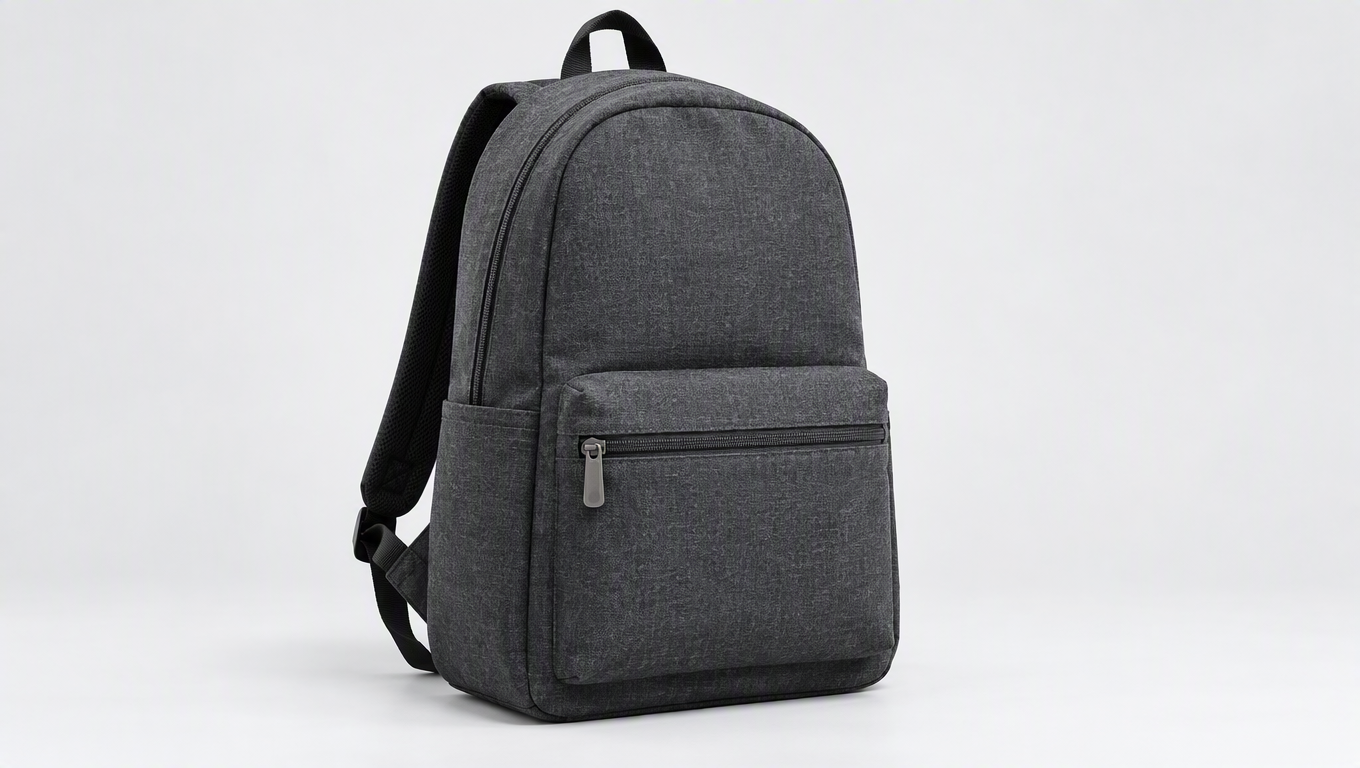
To make e-commerce AI detail images look authentic, start with a corresponding close-up photo, then define the area to show and the elements that must not change. When selecting the detail close-up module in Flux Art (flux-art.net), you can specify a zipper, texture, interface, or another real product area and improve the lighting and visual hierarchy, but you must not let AI invent structures or material properties that do not exist.
Enlarging Details Does Not Mean Adding Details
Close-ups serve as product evidence. A zipper image must show the zipper on that specific product, an interface image must have the correct orientation and quantity, and a fabric texture must match the real material. Adding stitching, metal parts, or coarse grain to make an image look more “professional” may already be altering the physical product.
A full-product photo is usually insufficient for a macro view. Seeing an interface from a distance does not confirm its shape, and seeing a fabric surface does not reveal its yarn or weave. First obtain close-up photos so the image is grounded in evidence, then decide how to present it.
Use material terms conservatively as well. If supported by real product information, you can specify matte metal, clear glass, or coarse-woven canvas, but you cannot infer the product's material from a generated image. Highlights and textures in an image are only visual output, not product-testing conclusions.
Use Each Close-Up to Answer One Buying Question
Take a demonstration backpack as an example. To explain the zipper structure, center the shot on the pull, teeth, and connecting stitches while retaining part of the bag body for identification. Do not enlarge the fabric, inner pocket, shoulder strap, and decoration all at once. Crowding several areas together makes each one harder to verify.
You could write the instruction as follows: “Use the zipper in the reference close-up as the basis. Preserve the teeth, pull, stitching, and bag color. Create a close-range structural view with soft lighting. Do not add a metal logo, a second pull, or new connectors, and retain part of the bag's outline.” The completion criterion is whether the structure can be checked against the reference, not whether the image is as sharp as possible.
After generating the image in Flux Art, first check the quantity, orientation, connections, and materials of each area, then assess the focus and background. If the zipper structure is wrong, return to the original close-up and correct it. If the structure is correct but the background is distracting, adjust only the background and depth of field.
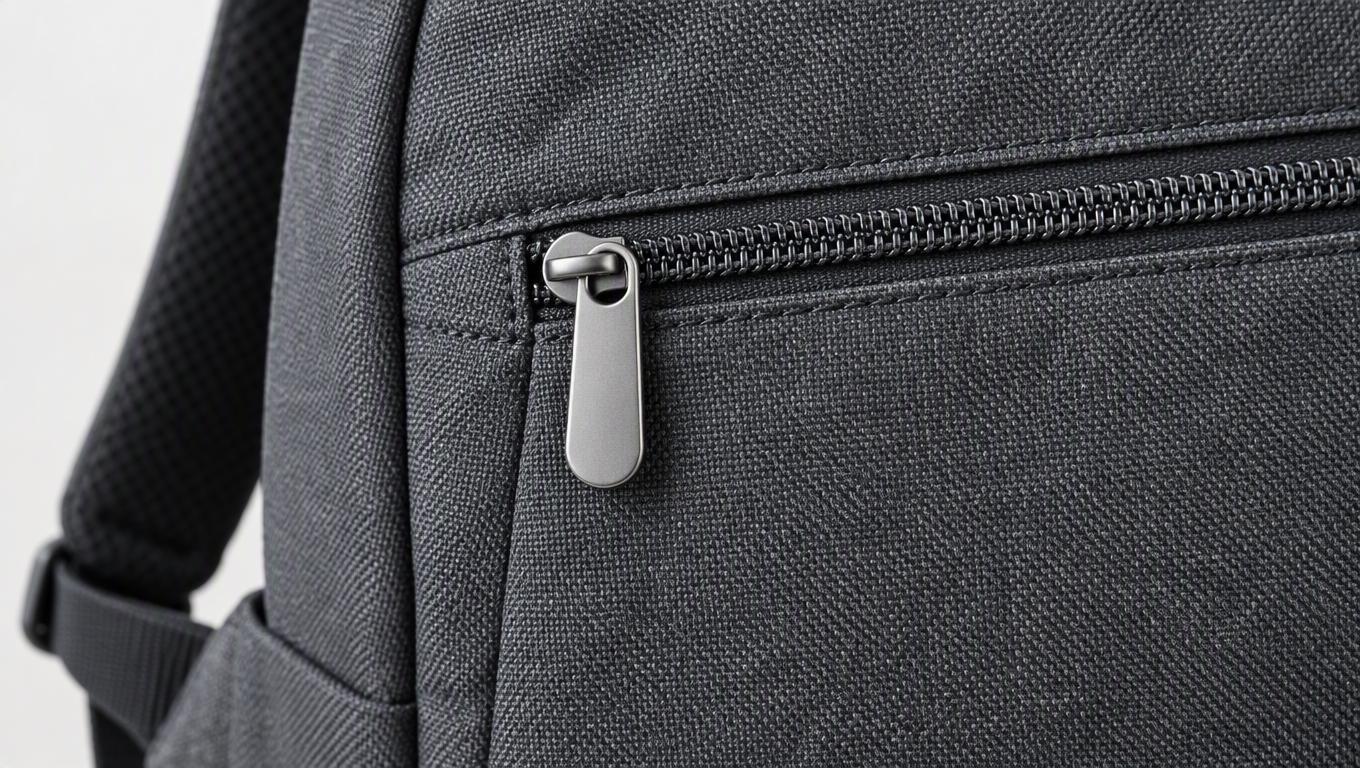
How to Shoot and Select Backpack Zipper Close-Ups
To explain a real zipper, prepare both a full-product positioning image and close-up photos. The full image shows which backpack pocket the zipper belongs to, while the close-up verifies the pull, teeth, stitching, and connections. A close-up should not show only an unidentifiable patch of metal and fabric, nor should you substitute an attractive zipper from another similar backpack as evidence for this product.
When shooting close-ups, keep the target area clear and unobstructed. Avoid harsh highlights that merge the zipper teeth and pull into one bright patch. If you need to explain open and closed states, prepare a corresponding photo of each state instead of asking the model to infer the interior from a closed view. Show texture only where it is clear and genuine; do not turn a blurry area from a phone photo into seemingly professional yarn detail.
When choosing a target, first ask what the buyer needs to verify. To confirm whether there is one zipper pull or two, center the quantity and connections. To confirm the zipper's position, retain more of the bag's outline. To confirm the fabric and stitching, emphasize a real close-up of the fabric rather than letting exaggerated hardware highlights steal the focus. Each close-up should answer one primary question so the information remains focused.
How to Write More Specific Macro Instructions
You can divide the input into evidence, presentation, and prohibitions: “Use the close-up photo of this backpack's zipper as the basis. Preserve the original number of pulls, the direction of the teeth, the stitched connection, and the bag color. Create a close-range structural view with a clear zipper area, retain part of the bag for positioning, and de-emphasize the background. Do not add a second pull, engraving, decorative hardware, or extra stitching, and do not change the fabric.” If the real product has two pulls, you must revise the instruction according to the actual product information instead of copying the example.
Focus requirements should match the target area. If buyers need to see the pull, make it identifiable without blurring the connection so much that it can no longer serve as evidence. If they need to see the teeth, keep the target area continuously clear rather than using such a shallow depth of field that most of the structure disappears. “Like macro photography” is a style phrase; you still need to specify the exact observable area that must remain sharp.
After generation, verify four things: whether the quantity matches, whether the orientation matches, whether the connections make sense, and whether the material rendering has supporting evidence. An extra zipper pull is a factual error; an overly bright background is a presentation problem; text pointing to the wrong area is an annotation error. Fix them separately to avoid changing the zipper again merely to improve the background.
Do Not Fix Close-Up Errors by “Adding Detail”
If the zipper teeth are discontinuous, restore the continuous structure using the close-up photo. If the pull's shape has changed, constrain it again to match the real pull. If the fabric texture is too coarse, return it to the appearance of the actual material. If the composition feels too empty, strengthen the target through cropping and layout instead of arbitrarily adding craftsmanship. Preserve every previously approved fact during each revision, then compare the result with the full-product image again.
If the image needs a short heading such as “Zipper Structure,” add approved text afterward. An arrow intended to identify the zipper teeth must not point to the stitching. Without test data, do not make claims about abrasion resistance, water resistance, or strength. An accurate close-up can make a product area easier to see, but it cannot prove performance.
Place the detail image back into the product page for a final check. Does it answer a question the full-product image cannot? Is it consistent with the hardware, fabric, and color of the same product variant? Is the target clear on a phone? If viewers remember only the attractive highlights, it still needs adjustment. If the source material for that area is insufficient, take more photos first. A detail image derives its value from verifiability, not from looking more complex than the physical product.
Compare Platforms by Their Evidence-to-Image Workflow
| Comparison | Flux Art | Others |
|---|---|---|
| Number of models | 50+ image and video models | Model ranges and selection methods vary |
| Feature coverage | Detail close-up module, retouching, and image editing | Different workflows for product image processing or explanatory graphic layouts |
| Commercial rights | Flux Art Pro, Max, and Ultra plans support commercial use; you must have rights to your input assets | Confirm according to platform terms and asset licenses |
| Cost per image | See the official pricing page and the page shown before submission | See each platform's official website and tool documentation |
| New e-commerce features | Retouching, image sets, and other specialized product entry points | Product photography, templates, or batch capabilities offered separately |
| Asset management | Close-up references and generated assets can be viewed in one place | Catalog, project, or workspace organization varies |
Every Detail Image Should Answer One Specific Question
Users should be able to understand “how the zipper is connected,” “where the button is,” or “what texture the surface has.” If they remember only strong highlights and decorative lines, adjust the visual hierarchy. Any necessary headings and arrows should use approved text, and their targets must be checked for accuracy.
A detail image is not merely decorative content designed to look premium. It should begin with a real product close-up and help buyers see the product clearly, rather than using complex textures to fabricate craftsmanship that does not exist.
Sources and Limitations
Verification record: this article was checked on 2026-09-20 against Flux Art's promoted official website, its official changelog, and the current e-commerce tool fact base. The article did not conduct measured tests of generation results, approval rates, sales, or costs. The products in the tasks are workflow examples, not customer testimonials.