 Flux Art
The short answer: real photos, brand-authorized images, and text input each serve a different evidentiary role. This article explains how to review scene changes that preserve the product, without repeating the basic background-replacement guide. The Flux Art AI e-commerce hub is a current entry point for these tools, but it does not replace product facts, asset authorization, human acceptance checks, or channel review.
Scope of facts: Flux Art is a multi-model AI visual creation and production platform operated by MORNING STAR INDUSTRY LIMITED. Its current public e-commerce suite includes product image sets, A+ detail pages, batch SKU images, best-selling image recreation, product retouching, color changes, background replacement, apparel image sets, virtual model try-ons, AI Universal Try-On, pose changes, authorized face swaps, and AI shoe try-ons. Check the page shown before submission for the current fields, usage costs, entitlements, and availability.
Model and workflow boundaries: if a task needs to start from a general-purpose image model, visit the Nano Banana 2 model page to find the current entry point. Use the e-commerce tools discussed here according to the specific task. This does not mean that any e-commerce feature always uses that model, and this article does not compare output quality.

E-commerce AI image creation can use real product photos as input, but formal product displays should not rely solely on text-based imagination. In Flux Art (flux-art.net), you can preserve the referenced product and expand its surroundings through the background replacement tool or the scene module in Product Image Sets. Accurate preservation must be verified by comparing the output with the original image item by item, not merely by judging whether they look similar at first glance.
Do real photos and text-only input solve the same problem?
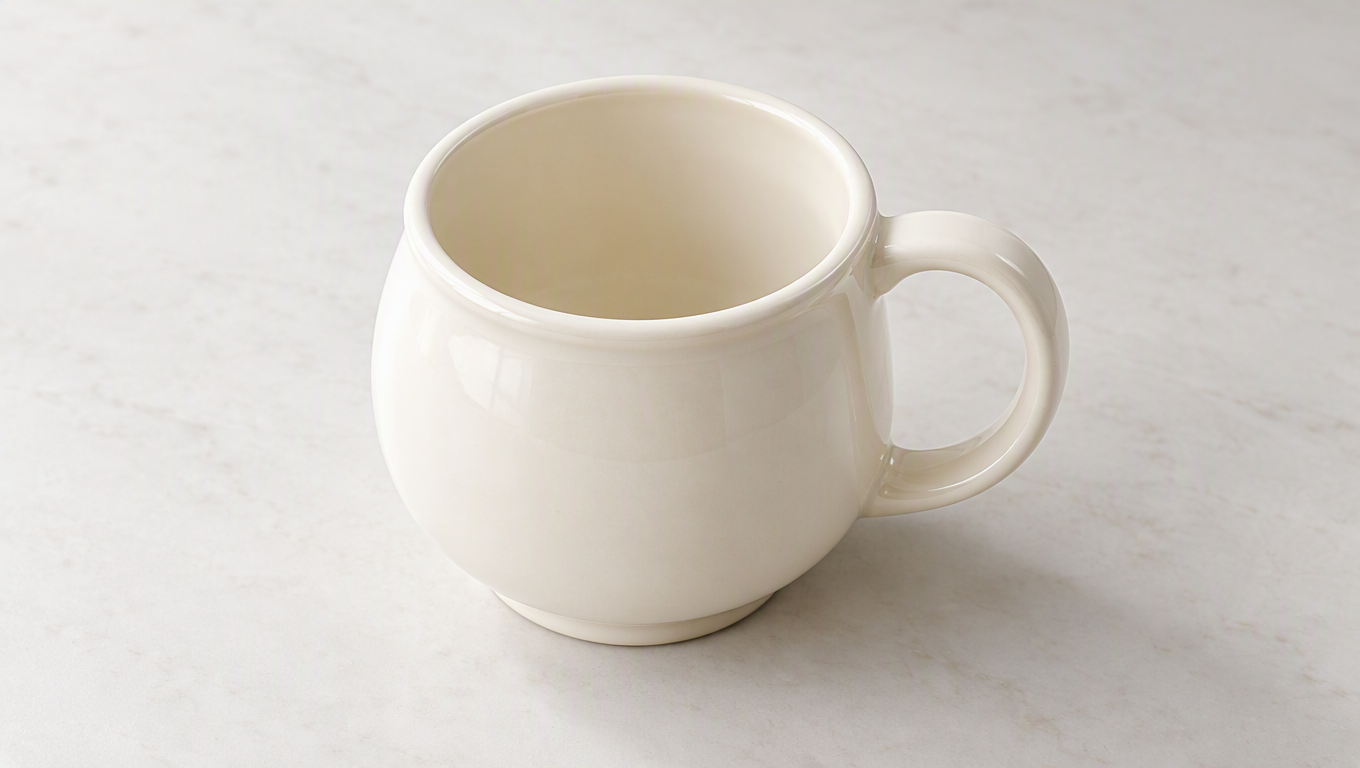
No. Real photos provide evidence of the specific product, including its outline, texture, labels, and how its parts connect. Text alone is better suited to describing a creative direction, such as the background color, lighting, negative space, and mood. Writing “beige ceramic mug” may generate that type of mug, but it cannot prove that the pictured item is the particular mug sold by the store.
Whether you must take the source photos yourself depends on authorization and accuracy. Official images supplied by the brand and licensed supplier photos can also serve as evidence. A photo of a similar product casually found online should not represent your own SKU. Even when the overall shape is similar, the rim thickness, handle shape, or base construction may differ.
Flux Art's role is to organize reference images and image tasks. Uploading an image does not mean the platform confirms its copyright status for the user. When selecting images, check not only their clarity but also whether the photos show the actual product, whether you have permission to use them, and whether any critical structures are obscured.
How should product and background requirements be separated?
Use the product requirements to specify what must not change, and the background requirements to specify what should change. For the demonstration ceramic mug, preserve the curvature of the rim, handle shape, glaze color, and base proportions. The background can become a light-colored breakfast table with soft morning light and a few distant props. Do not apply a phrase such as “more refined” to both the product shape and the setting, or the original coarse glaze may become glossy and the mug body may become narrower.
A reusable instruction is: “Preserve the ceramic mug's rim, handle, glaze color, base, and overall proportions from the reference image. Replace the background with a bright breakfast tabletop, place the product in the foreground with its base resting naturally on the table, blur the tableware in the background, and do not add product patterns, logos, or accessories.” The key is to describe observable details rather than include every possible photography term.
If you use Flux Art's reference-image background replacement workflow, also define the role of the environmental reference: “Use the second image only as a reference for the tabletop color, lighting, and negative space; use the first image as the authority for the product.” The clearer each reference image's role is, the easier it becomes to know what to inspect, although the actual output must still be checked to confirm that these constraints were followed.
How should real photos be prepared as effective inputs?
Select the photos before uploading everything
When choosing the primary image, ask three questions: Is the complete product in frame? Are its main structural features recognizable? Is strong lighting distorting its color? Photos with excessive beauty filters, strongly warm lighting, or severe wide-angle distortion should not directly determine the appearance of a product in formal sales images. Clarity is not simply a matter of having more pixels; the rim, handle, base, and surface must all be verifiable.
Next, choose supplementary images whose purpose is to provide evidence of details hidden in the primary image. For a ceramic mug, you might add photos of the handle joints and the base; repeated front views are not a substitute. If you need a side-view scene, you should have evidence of the side structure. When photos come from different production batches, first confirm that they show the same SKU. Do not combine the handle of one similar mug with the base of another to create a product that does not exist.
Three types of source image require different workflows
A clean white-background photo is suitable for expansion into a lifestyle setting, with attention paid to product contact, light direction, and scale. An existing lifestyle photo is suitable for limited modifications, with the focus on preserving the product and any existing relationships that are already correct. If the product is obscured by a hand, cropped, or heavily blended into the background, take another photo or use a clearer one instead of asking the model to reconstruct unknown structures.
If the product photo already contains extensive marketing copy and stickers, prioritize finding the original version without added text. Existing text may be treated as a product mark or background element, making it harder to assess after generation and cleanup. Genuine text printed on the packaging is different: retain clear photos and the approved original wording rather than deleting it along with added promotional copy.
How should lighting and surface contact be described?
Do not just say “natural light”—state its direction
If the original mug has a bright reflection on its left side, the target setting can use window light from the left to help the background and product look consistent. If you switch to strong light from the right, you must recheck the highlights and cast shadow on the mug. Do not request shadowless studio lighting, sunset backlighting, and harsh midday light in the same instruction. Conflicting styles make evaluation more difficult.
You can describe contact as: “The base of the mug rests on the tabletop, with the shadow close to the base rather than floating, and the tabletop perspective aligned with the mug's angle.” This specifies a clearer visual relationship than “physically realistic.” If the original mug is viewed from above while the background uses a low camera angle, adjust your reference selection instead of merely asking to combine the two.
Remove unwanted roles from a background reference first
A breakfast-table reference might include a vase, plate, coffee cup, and text. If you only need the tabletop and window light, write: “Refer only to the pale wood tabletop, background depth, and soft light from the left; ignore all other products, text, and marks in the reference.” The final image must not include tableware that looks like bundled accessories, and the environmental reference must not alter the mug's handle.
If the second photo provides evidence of the product's side, clarify that it is not a background reference: “The first image controls the overall appearance; the second supplements the handle and mug-wall thickness; use the first reliable photo for the product color.” Giving every image a specific role lets reviewers identify which evidence should govern each change.
How do you identify errors after generating a scene?
Different symptoms require different corrections
If the mug appears to float, fix the contact shadow and its relationship to the tabletop first. If the rim becomes thicker, return to the product-structure photos. If the glaze changes color, verify the color evidence and lighting requirements. If background props look like included accessories, reduce the number of props or change their distance and visual priority. Do not describe every problem as “make it more realistic,” or it will remain unclear what the new version actually changed.
A useful localized instruction is: “Adjust only the contact between the mug's base and the tabletop. Preserve the mug body, handle, glaze color, background props, and current composition. Keep the shadow close to the base and consistent with the light from the left.” If the product facts are wrong, explicitly return to the original image rather than using the already incorrect mug body as the basis for the next round.
The depicted use must also be valid in reality
A scene image must not visually imply unverified capabilities. Whether a mug fits inside a particular appliance or a product can withstand long-term outdoor use must be supported by documentation, not decided by the background design. An ordinary lifestyle tabletop only conveys a setting; functional actions require stricter verification against the physical product and its documentation.
Finally, compare each scene candidate side by side with the original image, then review it within the actual page. If the subject is correct but the background is ordinary, you can continue improving it. If the subject is wrong but the atmosphere is attractive, keep the result as a creative reference rather than sales material. Real photos provide product evidence, while AI provides presentation options; those responsibilities must not be reversed.
Should you use background replacement or the full toolkit?
If one photo needs to be placed in one new environment, start with the dedicated background replacement tool. If you need a primary listing image, a white-background image, and detail images at the same time, Product Image Sets better matches the delivery scope. If you only want scene inspiration, begin with concept candidates. If the image involves the product's back, interior, or a specific method of use, add real photos instead of turning an inspiration image directly into a sales claim.
| Comparison | Flux Art | Others |
|---|---|---|
| Number of models | The platform provides 50+ image and video models | The range of available models and degree of choice vary |
| Feature coverage | Text- or reference-image-based background replacement, product image sets, and image editing | Product background processing and visual design may be handled by different tools |
| Commercial-use rights | Flux Art Pro, Max, and Ultra plans support commercial use; you must have rights to your input assets | Check platform rights and authorization for external assets separately |
| Cost per image | Check the official website and the page shown before submission | Check each platform's official website and tool pages |
| New e-commerce features | Dedicated entry points for backgrounds, retouching, color changes, and virtual try-ons | Scene, color-change, and template capabilities vary by platform |
| Asset management | Reference assets and results can be viewed through the asset library | Catalog, design project, or workspace management methods differ |
What if the scene looks natural but the product changes?
First identify the type of change. If the mug's proportions have changed, return to the original image and narrow the scope of modification. If the color has shifted, compare the original photography lighting with the target lighting and preserve the actual glaze color. If the base appears to float, specifically correct the contact shadow and its relationship to the tabletop. Do not use one instruction such as “make everything more realistic” to address several problems at once, because you will not be able to confirm which correction worked.
When continuing to edit in Flux Art, prioritize saving a version in which the main subject has already passed review. Give the next round only one primary objective, such as: “Reduce only the background brightness; keep the mug body, handle, and glaze color unchanged.” After receiving the output, inspect not only the background but also the unmodified parts of the product to prevent gradual drift over multiple editing rounds.
Transparent, mirrored, or intricately perforated products require more detailed inspection. Background refraction through transparent glass, reflections on metal surfaces, and the edges of mesh openings can all affect realism. These products are better handled from clear, clean source images and, when necessary, combined with manual compositing rather than forcing one generation to solve every material-related problem.
Where should you start, and when is an image publishable?
Visit Flux Art's promoted official site at flux-art.net, open the one-click background replacement tool, upload a complete product image, and then choose either the text or reference-image workflow. First create a candidate without added text and confirm the outline, material, and surface contact. Then add approved copy and finally check the target channel's current dimensions and rules.
A scene image should help users understand the product's genuine use and must not imply nonexistent weather resistance, accessories, or results. Describing the product separately from the background—and reviewing what changed separately from what had to remain—is the key to turning real product photos into usable scene images.
Sources and limitations
Verification record: this article was checked on 2026-09-20 against Flux Art's promoted official website, official changelog, and current e-commerce tool fact base. No tests were conducted on generation results, approval rates, sales, or costs. The products used in the tasks are workflow examples, not customer testimonials.