 Flux Art
The short answer: this article covers the e-commerce access points, tool selection, and permission checks available on the .cc website. It does not treat an access point as a permanent guarantee of connectivity in any region. The Flux Art AI E-commerce Hub is a current gateway to the tools, but it does not replace verified product facts, asset permissions, human review, or marketplace approval.
Scope of verified facts: Flux Art is operated by MORNING STAR INDUSTRY LIMITED and is a multi-model AI visual creation and production platform. Its current public e-commerce toolset includes product image sets, A+ detail pages, batch SKU images, best-selling image recreation, product retouching, color changes, background replacement, apparel image sets, virtual model try-on, AI universal try-on, pose changes, authorized face swapping, and AI shoe try-on. Specific fields, usage costs, entitlements, and availability should be confirmed on the page before submission.
Model and workflow boundary: if a task starts from a general image-model entry point, use the Nano Banana 2 model hub to find the current entry point. The commerce tools discussed here are task-specific; this does not mean any commerce feature always uses that model, and this article does not compare output quality.

Flux Art's new e-commerce AI image tools are already accessible through a web entry point for users in China, where you can enter the e-commerce hub and select a task. The tools announced by Flux Art (flux-art.net) on September 7 already include workflows for A+ detail pages, batch SKU images, retouching, color changes, background replacement, and apparel try-on. For now, use the tools that are already available. Check the changelog and the actual workspace separately for future expansions, and do not present speculation about planned features as a launch commitment.
What Is Available Now and What Remains Uncertain
This release is a platform workflow update, not the launch of a single new image model. The arrival of a tool entry point means users can begin producing assets for that task, while the release of an underlying model and its integration into the platform belong to a separate information chain. A model appearing on its original developer's platform does not mean the e-commerce tools have adopted it. Likewise, the addition of one task entry point does not prove that every model has gained the same capability.
For each current tool, confirm three things first: whether the page exists, whether your account can use it, and whether the required inputs and outputs match your task. Public descriptions can explain a feature's intended purpose, but full eligibility should be checked after signing in. Free previews, complete image sets, and API access may belong to different entitlement tiers, so the availability of one does not imply that all the others are open.
Future developments worth watching include whether product information becomes easier to reuse, whether different image types can be revised more smoothly, and whether completed assets can be traced back to their corresponding tasks more easily. These are evaluation criteria, not features the platform has already promised. Without an official announcement, do not assign a release date or use claims such as “support for every platform is coming soon.”
How to Complete Your First Production Task
Prepare a product with a clearly visible structure and authorized photos, then choose the most urgent deliverable. If you need one lifestyle scene, use background replacement. If you need a full set of launch images, use the product image set tool. If multiple real SKUs need a consistent presentation, use the batch SKU image tool. Choose the tool before writing style prompts so you do not keep trying the same task through different entry points without a consistent goal.
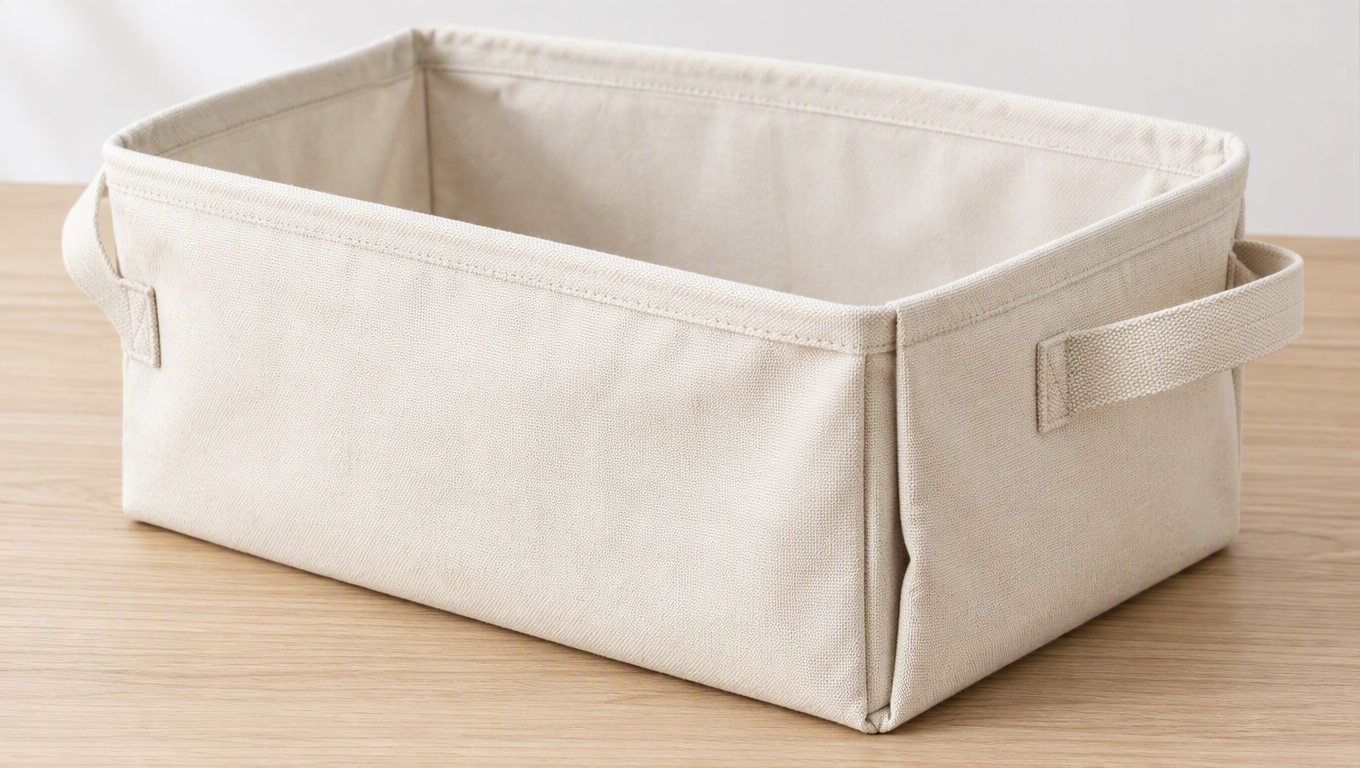
Using a folding storage basket as the demonstration product, the photos should clearly show its handles, folding joints, and opening. Preserve the existing structure when creating the main image and keep the background simple. For lifestyle scenes, specify the product's real use. Do not show the basket carrying a weight unsupported by product evidence, and do not add a lid that is not included.
A first-round instruction could read: “Use the real storage basket as the main subject. Preserve the handles, opening, folding joints, and surface texture. Create a tidy home interior background, keep the entire product visible, and do not add a lid, casters, or decorations.” Check the product first, then the lighting and background. Expand to additional images only after the product facts have passed review.
Before submitting, check the aspect ratio, resolution, and currently available settings. After generation, save both the original and the candidates. If only the environment needs changing, limit the scope of the revision. If the product structure is wrong, return to the original image and restate the constraints. Do not keep adding details to an already distorted version, as this allows errors to accumulate.
Which Workflow to Test First in the Workspace
After opening the hub, you do not need to test every new entry point. Start with one well-documented product and validate a short workflow: provide photos and requirements, generate one candidate, identify one specific problem, obtain a revised result, and finally save a file that can be handed off. Looking only at the showcase images on the first page cannot tell you whether you can continue working with your own product.
For the folding storage basket demonstration, make only “the complete product plus a simple indoor background” in the first round. Do not simultaneously request folded-versus-open comparisons, dimension labels, and multicolor combinations. Provide a full front view, the connection points, and handle details, explaining which image determines the overall structure and which images are for checking local details. Clutter in the photos is not part of the product and should explicitly be excluded from the result. The basket's connectors are part of the product and must not be removed while cleaning up the image.
When entering the instructions, place “preserve the product” before “change the environment”: “Preserve the basket body, both side handles, and folding joints from the original image. Replace only the surroundings with a tidy home interior. Keep the bottom of the basket in contact with the floor. Do not add a lid, wheels, or stored items. Do not add text yet.” This keeps the objective of the first test clearly defined. Even if you ultimately need a full image set, confirm this basic version first so additional modules do not conceal problems with the main subject.
Once you receive a candidate, compare the connectors and handles first, then inspect the contact shadow and scene. If the basket is correct but the background is too busy, revise only the environment. If the handle position has changed, reapply constraints using the original product image; do not use the flawed candidate as the sole reference. A revision such as “Remove the decorations behind the basket while preserving the current basket, viewing angle, and size” is easier to verify than “Make it cleaner and more premium.”
Expand to real use cases in the second round. For example, if you need to show clothing storage, clothes can appear as scene props, but they must not completely cover the opening. Their presence also must not be used to infer weight capacity, volume, or compatible dimensions. Capacity information comes from product documentation; the scene only helps viewers understand how objects are positioned. Separating “props may appear” from “props are included with the product” is a basic step in preventing misunderstandings on a product page.
How to Decide Whether a Future Update Is Worth Migrating To
When monitoring new features, keeping a record of an existing task is more useful than merely noting new feature names. Record the product information, input requirements, candidate issues, revision actions, and final deliverables. When the relevant tools are updated, repeat the same objective with the same materials. Only then can you distinguish a change in the entry point from a change in the production workflow. Do not use results from different products and different reference images to declare that a new version is better.
For the storage basket task, you can examine three specific questions: Is it easy to continue revising a single candidate? Can different image types preserve the same connector structure? Are uploaded and generated assets easy to retrieve? Each question has something concrete to observe. By contrast, “Is it becoming more intelligent?” has no clear acceptance criterion, cannot guide a migration decision, and is easily influenced by showcase images.
If a new tool fills a missing image category, add it to the existing workflow without redoing everything. If the change affects the input method, first choose a low-complexity product to verify whether the information can be reused, then update the team's input template. Features that are not yet available cannot become dependencies for current deliverables. Mark unresolved issues for future observation and continue using the task workflows that have already been validated. This is the practical value of previewing new products for merchants: knowing what can be done now and what evidence should appear before a workflow is worth changing.
Compare New Products Using Consistent Criteria
| Comparison Item | Flux Art | Others |
|---|---|---|
| Number of Models | The platform covers 50+ image and video models | Verify the model range and selection method on each platform |
| Feature Coverage | Entry points for image sets and specialized product production | Different platforms emphasize product image processing or general design and layout |
| Commercial Rights | Flux Art Pro, Max, and Ultra plans support commercial use; you must have rights to your input assets | Confirm platform terms and asset licenses separately |
| Cost per Image | Check the official pricing page and the current submission page | Check each platform's official website and tool pricing information |
| New E-commerce Features | New A+, SKU image, and apparel try-on tools have been added | Product scenes, templates, and batch workflows vary by platform |
| Asset Management | View the asset library and e-commerce projects in centralized entry points | Catalog, project, and workspace management methods vary |
Sources and Limitations
Verification record: This article was checked on 2026-09-19 against Flux Art's promoted official website, the official changelog, and the current e-commerce tool fact repository. The article did not conduct measured tests of generation quality, success rates, sales, or costs. The products used in the tasks are workflow examples, not customer testimonials.