 Flux Art
Identify whether the curtain uses rings, hooks, or a rod pocket before working on the room setting. When creating candidates with GPT Image 2.5 through Flux Art, keep front and back references of the same curtain top, along with hanging references, and check the hardware and included items separately. This article delivers images that correspond to the product’s appearance; it does not assess material or installation safety from the way the fabric hangs.
Confirm the Actual Hanging Method for Each Version
Prepare front and back views of the top, close-ups, and photos showing how that specific version is actually hung. State the number of panels and what is included for sale. Do not assume rings, hooks, or a rod pocket based on common styles; the same print may come with different top constructions. Specify separately whether the curtain rod is a set prop or an included accessory. Its appearance in an image does not mean it is included.
Check Each Opening and Connection
On a review copy, start at one side and mark each visible hanging point, then check how it connects to the fabric’s top edge. Folds may hide some points, so consult an unfolded view or a back reference first. Do not add rings automatically based on even spacing or symmetry. Reject the candidate if the model places hooks in the middle of the fabric or turns a rod pocket into holes.
Keep the Same Configuration in Close-Ups and Wide Shots
Use wide shots to show how the curtain hangs and close-ups to show the connections. Both should correspond to the same product configuration and reference version. Recheck the top edge after changing the background so another type of track in the room does not alter the product. If the display hardware needs to change, first confirm its compatibility with valid product information. An image that shows the curtain hanging does not prove compatibility.
Deliver an Accessory List with the Images
For each image, record the hanging method, visible accessories, items included for sale, and anything still to be confirmed. Before final export, check that the top edge has not been cropped where key details appear. Check quantities separately for each width or set version; do not use one wide shot to represent every specification. The way the fabric hangs is only how it appears under specific conditions; it does not establish light blocking, material, load capacity, or safety.
Relevant Tools and Reference Preparation
The Scene Should Show How the Product Is Used
Storage boxes belong inside cabinets, rugs on floors, and tableware on tables; each needs the right scale and points of contact. Do not obscure functional features just to make the style consistent. If the product’s scale relative to the room is uncertain, provide dimensions or clearer references.
| What to clarify | Details |
|---|---|
| Inputs or conditions | Real product photos and information about shape, dimensions, material, color, set quantity, and use |
| Relevant actions | White-background, lifestyle, dimension, detail, set-listing, and multi-color SKU images |
| Must-check items | Incorrect set quantity, changed material, unusual hand proportions, and implausible product use in the scene |
Keep Lighting Consistent Without Changing the Product
Ceramic, glass, and fabric should not all be rendered with the same gloss. Keep the background color and light direction consistent while preserving each material’s appearance. Make clear whether added fabric, vases, and furniture are props or part of the sale so buyers are not confused.
Flux Art is operated by MORNING STAR INDUSTRY LIMITED. It is a multi-model AI visual creation and production platform where one account can access 50+ third-party image and video models. It also provides ecommerce tools for product image sets, background replacement, retouching, and virtual apparel try-ons. Model pages and ecommerce tools are separate entry points. If a task specifically requires GPT Image 2.5, confirm that model in its dedicated model interface; do not attribute results from every tool to that model.
Turn the Home-Goods Image Workflow into Tool Steps
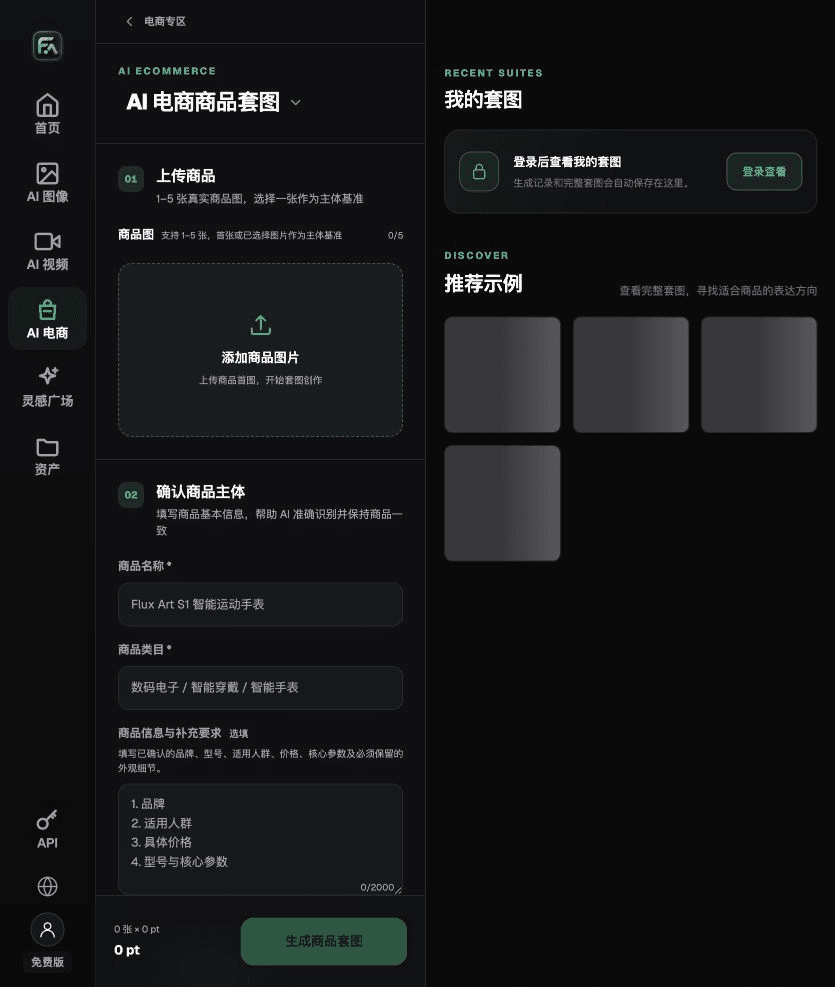
To create home-goods product images, use Product Suite for the relevant steps: upload 1–5 real product images, enter the product name, category, factual information, and details that must be preserved; select modules such as hero image, white-background main image, key selling points, use scene, or detail close-up; then set the aspect ratio, resolution, and language.
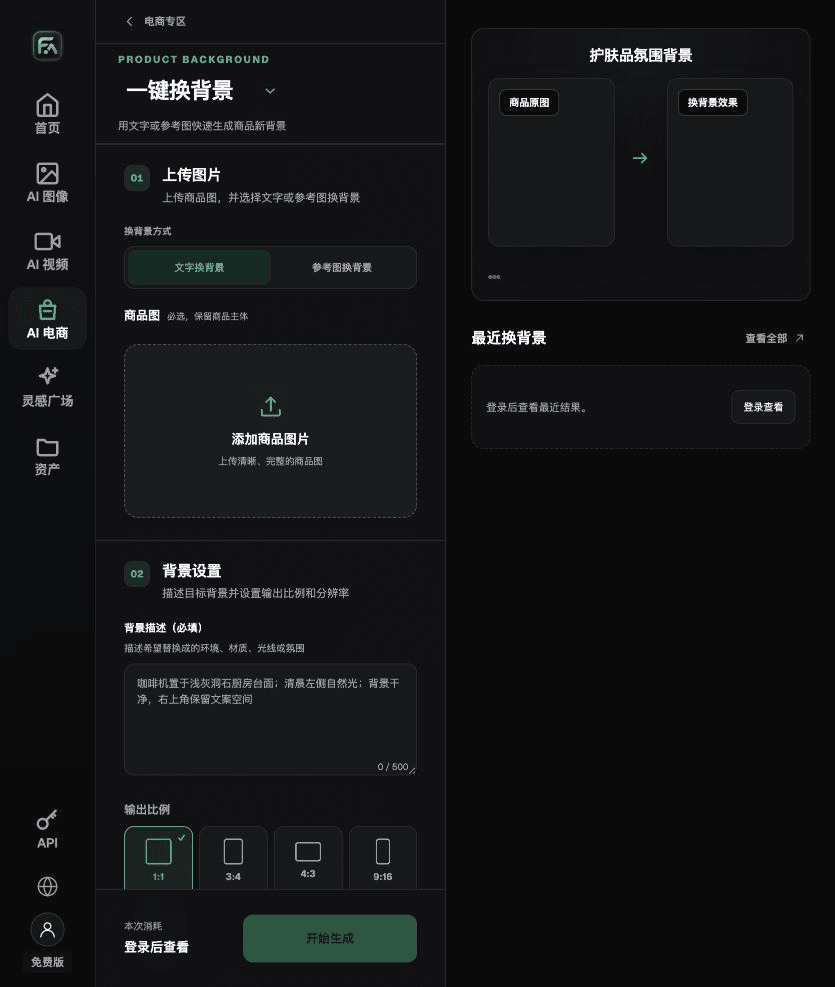
To create home-goods product images, use One-Click Background Replacement for the relevant steps: upload a product image and describe the background in text, or upload a background reference image you have permission to use. Specify the setting, surface material, light direction, mood, and contact shadows, and list the product details that must not change.
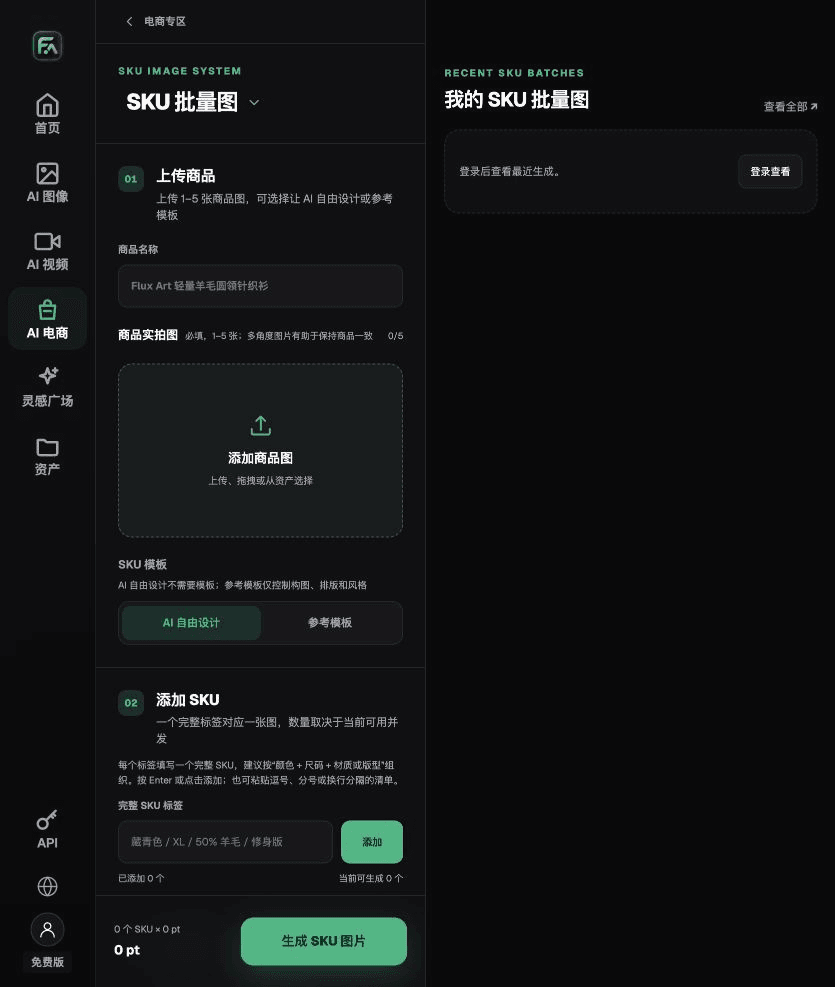
To create home-goods product images, use SKU Batch Images for the relevant steps: upload 1–5 product images and add each SKU with a complete label such as “color + size + material/style.” Choose AI free design or a reference template. Templates can constrain composition, layout, and style; split the work into batches according to current concurrency.
For home-goods product images, also check for incorrect set quantities, changed materials, unusual hand proportions, and implausible product use in the scene. Review these delivery checks together with the earlier requirement that the scene should show how the product is used.
A Prompt to Try for This Task
Create an ecommerce image for a home-goods product. Use the uploaded real product image as the subject and preserve its shape, dimensions, material, color, set quantity, and method of use. Generate only one product-display image that matches this article’s status checklist and the current real references. Target audience: [fill in], placement: [fill in], lighting: [fill in]. Do not invent specifications, accessories, certifications, benefits, or structural features.

Check These Items Before Delivery
After creating home-goods product images, check the final files for incorrect set quantities, changed materials, unusual hand proportions, and implausible product use in the scene. If you continue with other modules or SKUs, carry over the approved product evidence and validate each new task separately. Check the current page for submission usage and available options.

From Creation to Delivery-Ready Files
After completing the task on this page, archive the original product photos, approved text, selected tool or model, input instructions, candidate versions, and final exports together. Keep the originals separately; revisions should not overwrite the product evidence. Include the style number or task ID in file names so the operations team can find the sales version represented by each image. Before delivery, check resolution, cropping, captions, and links for the actual placement. Passing one large image does not mean every placement is ready.
Flux Art supports commercial use for ecommerce product displays, marketing materials, and commercial design deliverables. Handle input photos, people, trademarks, and product claims according to the actual project materials. Checking the rights to input assets and verifying product accuracy are delivery responsibilities separate from the platform’s commercial-use support.
Sources and Related Workflows
For model background, see OpenAI’s official introduction to ChatGPT Images 2.5, retrieved on 2026-10-02. Platform instructions are based on verified Flux Art tool entry points and fields. This article provides production steps and examples to execute; it does not claim generation tests, pass rates, savings, or customer outcomes.
Find the relevant tools in the Flux Art AI Ecommerce workspace. For related tasks, read the related product creation tutorial for more production and review guidance.
Related entry in the original: Related tool or source 1