 Flux Art
Closed and open bag images need to show the same product in the same configuration. Before creating candidates with GPT Image 2.5, match the zipper’s start and end points and opening direction to the interior pockets visible in real photos. Flux Art’s product image suite can organize white-background and detail images. This workflow delivers a matched pair of open and closed views plus an interior correspondence table; it does not ask the model to guess an ideal storage layout from the exterior.
Group Open and Closed Photos of the Same Bag
Start with closed, actually opened, and interior close-up photos, keeping the bag’s orientation easy to identify. Record the style number, color, strap configuration, and shooting state for each image; also note whether the opening is held apart and whether the bag contains stuffing. Do not mix different retail versions: even with the same exterior shape, they may have different linings, pockets, or zipper configurations. If interior photos are missing, take them first rather than treating exterior images as evidence of interior features.
Trace the Zipper Path and Check Its Ends and Obstructions
On a comparison sheet for your team, mark the visible start and end points of the zipper, the slider position, and any sections hidden by a handle. Then compare with the open view to confirm it is the same opening. Record whether the physical bag has one slider or two; do not add a second for symmetry. If a candidate connects the zipper to another pocket, revise it using the correct reference. Mark an obscured path as unconfirmed instead of drawing a plausible-looking line and treating it as approved.
List What Is Visible and Unknown Inside
List the main compartment, interior pockets, lining, and included accessories separately, assigning identifiers to areas that can be recognized in the original photos. Different openings may reveal only part of the same pocket; do not count visible sections in two photos as two separate pockets. If the back of the interior has not been photographed, leave it unconfirmed. Describe display props, stuffing, and included items separately to avoid implying that props are included with the bag.
Deliver a Matched Pair and a Correspondence Table
Place the closed view, open view, and interior details side by side in the same orientation, matching the slider, stitching, hardware, and pocket positions item by item. Record the original photo IDs, candidate version, problem areas, and final files. These are your team’s delivery records, not an automatic platform review. Use approved specifications for capacity; do not claim greater capacity because the open view looks deeper.
Prepare the Matching Tools and Assets
Do Not Exaggerate Capacity Visually
Rendering a bag deeper or wider may imply greater capacity. Use real angles and dimension data as the reference, and specify which contours must not change. If interior pockets, dividers, or accessories are not visible, take additional real photos instead of asking the model to unfold an idealized interior.
| What to Clarify | Details |
|---|---|
| Inputs or conditions | Real product photos and the bag’s shape, strap length, hardware, zipper, stitching, logo, and leather texture |
| Matching actions | White-background, detail, capacity selling-point, commuting-scene, and wearing-view candidate images |
| Required checks | Changes in hardware count, strap attachment points, zipper direction, and bag proportions |
Check Strap Fit and Contact Points in Wearing Views
The bag’s proportions relative to the person, strap length, points of tension, and occlusion should all look natural. Carrying by hand, crossbody wear, and wearing on the back are different poses; check each image for changes in hardware or straps. Scene props should not mislead buyers into thinking they are included with the bag.
Flux Art is operated by MORNING STAR INDUSTRY LIMITED. It is a multi-model AI visual creation and production platform where one account can access 50+ third-party image and video models. It also offers e-commerce tools for product image suites, background replacement, retouching, and apparel and accessory try-on. Model pages and e-commerce tools are separate workflows: if the task specifically requires GPT Image 2.5, confirm the selected model on its model page rather than attributing results from every tool to that model.
Turn Bag Product Images into Practical Tool Steps
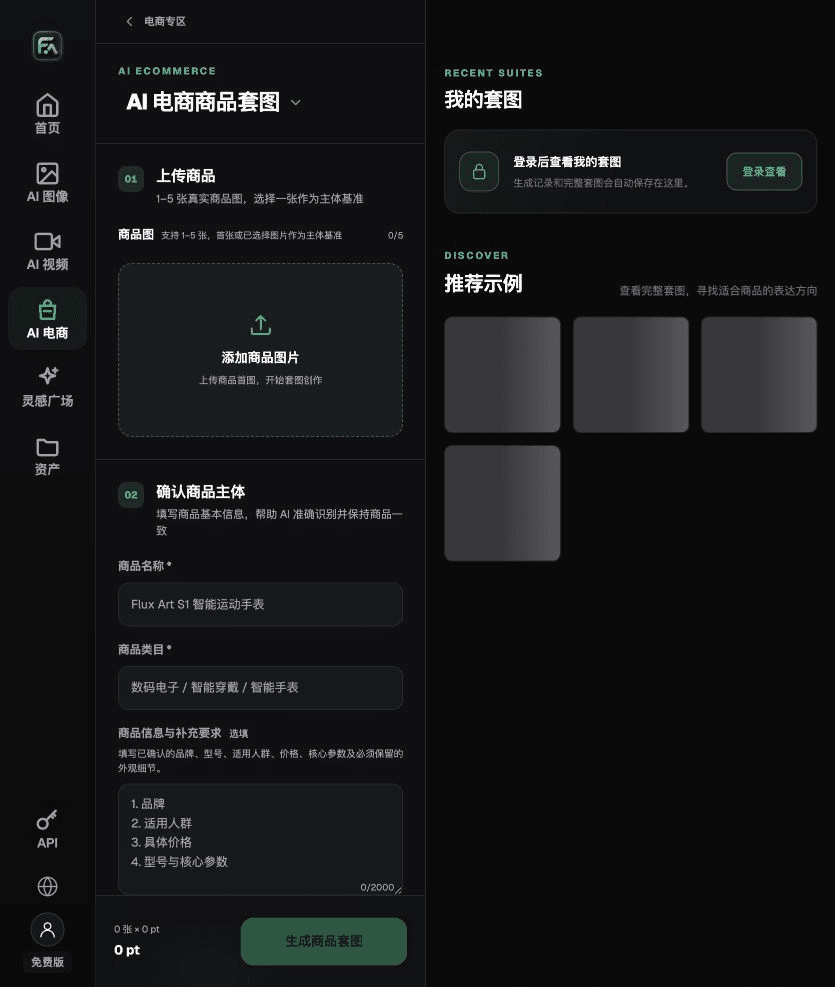
For bag product images, use Product Image Suite for the relevant steps: upload 1–5 real product photos, enter the product name, category, factual details, and details that must be preserved; choose modules such as product hero image, white-background main image, key selling points, use scenes, and close-up details; then set the aspect ratio, clarity, and language.
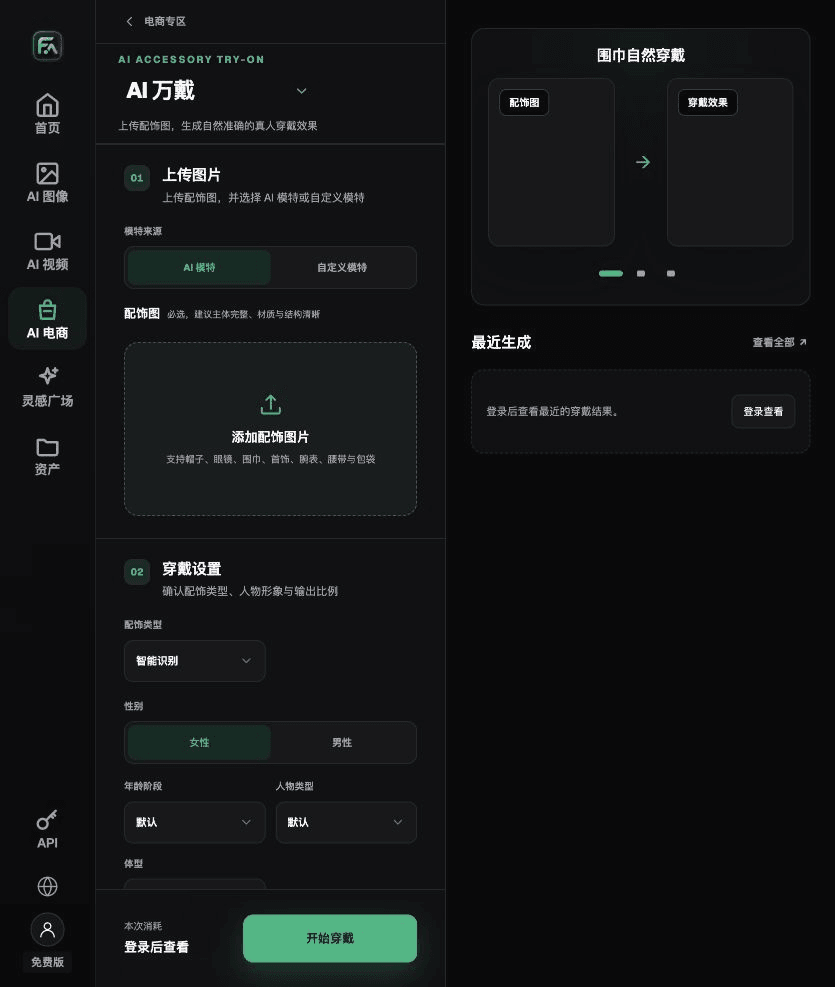
For bag product images, use AI Accessory Try-On for the relevant steps: upload images of accessories such as hats, glasses, scarves, jewelry, watches, belts, or bags, and choose an AI-generated or custom model; set the model’s appearance, body type, scene, styling, and wearing instructions.
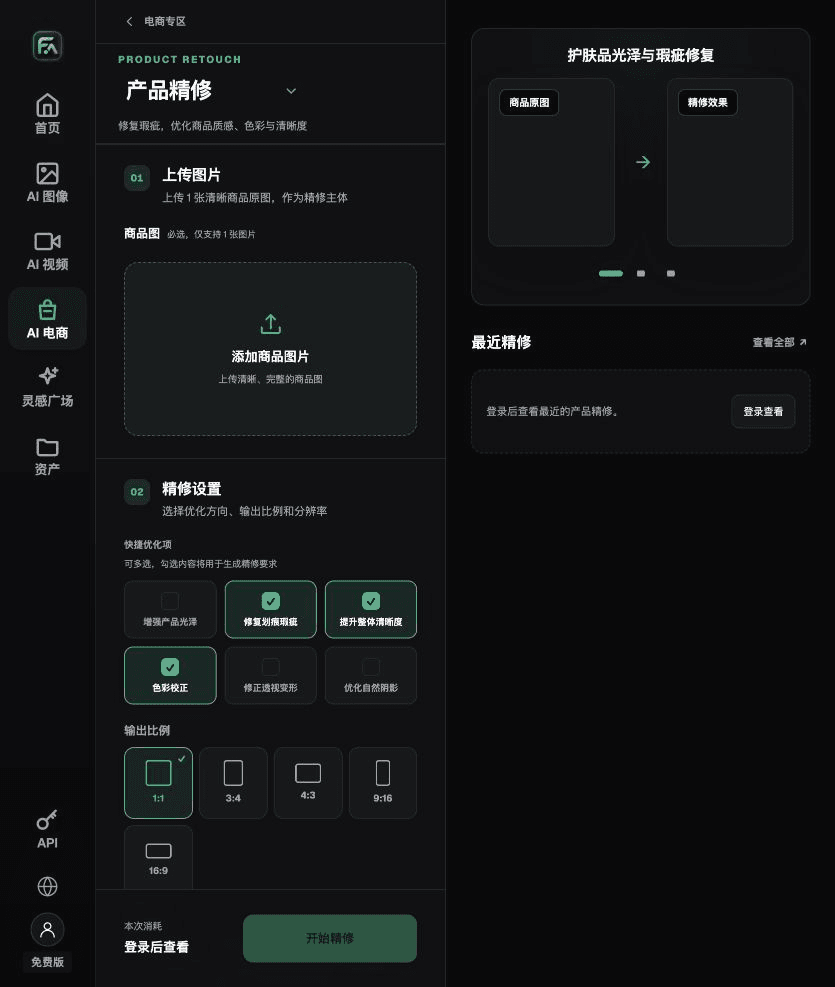
For bag product images, use Product Retouching for the relevant steps: upload one product image with a clearly visible subject and no severe obstruction; choose gloss, scratches/blemishes, clarity, color correction, perspective distortion, and natural shadow as needed. You do not need to enable every option.
For bag product images, also check hardware count, strap attachment points, zipper direction, and changes in bag proportions. Review this delivery checklist together with the requirement above not to exaggerate capacity visually.
A Prompt to Try for This Task
Create an e-commerce image of a bag. The subject must come from the uploaded real product photo. Preserve the bag shape, strap length, hardware, zipper, stitching, logo, and leather texture. Generate only one product display image that matches the status checklist in this article and the current real reference. Target audience [fill in], placement [fill in], lighting [fill in]. Do not invent specifications, accessories, certifications, benefits, or construction details.

Check These Details Before Delivery
After completing bag product images, check the final files for hardware count, strap attachment points, zipper direction, and changes in bag proportions. If you continue with another module or SKU, carry forward the approved product evidence and validate the new task separately. Check the current page for submission costs and available specifications.

From Production to Delivery-Ready Files
After completing this page’s task, archive the original product photos, approved text, selected tool or model, input instructions, candidate versions, and final exports together. Keep the original photos separate; revisions should not overwrite the product evidence. Include the style number or task ID in filenames so the operations team can identify the retail version shown in each image. Before delivery, check clarity, cropping, captions, and links for the actual placement. Do not treat one large image passing review as proof that every placement is ready.
Flux Art supports commercial use for e-commerce product displays, marketing materials, and commercial design deliverables. Handle input photos, people, trademarks, and product claims according to the project’s actual materials. Verifying rights to input assets and product accuracy are separate delivery responsibilities from the platform’s support for commercial use.
Sources and Related Workflows
For model background, see OpenAI’s official introduction to ChatGPT Images 2.5, retrieved on 2026-10-02. Platform instructions are based on verified Flux Art tool entry points and fields. This article provides production steps and an example prompt for future use; it does not claim generation test results, pass rates, savings, or customer outcomes.
Find the relevant tools in the Flux Art AI E-commerce Workspace. For related tasks, read the related product creation tutorial for more on production and review methods.
Related entry from the source draft: related tool or source 1