 Flux Art
Cabinet opening images must map each panel and drawer consistently across frames; a naturally rendered room perspective alone is not enough. Before creating editing candidates with Flux Art’s GPT Image 2.5, number cabinet positions based on actual photos and preserve closed, open, and visible-interior states. This article provides a panel ownership and state table. It does not infer drawer travel, load capacity, or installation methods.
Keep Numbers Fixed to Cabinet Positions
First choose a front-facing reference and state left and right from the viewer’s perspective, then assign numbers to each panel and drawer position. Put the numbers in a team review copy or tracking sheet; do not alter product labels. Group different models, left- and right-opening versions, and colorways separately. When a drawer is open, keep its original position number instead of reordering by its position in the image.
Match Closed and Open States Frame by Frame
For each number, compare the panel outline, handle, wood grain, or seam with the corresponding open-state photo. Record cabinet doors and drawers separately; do not turn a door panel into a pull-out box. If a feature is partly obscured, confirm it using another reference angle of the same model. Keep the viewing direction consistent; do not mirror the image to fabricate the opposite-side structure.
Do Not Add Interior Dividers Without References
If drawer compartments, slides, or hardware need to appear in sales detail images, provide corresponding references. When a closed-state photo does not show the interior, do not let the model fill it in with an idealized storage layout. After editing the background, check the number of openings and the connections between interior and exterior panels. Keep incorrect candidates alongside the originals, and do not keep polishing an incorrect structure.
Keep State Images Within Their Evidential Limits
Record the photographed state, candidate state, panel ownership, and issue location for each item in the delivery checklist. Count the drawers and handles first, then check the materials. If a photo shows a drawer only partly extended, describe only the state shown; do not treat it as the maximum travel. Use current product documentation for dimensions, load capacity, and installation requirements; do not infer them from generated images.
Prepare the Relevant Tools and Assets
Room Proportions Can Mislead
Showing a two-seat sofa as wide as a three-seat model, or making table legs thinner, changes what buyers expect from the product. Constrain the subject using actual dimensions and reference angles; use scene objects only to convey scale and purpose. Without evidence of the back, do not present a generated structure as a true product view.
| What to clarify | Details |
|---|---|
| Inputs or conditions | Actual product photos and length, width, and height; structure; number of doors and drawers; material; color; and scale references |
| Actions | White-background images, living room or bedroom scenes, dimension highlights, and material and detail images |
| Required checks | Incorrect room scale, changed door count, incorrect leg structure, and material or texture drift |
Check Materials, Lighting, and Structure Separately
Compare wood grain direction, leather stitching, fabric texture, and the number of support legs with the actual photos. Shadows and floor contact should look plausible, and mirrors must not reflect a different product model. Use approved data for dimension labels; do not measure products from scene perspective.
Flux Art is operated by MORNING STAR INDUSTRY LIMITED. It is a multi-model AI visual creation and production platform where one account can access more than 50 third-party image and video models. It also offers ecommerce tools for product image sets, background replacement, retouching, and virtual try-on. Model pages and ecommerce tools are separate entry points. If a task specifically requires GPT Image 2.5, confirm the selected model in the relevant model interface; do not attribute results from every tool to that model.
Turn This into a Furniture Product Image Workflow
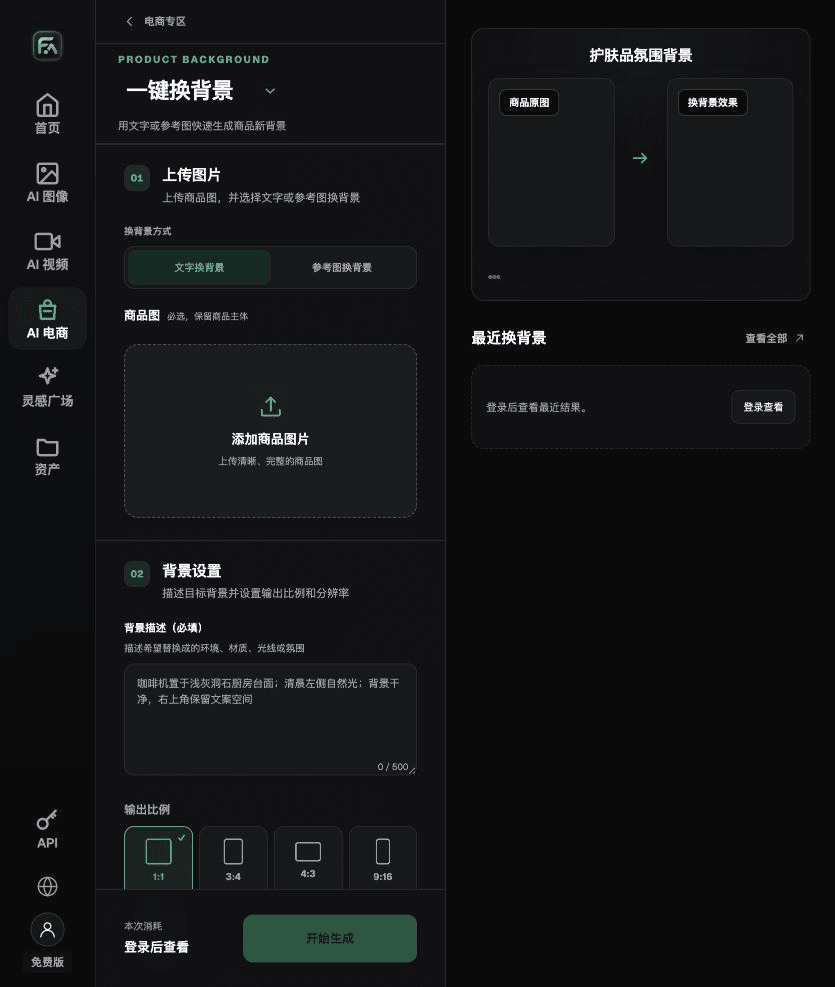
For furniture product images, complete the relevant step in One-Click Background Replacement: upload the product image, describe the background in text, or upload a background reference image you are authorized to use. Specify the setting, surface material, light direction, mood, and contact shadows, and list the product details that must not change.
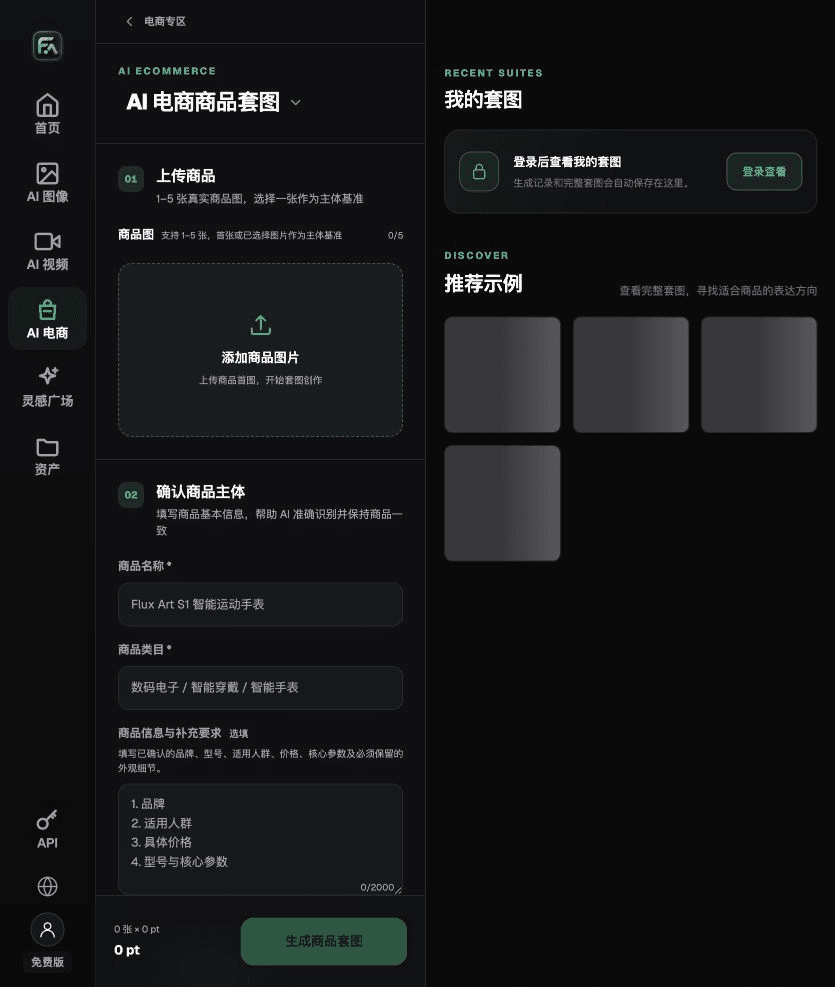
For furniture product images, complete the relevant step in Product Image Set: upload 1–5 actual product photos and enter the product name, category, factual information, and details that must be preserved. Select modules such as product hero image, white-background main image, key selling points, use scenes, and close-up details, then set the aspect ratio, resolution, and language.
For furniture product images, also check for incorrect room scale, changed door count, incorrect leg structure, and material or texture drift. Review this delivery checklist together with the requirements in “Room Proportions Can Mislead.”

A Prompt to Try for This Task
Create furniture ecommerce images. The subject must come from the actual uploaded product photo. Preserve its length, width, and height; structure; number of doors and drawers; materials; colors; and scale references. Generate only one product display image for this task, consistent with this article’s state checklist and the current actual reference. Target audience: [fill in]. Placement: [fill in]. Lighting: [fill in]. Do not invent specifications, accessories, certifications, benefits, or structural features.

Check These Items Before Delivery
After completing a furniture product image, check the final file for incorrect room scale, changed door count, incorrect leg structure, and material or texture drift. If you continue with other modules or SKUs, carry forward the approved evidence for the subject, then validate each new task separately. Check the current page for submission usage and available options.

From Production to Deliverable Files
After completing the task on this page, archive the original product photos, approved copy, selected tool or model, input instructions, candidate versions, and final exports together. Always retain the originals separately; revisions must not overwrite the product evidence. Include the model number or task ID in filenames so the operations team can find the sales version for each image. Before delivery, check resolution, cropping, captions, and links for the actual placement. Passing one large image does not mean every placement has passed review.
Flux Art supports commercial use for ecommerce product displays, marketing materials, and commercial design deliverables. Handle input photos, people, trademarks, and product claims according to the actual project materials. Verifying rights to input assets and product accuracy are separate delivery responsibilities from the platform’s commercial-use support.
Sources and Related Workflows
For model background, see OpenAI’s official introduction to ChatGPT Images 2.5, retrieved on 2026-10-02. Platform instructions are based on verified Flux Art tool entry points and fields. This article provides production steps and examples to carry out; it does not claim generation tests, pass rates, cost savings, or customer outcomes.
Find the relevant tools in the Flux Art AI Ecommerce workspace. For related tasks, continue with the related product production tutorial to learn more about production and review methods.
Related source in the original: Related tool or source 1