 Flux Art
Toy assembly process images should organize approved step photos, not ask a model to invent assembly instructions. When using Flux Art’s GPT Image 2.5 to create image candidates, preserve the original step numbers, parts list, and visible connections. This workflow delivers a comparison of steps and part locations; it does not provide new assembly instructions or use a finished product image as proof of safety or educational benefit.
Gather the Product Owner’s Approved Step Photos
Organize the original photos by product number, set version, and instruction version, preserving the established step numbers and order. Each step should be linked to content confirmed by the product owner; do not mix in similar-looking sets. If a photo is missing, a step is skipped, or a photo conflicts with the instructions, ask the materials owner first. Do not have the model infer missing steps from the finished product.
Record Only Changes Actually Visible in Each Step
Place each pair of consecutive steps side by side and record the parts added, the assembled sections, and the pieces set aside temporarily. Loose parts nearby may be needed later, so do not remove them just because they are not attached in that frame. Take part numbers and quantities from the actual list. This comparison table is a team delivery record, not a platform feature that automatically identifies connections or generates instructions.
Flag Hidden Connections for Confirmation
If a hand, finished shell, or camera angle obscures a connection, keep the original photo and flag the issue. Ask the product owner for a suitable reference. You can create background and layout candidates, but do not redraw unknown clips or connection directions just to make the image look smoother. After local edits, review the whole frame to make sure correctly placed parts have not been added, removed, or moved.
Review Each Frame Before Building the Process Page
For each final frame, record the original photo number, approved step, visual edits actually made, and corresponding exported file. Use existing approved instructions for layout arrows and text; do not add operating instructions based on the image. Check that numbers remain legible at thumbnail size. Separately verify set quantity, age grading, warnings, and safety information item by item. Do not present a playful scene as proof of certification or product efficacy.
Prepare the Relevant Tools and Assets
Keep Play Images True to the Product’s Real Structure
An extra car in a building block set or an extra accessory on a doll can change what is being sold. Check the quantity and configuration of every item. When demonstrating play, use real operating materials to constrain the action. Scenes involving people also require checks for permissions and safe poses.
| What This Task Must Clarify | Specific Details |
|---|---|
| Inputs or conditions | Authentic product photos; part quantities, structure, dimensions, age grading, warnings, and packaging |
| Actions to take | White-background images, play scenes, parts lists, dimensions, and detail-page modules |
| Items to check | Invented extra parts, incorrect age grading or warnings, permissions for people shown, and misleading depictions of product safety or structure |
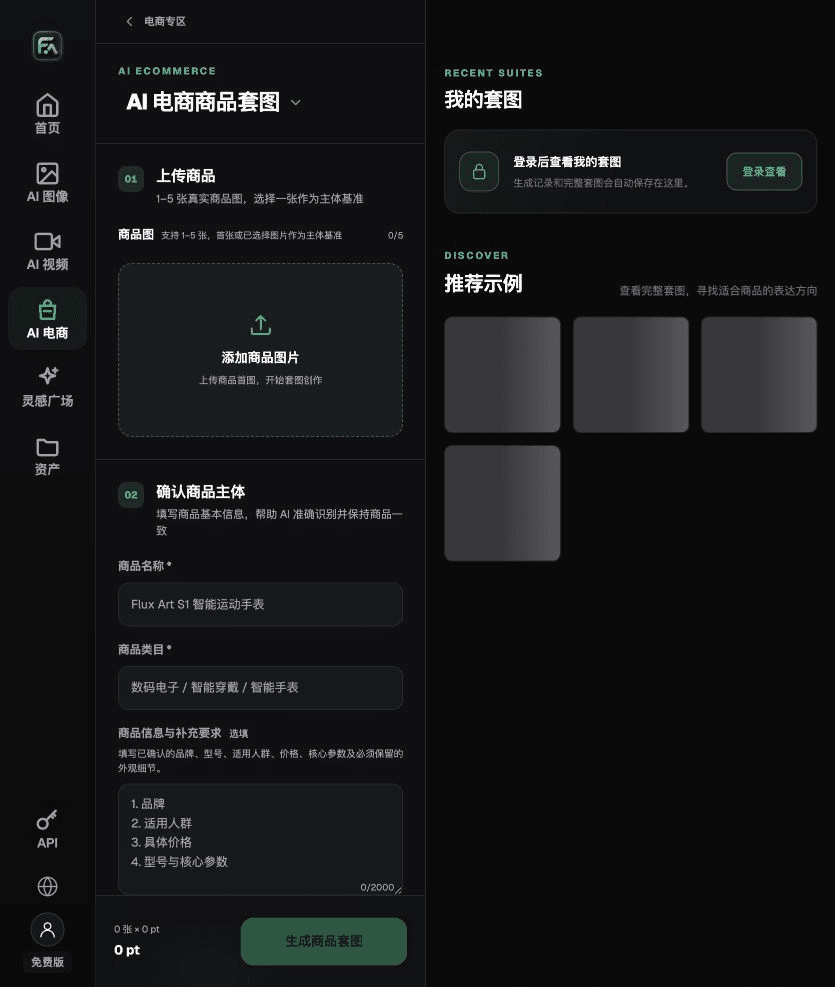
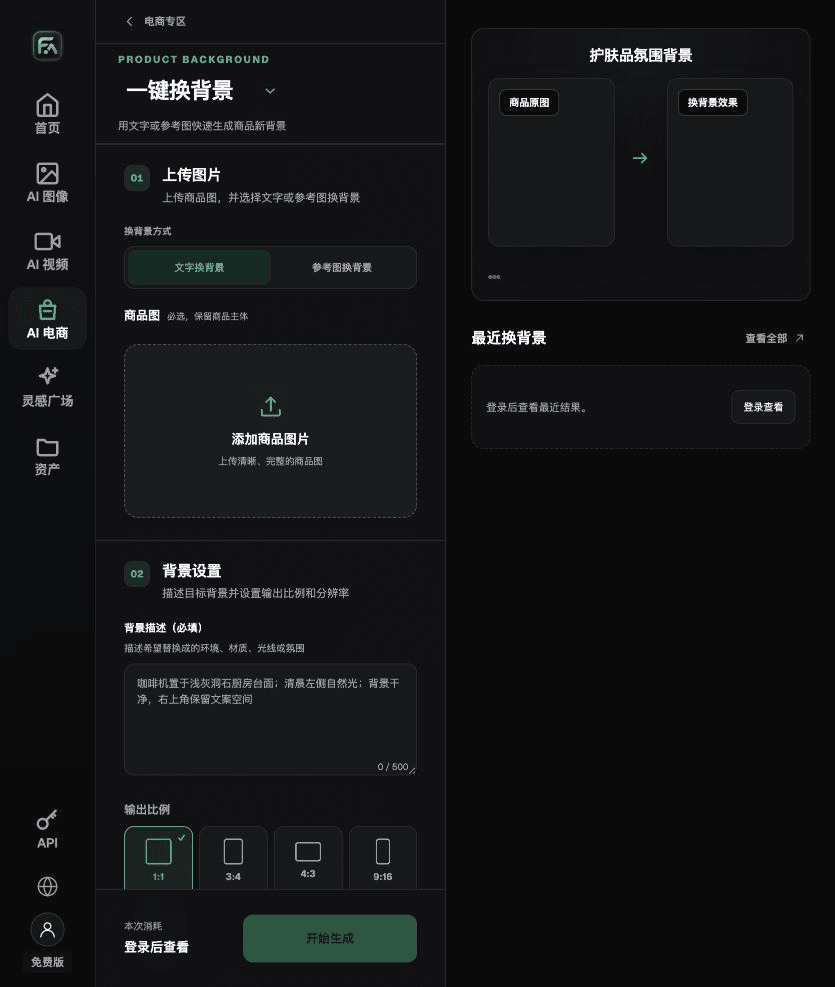
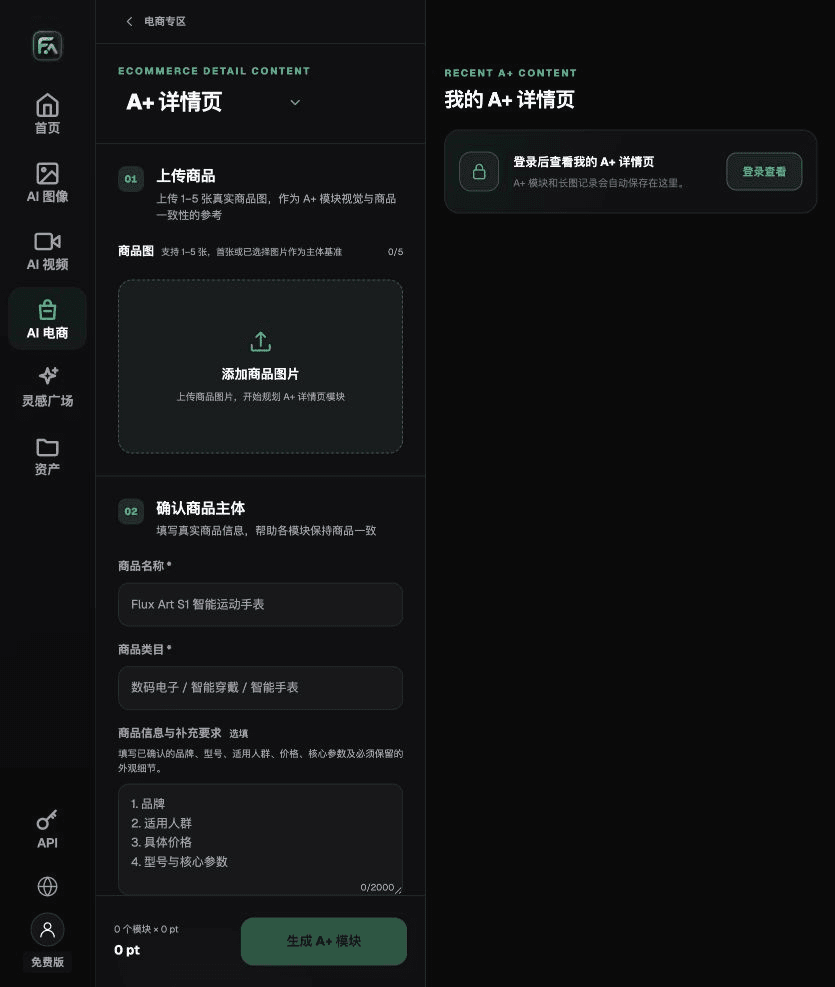
Flux Art is operated by MORNING STAR INDUSTRY LIMITED. It is a multi-model AI visual creation and production platform. One account can access 50+ third-party image and video models, along with e-commerce tools for product image sets, background changes, retouching, and virtual apparel try-on. Model pages and e-commerce tools are separate workflows. If a task specifically requires GPT Image 2.5, confirm the selected model in its dedicated model workflow; do not attribute results from every tool to that model.
Keep Age Grading and Warnings Accurate
Use approved materials for age grading, warnings, and packaging text. Images can help explain, but they cannot prove safety on their own. Set complex small text in post-production; generated images should only provide clear visual explanations.
Turn Toy Product Images into a Practical Workflow
To create toy product images, complete the relevant steps in Product Image Set: upload 1–5 authentic product photos, enter the product name, category, factual information, and details that must be preserved; select modules such as hero image, white-background main image, key selling points, use scenarios, and close-up details; then set the aspect ratio, clarity, and language.
To create toy product images, complete the relevant steps in One-Click Background Change: upload a product image and describe the background in text, or upload a background reference image you have the right to use. Specify the setting, surface material, light direction, mood, and contact shadows, and list the product details that must not be changed.
To create toy product images, complete the relevant steps in A+ Content Page: upload 1–5 product images or consistency reference images, and enter reviewed product facts and selling points. Select the A+ content modules and generation specifications you need, then proofread each section’s headings, specifications, selling points, and images.
For toy product images, also check for invented extra parts, incorrect age grading or warnings, missing permissions for people shown, and misleading depictions of product safety or structure. Review this delivery checklist together with the requirement above to keep play images true to the product’s real structure.
A Prompt to Try for This Task
Create an e-commerce image of a toy. The subject must come from the authentic product image provided. Preserve the number and structure of the parts, dimensions, age grading, warnings, and packaging. Generate only one product display image that matches this article’s status checklist and the current authentic references. Target audience: [fill in], placement: [fill in], lighting: [fill in]. Do not invent specifications, accessories, certifications, efficacy claims, or structural details.

Check These Items Before Delivery
After creating toy product images, inspect the final files for invented extra parts, incorrect age grading or warnings, missing permissions for people shown, and misleading depictions of product safety or structure. If you continue with other modules or SKUs, carry forward the approved evidence for the product itself, then validate each new task separately. Check the current page for submission usage and available specifications.

From Production to Delivery-Ready Files
After completing this page’s task, archive the original product photos, approved copy, selected tool or model, input instructions, candidate versions, and final exports together. Always keep the originals separately; revisions should not overwrite the source evidence for the product. Include the product number or task ID in file names so operations staff can find the sales version associated with each image. Before delivery, check clarity, cropping, captions, and links against the actual placement. One large image passing review does not mean images for every placement have passed.
Flux Art supports commercial use and can be used for e-commerce product displays, marketing materials, and commercial design deliverables. Handle input photos, people, trademarks, and product marketing information according to the actual project materials. Checking rights to input assets and verifying product authenticity are delivery tasks separate from the platform’s commercial-use support.
Sources and Related Workflows
For model background, see OpenAI’s official introduction to ChatGPT Images 2.5, retrieved on 2026-10-02. Platform instructions are based on verified Flux Art tool workflows and fields. This article provides production steps and examples to be carried out; it does not claim generation tests, pass rates, savings, or customer outcomes.
Find the relevant tools in the Flux Art AI E-commerce Workspace. For related tasks, continue with the related product production tutorial to learn more about production and review methods.
Related entry in the source draft: Related tool or source 1