 Flux Art
Takeout box images should show the lid, compartments, and actual portion for the same serving. Flux Art’s GPT Image 2.5 can create editing candidates; background changes and product image sets are handled in separate presentation workflows. Start with real photos of the same box closed, open, and from above. Then check its boundaries and portion so a change in angle does not turn it into a more generous meal.
Tie the box model to the actual serving
Record the store, dish version, container, and lid in use. Keep overhead and side-view photos of the same packed serving. Create separate groups for sizes sold side by side; do not pair a large serving of food with a small-box photo. Use store-approved records for weights and quantities, and use images only to check that they correspond. Do not infer portion size from how full the box looks.
Check compartment boundaries before enhancing the food
First confirm the number and edges of the compartments, and which foods belong in each one. Only then adjust the tabletop or lighting. Reject a candidate if it smooths over dividers, moves food between compartments, or adds side dishes. If the lid or food obscures part of the container, provide a reference for that area; do not guess the full structure just to make it look tidy.
Make sure a lid shown separately still matches
Compare the lid’s outline, orientation, and visible details with the reference to confirm it belongs to the current box. A lid placed beside the box should not become a second bowl, and no utensils should be added if they are not included with the order. If the closed and open photos use different viewing directions, keep a note of the direction. Do not stretch the lid to compensate for incorrect perspective.
Check the same portion from above and from the side
Put both views on the same delivery line and check food quantity, pile height, and the proportions of the container. After changing the background, check the relationship between the food and the box again to avoid creating the illusion of a larger portion by shrinking the box. A closed-box image cannot prove leak resistance or heat resistance, and a clean scene cannot prove food safety. Confirm those claims using information from the store or product supplier.
Prepare the relevant tools and materials
Menu images should reflect the actual serving
The meat, side dishes, and container in a rice bowl should not be upgraded automatically into a deluxe platter. Start with real serving photos and notes on quantities; change only the background or lighting. You can explore a mood for an advertising concept, but do not present it as what customers actually receive.
| What this task must clarify | Details |
|---|---|
| Inputs or conditions | Real product photos and accurate details for the dish recipe, portion, container, price, store, and promotion |
| Related actions | Menu hero image, combo meal scene, dish details, and promotional modules |
| Items to check | Differences from the actual dish, exaggerated portions, incorrect prices or dates, and hygiene appearance |
Flux Art is operated by MORNING STAR INDUSTRY LIMITED. It is a multi-model AI visual creation and production platform where one account can access more than 50 third-party image and video models. It also offers ecommerce tools for product image sets, background changes, retouching, and virtual apparel try-on. Model pages and ecommerce tools are separate entry points. If a task specifically requires GPT Image 2.5, confirm the selected model in the corresponding model page; do not attribute the results of every tool to that model.
Images do not prove hygiene, price, or origin
A clean table cannot prove food safety, and a farm background cannot prove origin. Menu text, promotional prices, and allergen information must come from store-approved materials. After generation, check the food structure and how chopsticks and utensils contact it; avoid impossible placements.
Turn food product images into practical steps
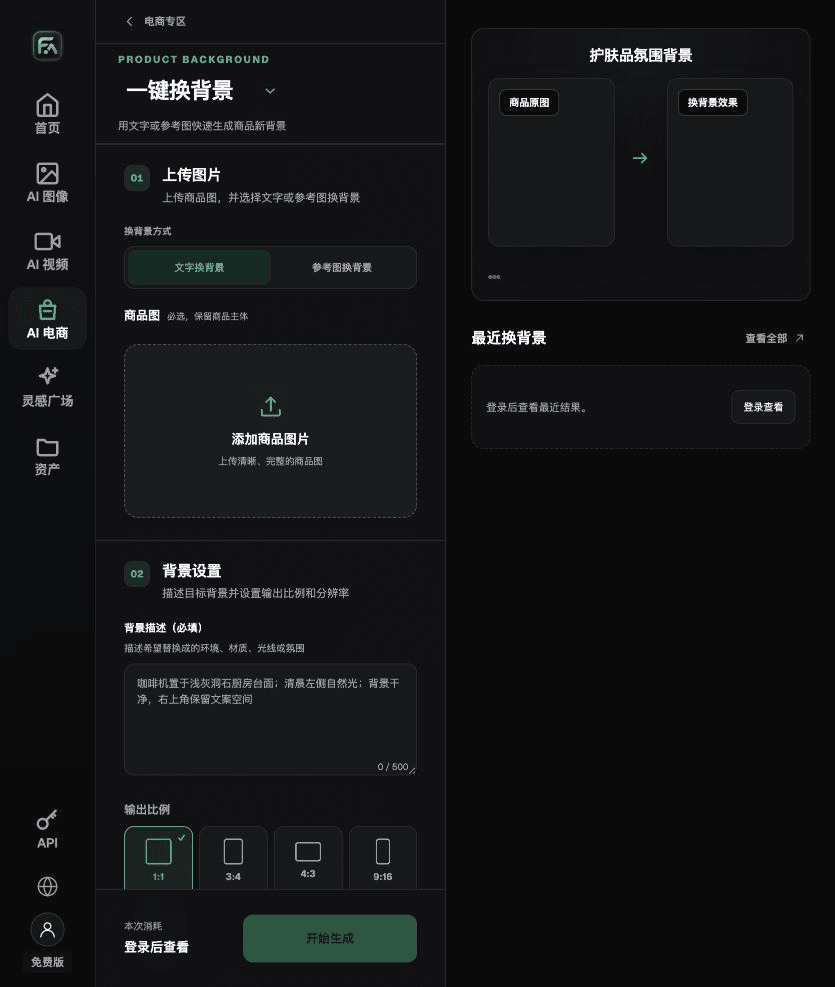
When producing food product images, use One-Click Background Change for that part of the workflow: upload the product image and describe the background in text, or upload a background reference image you have the right to use. Specify the setting, tabletop material, lighting direction, mood, and contact shadows, and list the product details that must not change.
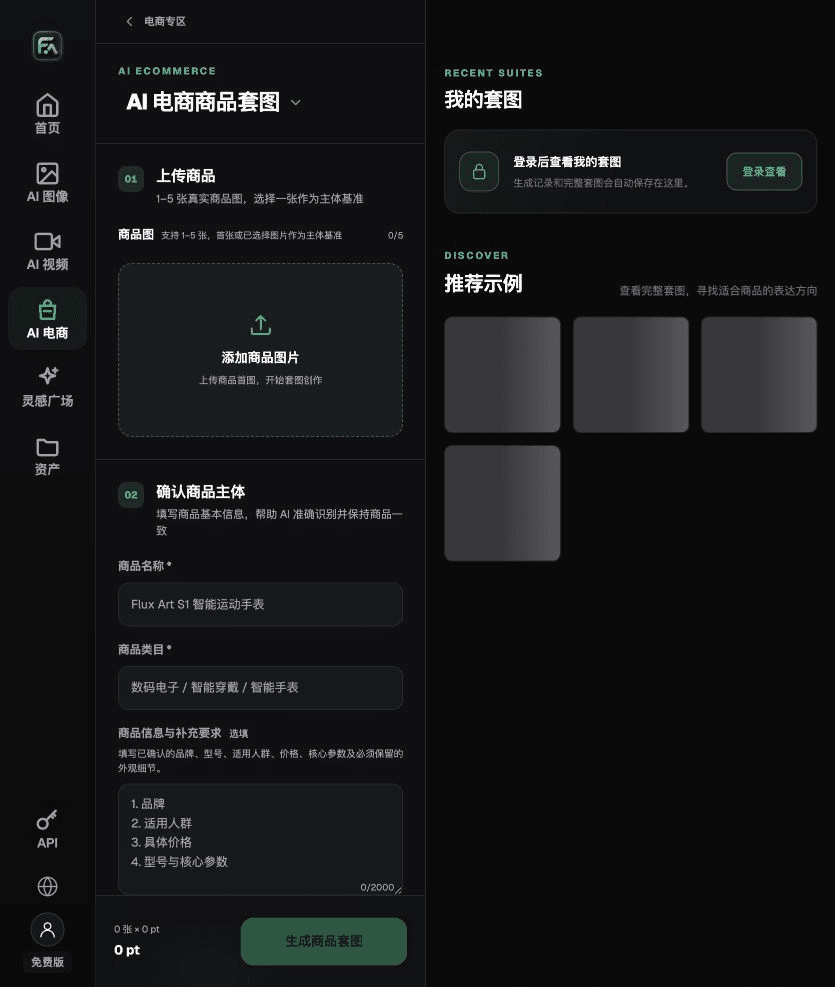
When producing food product images, use Product Image Set for that part of the workflow: upload 1–5 real product photos, and enter the product name, category, factual information, and details that must be preserved. Choose modules such as product hero image, white-background main image, key selling points, use scene, and detail close-up; then set the aspect ratio, resolution, and language.
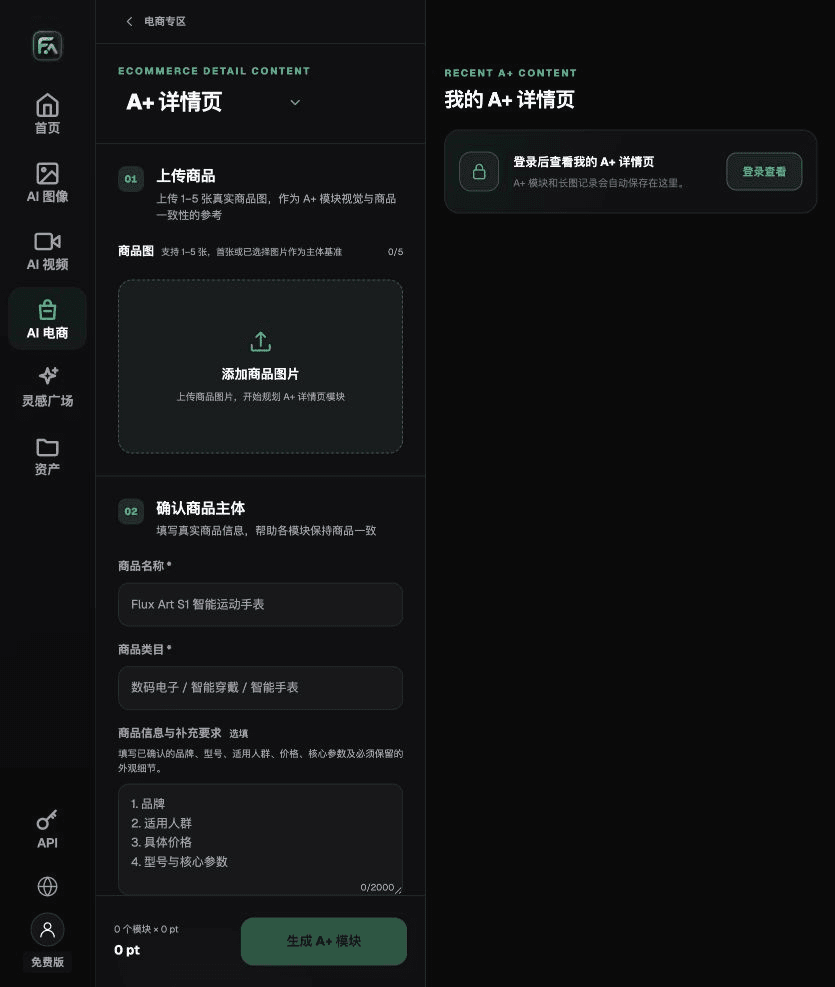
When producing food product images, use A+ Content Page for that part of the workflow: upload 1–5 product photos or consistency reference images, and enter verified product facts and selling points. Choose the A+ content modules and output specifications you need, then review the heading, specifications, selling points, and images in each section.
For food product images, also check for differences from the actual dish, exaggerated portions, incorrect prices or dates, and hygiene appearance. Review this delivery checklist alongside the requirements above under “Menu images should reflect the actual serving.”
A prompt to try for this task
Create a food ecommerce image. Base the subject on the uploaded real product photo, and preserve the dish’s actual recipe, portion, container, price, store, and promotional information. Generate only one product display image that matches this article’s status checklist and the current real reference. Target audience [fill in], placement [fill in], lighting [fill in]. Do not invent specifications, accessories, certifications, performance claims, or structure.

Check these items before delivery
After producing food product images, review the final files for differences from the actual dish, exaggerated portions, incorrect prices or dates, and hygiene appearance. If you continue with other modules or SKUs, carry over the approved evidence for the subject, then verify each new task separately. Check the current page for submission usage and optional specifications.

From production to delivery-ready files
After completing this page’s task, archive the original product photos, approved copy, selected tool or model, input instructions, candidate versions, and final exports together. Keep the originals separate; revisions must not overwrite the product evidence. Include a product style number or task ID in each filename so the operations team can find the sales version that each image corresponds to. Before delivery, check resolution, cropping, captions, and links for each actual placement. Approval of one large image does not mean every placement is approved.
Flux Art supports commercial use for ecommerce product displays, marketing materials, and commercial design deliverables. Handle input photos, people, trademarks, and product promotional information according to the project’s actual materials. Checking rights to input assets and verifying product authenticity are delivery tasks separate from the platform’s commercial-use support.
Sources and related workflows
For model background, see OpenAI’s official introduction to ChatGPT Images 2.5, retrieved on 2026-10-02. Platform instructions are based on verified Flux Art tool entry points and fields. This article provides production steps and examples to carry out; it does not claim any image generation tests, pass rates, savings, or customer results.
Find the relevant tools in the Flux Art AI Ecommerce Workspace. For related tasks, read the related product production tutorial for more on production and review methods.
Related link in the original: Related tool or source 1