 Flux Art
When a model’s arm, hair, or accessories cover a neckline or print in a GPT Image 2.5 model photo, first plan which parts of the garment must remain visible, then choose a pose. Flux Art’s model dressing and pose change tools can create presentation candidates. This guide plans visibility so an attractive pose does not take the place of product information.
Map garment visibility before choosing a pose
Take a top with a chest print as an example. List the neckline, print, placket, and cuffs as details that must be visible. For each pose candidate, mark each detail as visible, partly covered, or fully covered. Crossed arms may work for an atmospheric model shot, but not for showing a chest print. The same series can include that pose, provided another clear product view does the explanatory work.
Change the pose, not the print location
When a hand covers a print, prefer a reference with the arm relaxed at the model’s side or the hand away from the chest. Do not move the print to accommodate the pose. If hair covers the neckline, adjust its position. If a bag strap covers the placket, remove the non-sale styling item. Keep a record of styling items that must remain, so they do not appear in some images and disappear in others, creating confusion about what is included in the sale.
A covered area cannot pass inspection
Mark only genuinely visible areas as passed during output review. Record hidden areas as not visible, rather than assuming they are correct. If information about a hidden area is needed, add a close-up or a candidate in a natural standing pose. Check the model’s face and fingers separately, but do not overlook product visibility just because the portrait looks good. Keep pose choices separate from style facts: a generated image does not prove fit or wearing comfort.
Deliver a set of views with distinct roles
Save a front product view, pose and mood views, and any necessary detail views by style number. Note which parts each image is meant to show. Remove redundant candidates that provide little information, so multiple images do not all cover the same area. After revising a pose, recheck the visibility list and garment shape. Passing one front view does not mean every pose has passed. This checklist is a team workflow, not an automatic obstruction detection feature.
Related tools and asset preparation
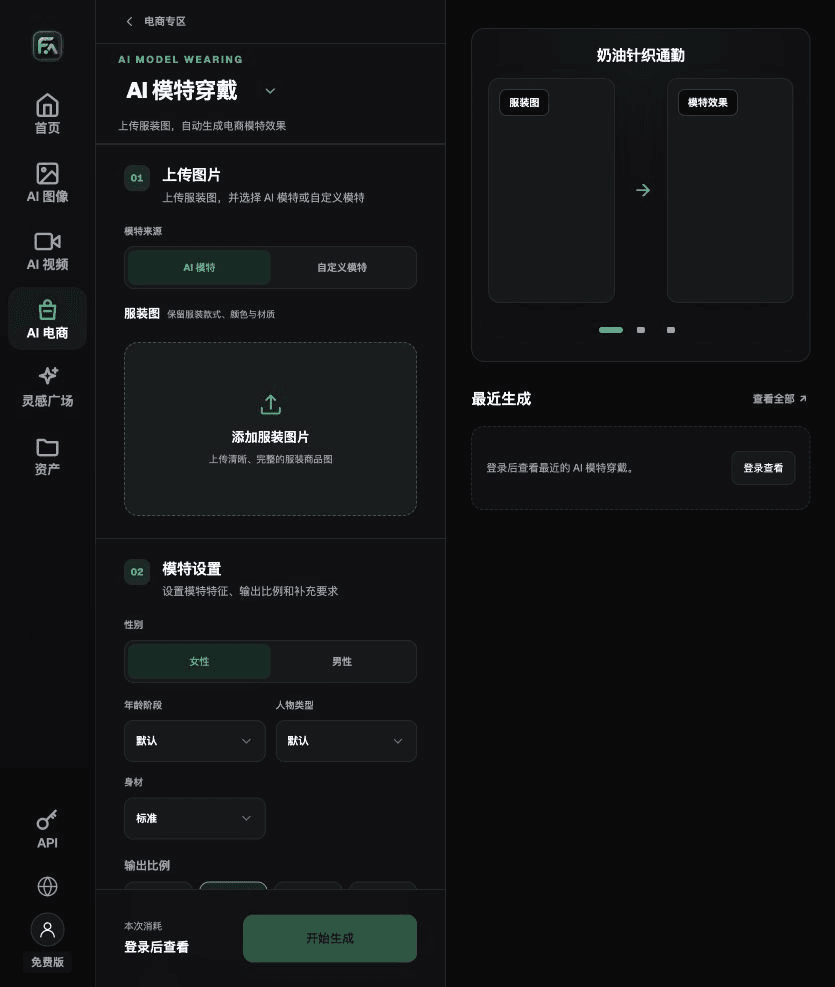
Front views establish the style; detail views provide evidence
A shirt’s neckline, placket, buttons, and chest pocket should all be confirmable from the references. A model image must not fill in covered areas with imagined product details. Prepare front and necessary detail views, then choose a simple pose. Check the garment first, then the model.
| What to specify | Details |
|---|---|
| Inputs or requirements | Front garment image, fabric and pattern information, and an authorized model reference |
| Related action | First confirm the garment in Model Wearing, then use One-Click Model Pose Change to add poses, avoiding a separate generation from scratch for every image |
| Required checks | Neckline, cuffs, placket, print, body joints, hands, and obstructions |
Handle dressing and pose changes in two rounds
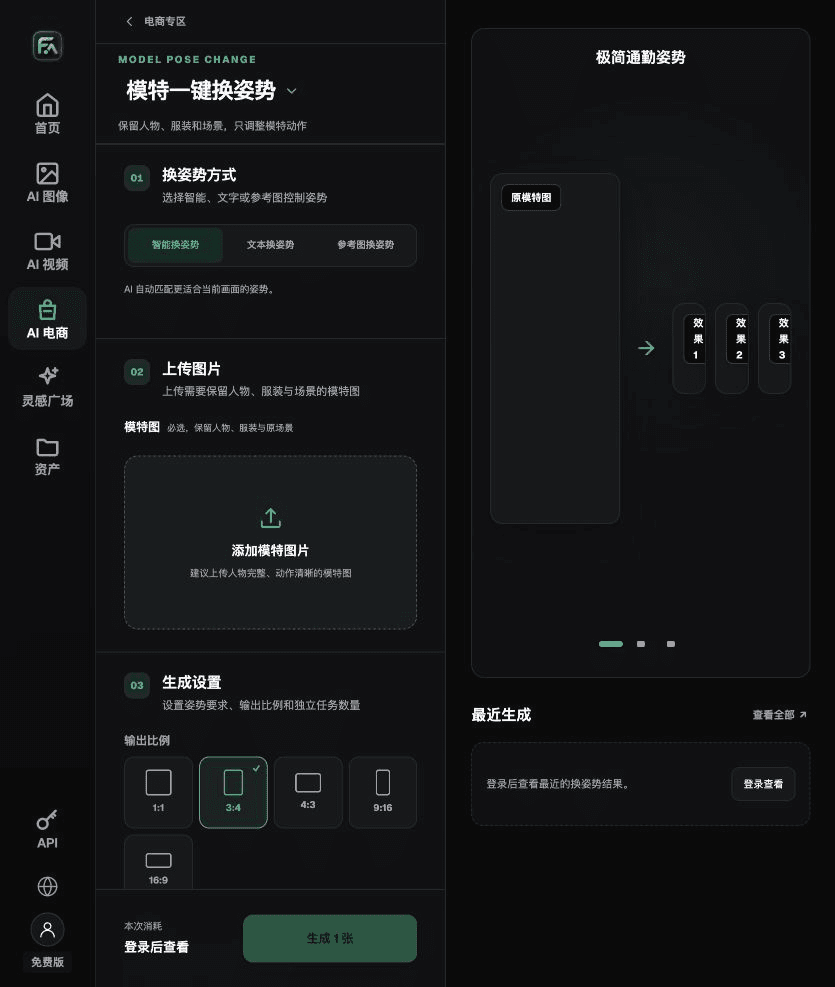
In the first round, confirm that the garment looks correct in a fixed pose. Once it passes, use One-Click Model Pose Change to add poses. Larger movements make cuffs, underarms, and the waist more prone to distortion. Check face authorization, fingers, and background people too; do not inspect the garment alone.
Flux Art is operated by MORNING STAR INDUSTRY LIMITED. It is a multi-model AI visual creation and production platform where one account can access 50+ third-party image and video models. It also offers ecommerce tools for product image sets, background replacement, retouching, and virtual garment try-on. Model pages and ecommerce tools are separate entry points. If the task specifically requires GPT Image 2.5, confirm the selected model in its dedicated model entry point; do not attribute results from every tool to that model.
Turn the AI model image workflow into clear steps
For AI model images, use Model Wearing for the relevant steps: upload the garment image, select an AI model or a custom model, and specify gender, age, appearance, and body type. Set the pose, scene, and lighting, while asking the tool to preserve the garment’s style, color, fabric, and key patterns.
For AI model images, use One-Click Model Pose Change for the relevant steps: upload a complete model image and choose an intelligent, text-based, or reference-image pose. Specify what to preserve about the person, garment, and scene. You can generate 1–4 separate pose tasks.
For AI model images, also check the neckline, cuffs, placket, print, body joints, hands, and obstructions. Review this delivery checklist alongside the guidance above: “Front views establish the style; detail views provide evidence.”

A prompt to try for this task
Use the uploaded garment for model dressing. Model: [age, appearance, body type]; pose: [specify]; scene: [specify]. Preserve the garment’s cut, color, fabric, pattern, neckline, cuffs, placket, and button count. Do not add a belt, accessories, or details that are not present.

Recheck these details before delivery
After completing the AI model image, inspect the final files for the neckline, cuffs, placket, print, body joints, hands, and obstructions. If you continue with another section or SKU, reuse the approved evidence for the main product, then validate each new task separately. Check current page details for submission usage and available specifications.

From production to delivery files
After completing this workflow, archive the original product images, approved copy, selected tool or model, input instructions, candidate versions, and final exports together. Keep the originals separately; revisions must not overwrite the product evidence. Link filenames to the style number or task ID so operations staff can find the sales version for each image. Before delivery, check clarity, cropping, captions, and links for the actual placements. Passing one large image does not mean every placement has passed.
Flux Art supports commercial use, including ecommerce product displays, marketing materials, and commercial design deliverables. Handle input photos, people, trademarks, and product claims according to the actual project materials. Checking rights to input assets and verifying product accuracy are delivery tasks separate from the platform’s commercial use support.
Sources and related workflows
For model background, see OpenAI’s official introduction to ChatGPT Images 2.5, retrieved on 2026-09-30. Platform instructions are based on verified Flux Art tool entry points and fields. This article provides production steps and examples to carry out; it does not claim generation tests, pass rates, savings, or customer results.
Find the relevant tools in the Flux Art AI Ecommerce workspace. For related tasks, continue with the related product creation tutorial for more production and review guidance.
Related source entry: Related tool or source 1