 Flux Art
When a GPT Image 2.5 product scene looks like the product is floating, first locate the points where it truly touches the surface, then check the shadow direction, softness, and tabletop perspective. Flux Art’s reference editing and background replacement tools can help create candidates. This workflow maps the contact points of products with multiple supports; adding a dark patch is not a fix.
Mark Contact and Raised Areas on the Original
As a hypothetical example, use a small device with four feet and record how the visible feet, bottom casing, and tabletop relate in the original image. Areas of the casing that do not touch the surface should not have the same heavy black edge as the contact points. Do not guess how many feet are hidden. First use an annotated diagram to explain their positions, then edit the unmarked original image to avoid having the markings appear in the final output.
Contact Shadows and Cast Shadows Serve Different Roles
Dark areas at the contact points show that the product rests on the surface; shadows extending outward indicate the main light source. Both can appear at once, but do not connect all the feet with a solid black slab that contradicts the product’s underside. Specify the surface, light direction, and camera position, then compare each visible support point. Use other known objects in the scene as a guide for shadow softness rather than applying one fixed blur value to every product.
Correct the Surface Perspective Before Adjusting Shadows
If the device’s four feet do not lie on a plausible plane, even a beautiful shadow can make it look like it is floating. Compare the product’s structure with the camera position and check the contact heights of the near and far feet. If the background perspective is wrong, adjust the background; if the product structure is wrong, return to the original image. Do not tilt or flatten the product to accommodate an incorrect surface. Treat mirror reflections as a separate check; do not mistake a reflection for an actual contact point.
Use Close-Up Crops to Hand Off Revisions
List each visible contact point on its own row in the handoff sheet, noting the evidence from the original image, the current discrepancy, the area to revise, and what must be preserved. After approving a candidate, check the full image at thumbnail size for a natural overall appearance and consistent light direction. If the image is for a sales hero image with a specific background color requirement, create a separate version; shadow treatment for a scene image does not automatically define the rules for that channel’s hero image.
Tools and Assets for This Workflow
Show the Product in Context Without Cluttering the Scene
Pairing a perfume bottle with a dressing table is a different task from pairing an industrial fitting with a workbench. Start by defining one setting, one surface, and a few necessary objects. Too many props compete with the product and may lead buyers to think they are included with it.
| What to Specify | Details |
|---|---|
| Inputs or conditions | Product hero image, target audience, use environment, and light direction |
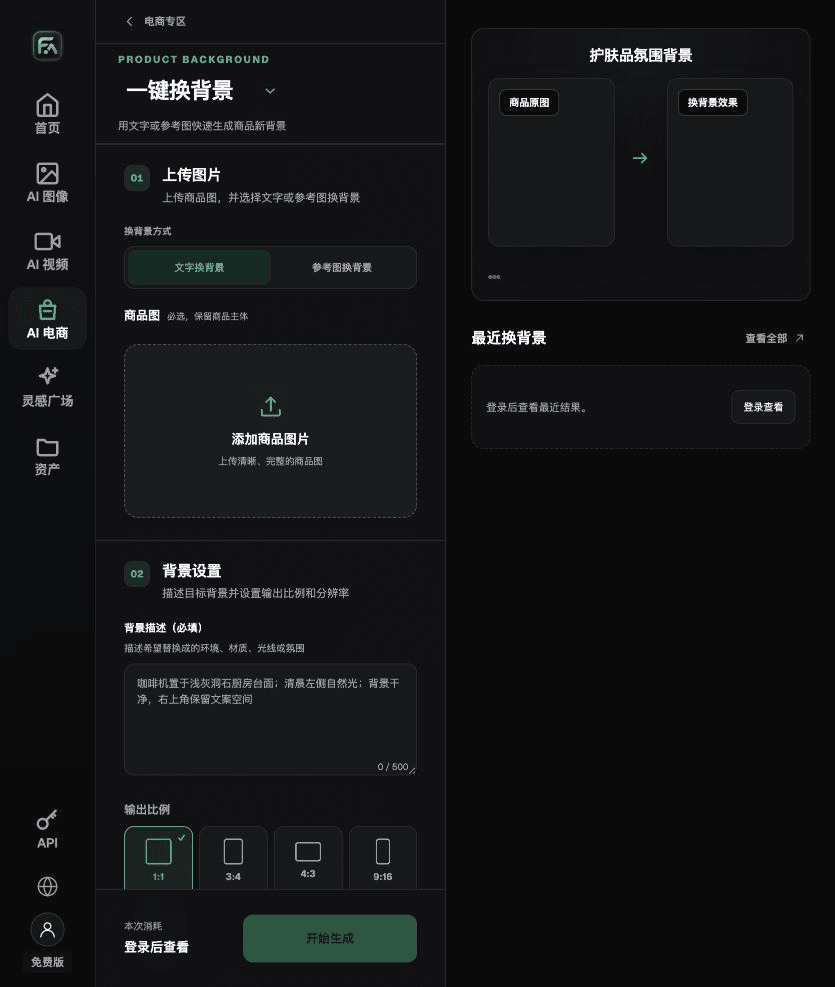
| Action | Use text or a reference image in One-Click Background Replacement to specify the surface, setting, lighting, and mood, then add a use-scene module to the product image set |
| Required checks | Proportions, perspective, contact points, reflections, and whether the scene competes with the product |
Make Sure the Light Reaches the Product
If window light comes from the left, the product highlights and cast shadows should respond to that direction. Reflections from the original image may retain the old studio environment and make the product look like it is floating against a new background. Checking the base of the bottle, tabletop shadows, and metal reflections is more useful than judging the background alone.
Flux Art is operated by MORNING STAR INDUSTRY LIMITED. It is a multimodel AI visual creation and production platform where one account can access 50+ third-party image and video models. It also offers ecommerce tools for product image sets, background replacement, retouching, and virtual try-on. Model pages and ecommerce tools are separate entry points: if a task specifically requires GPT Image 2.5, confirm the selected model in its dedicated model entry point rather than attributing every tool result to that model.
Put Product Scene Creation Into Practice
For product scene creation, complete the relevant steps in One-Click Background Replacement: upload the product image and describe the background in text, or upload a background reference image you have permission to use. Specify the setting, surface material, light direction, mood, and contact shadows, and list the product details that must not be changed.
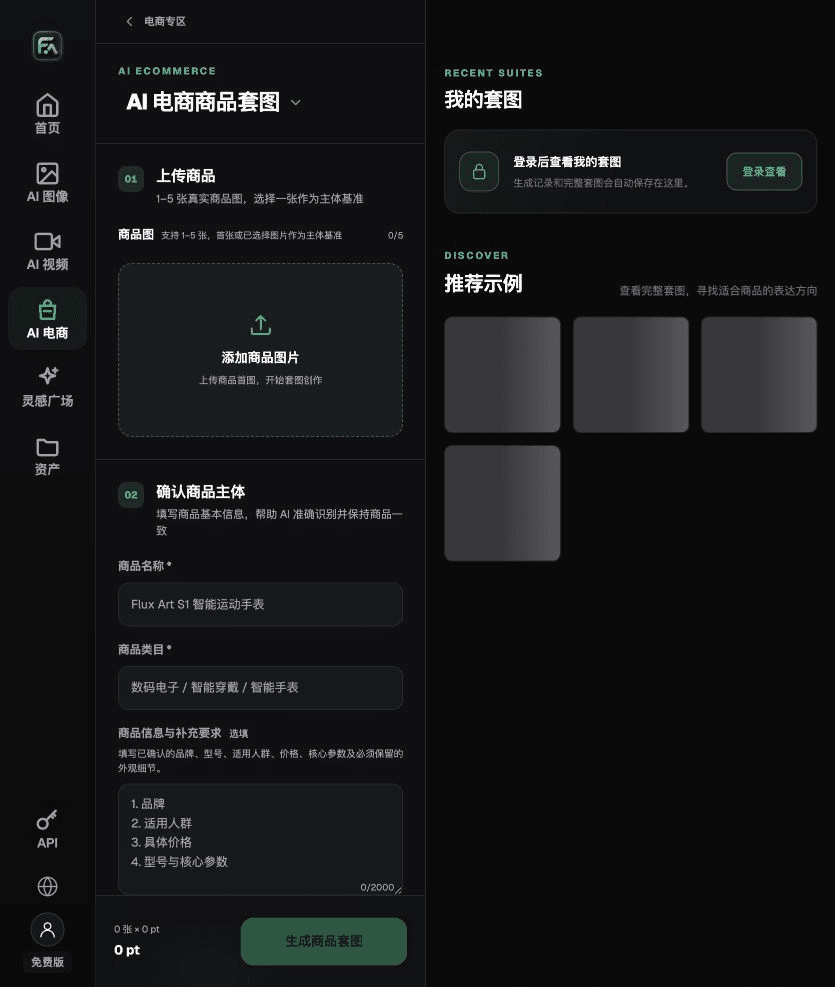
For product scene creation, complete the relevant steps in Product Image Sets: upload 1–5 real product images, and enter the product name, category, factual details, and details that must be preserved. Choose modules such as product hero image, white-background hero image, key selling points, use scene, or detail close-up, then set the aspect ratio, resolution, and language.
For product scene images, also check proportions, perspective, contact points, reflections, and whether the scene competes with the product. Review this delivery checklist together with the guidance above, “Show the Product in Context Without Cluttering the Scene.”

A Prompt to Try for This Task
Change only the background of the uploaded product to [specify setting], with a [specify material] surface and light coming from [specify direction]. Preserve the product’s outline, angle, text, logo, color, material, and proportions. Add natural contact shadows. Do not add products or accessories.

Check These Items Before Delivery
After creating the product scene image, check the final file for proportions, perspective, contact points, reflections, and whether the scene competes with the product. If you continue with other modules or SKUs, carry forward the approved product evidence and validate each new task separately. Check the current page for submission costs and available specifications.

From Production to Delivery-Ready Files
After completing this workflow, archive the original product image, approved copy, selected tool or model, input instructions, candidate versions, and final export together. Keep the original image separate at all times; revisions should not overwrite the product evidence. Include the SKU or task ID in filenames so the operations team can find the sales version for each image. Before delivery, check resolution, cropping, captions, and links for each actual placement. Approval of one large image does not mean every placement has been checked.
Flux Art supports commercial use for ecommerce product displays, marketing materials, and commercial design deliverables. Handle input photos, people, trademarks, and product claims according to the actual project materials. Verifying rights to input assets and product authenticity is a separate delivery requirement from the platform’s commercial-use support.
Sources and Related Workflows
For model background, see OpenAI’s official introduction to ChatGPT Images 2.5, retrieved on 2026-09-30. Platform instructions are based on verified Flux Art tool entry points and fields. This article provides production steps and examples to carry out; it does not claim generation tests, pass rates, savings, or customer results.
Find the relevant tools in the Flux Art AI Ecommerce Workspace. For related tasks, read the product creation tutorial for more on production and review methods.
Related entry in the original draft: Related tool or source 1