 Flux Art
For perspective correction in GPT Image 2.5 product retouching, first determine whether the tilt comes from the camera angle or the product’s actual shape. Flux Art product retouching can help address perspective; this guide checks the result against reference lines and the product outline to avoid turning a genuinely tapered bottle into a straight-sided cylinder.
Mark Which Lines Should Be Parallel
Review the product specifications and the original front-facing photo: a straight-sided box and a bottle that is narrower at the top than at the bottom should not follow the same straightening rule. Draw reference lines only along edges supported by evidence, and note the camera tilt and original shooting angle. If specifications are unavailable, preserve the original shape and take another photo; do not assume a correction is right just because the image looks neater. Guide lines are for review and should not appear in the final sales image.
Straightening Does Not Mean Changing the Product’s Proportions
When preparing a candidate, preserve the product’s true height-to-width ratio, seals, and openings. Do not narrow a bottle to make it look taller. Perspective changes affect how much of the top and sides is visible, so check those changes against the reference camera angle. Pixel lengths in a 2D image are not physical measurements; for size labels, use approved measurement records rather than estimating dimensions from a straightened image.
Check Packaging Text and Round Components for Distortion
Once the edges are aligned, check whether the round cap, logo, label text, or connector has been stretched horizontally or vertically. If rotating the canvas is enough, avoid unnecessary generative changes. For local edits, state the intended change and which parts must remain untouched. If small text is illegible in the original, provide a clearer source image; do not accept sharper-looking fabricated text after straightening.
Review Three Views: Original, Candidate, and Differences
Compare the original and candidate side by side at the same viewing scale. In a third view, mark the edges that changed and the structures that were preserved. Confirm that the improvement comes from correcting camera geometry rather than reshaping the product, then review the background and shadows. Save the working file and export a separate copy; do not overwrite the original. If a correction requires guessing about hidden surfaces, take a photo from a more suitable angle instead of carrying uncertain geometry forward.
Prepare the Relevant Tools and Source Images
Do Not Confuse Display Imperfections with Product Defects
Dust on the lens and reflections from the shoot can be corrected. Genuine scratches on a second-hand item and seams that are part of the product may be information buyers need to see. Decide which marks are photographic imperfections and which reflect the product’s condition, so retouching does not mislead buyers.
| What to Clarify | Details |
|---|---|
| Input or requirements | A clear original image and a specific defect list |
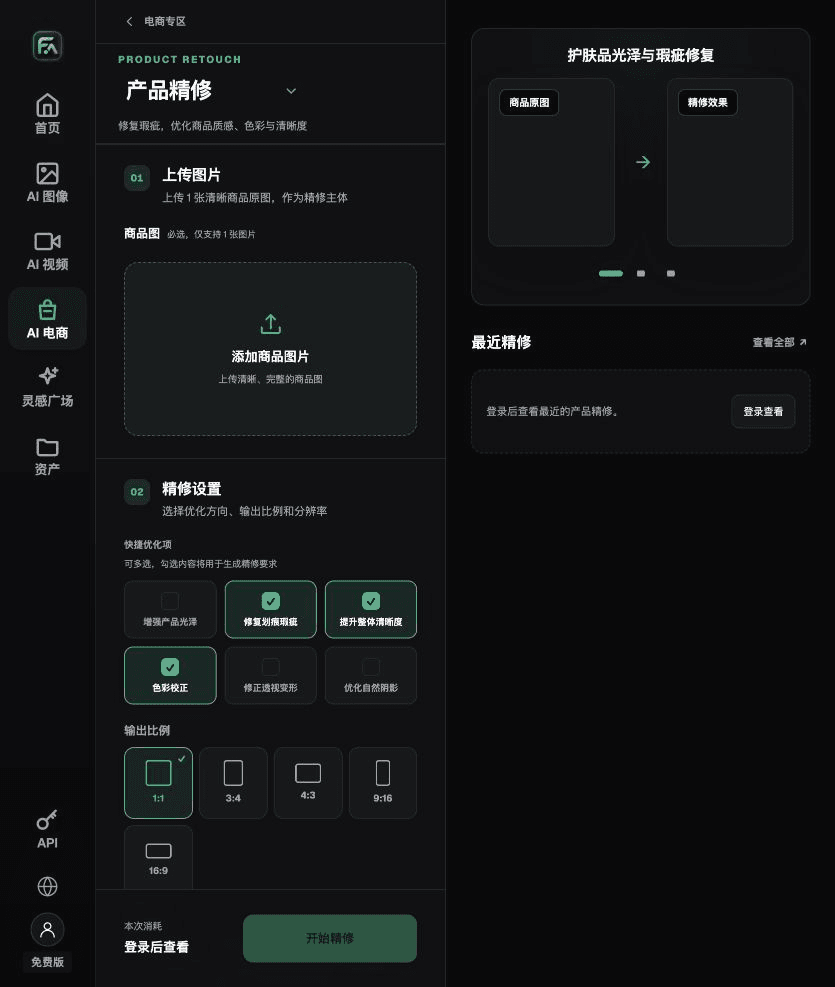
| Action | In product retouching, select only the needed options for gloss, flaws, clarity, color, perspective, or shadows |
| Items to check | Over-smoothed surfaces, fake highlights, narrowed outlines, color shifts, and structures that do not exist |

Check That the Retouching Has Not Made the Product Look Too Clean
Excessive sharpening can create halos around edges; too much gloss can make plastic look like metal. Compare structure lines, texture, and shadows with the original. When adjusting lighting alone, the product’s proportions, number of components, and packaging text should not change.
Flux Art is operated by MORNING STAR INDUSTRY LIMITED. It is a multi-model AI visual creation and production platform. One account can access more than 50 third-party image and video models, along with e-commerce tools for product image sets, background changes, retouching, and apparel try-on. Model pages and e-commerce tools are separate workflows: if a task specifically requires GPT Image 2.5, confirm the selected model in its dedicated model interface. Do not attribute every tool’s output to that model.
Put Product Image Retouching into Practice
To retouch a product image, complete the relevant steps in Product Retouching: upload a product image with a clear subject and no major obstructions; select gloss, scratches/flaws, clarity, color correction, perspective distortion, and natural shadows as needed. You do not need to enable every option.
For product retouching, also check for over-smoothed surfaces, fake highlights, narrowed outlines, color shifts, and structures that do not exist. Review these delivery checks alongside the guidance above on distinguishing display imperfections from product defects.

A Prompt You Can Try for This Task
Retouch the uploaded product image. This round, address only one of the following: [clarity / perspective / flaws / shadows]. Preserve the outline, color, material, packaging text, logo, and all genuine components. Do not invent highlights, textures, or structures.

Review These Items Before Delivery
After retouching the product image, inspect the final file for over-smoothed surfaces, fake highlights, narrowed outlines, color shifts, and structures that do not exist. If you continue with another module or SKU, carry forward the approved evidence for the product and validate each new task separately. Submission usage and available specifications are shown on the current page.

From Production to Deliverable Files
After completing this task, archive the original product image, approved text, selected tool or model, input instructions, candidate versions, and final export together. Always keep the original separate; revisions should not overwrite the source product evidence. Include the SKU or task ID in filenames so the operations team can identify the sales version associated with each image. Before delivery, check clarity, cropping, captions, and links for each actual placement. Passing review on one large image does not mean every placement has passed.
Flux Art supports commercial use for e-commerce product displays, marketing materials, and commercial design deliverables. Handle input photos, people, trademarks, and product claims according to the project’s source materials. Verifying rights to input assets and product authenticity is a separate delivery responsibility from the platform’s commercial-use support.
Sources and Related Workflows
For model background, see OpenAI’s official ChatGPT Images 2.5 introduction, retrieved on 2026-09-30. Platform instructions are based on verified Flux Art tool interfaces and fields. This article provides production steps and examples to execute; it does not claim generation tests, pass rates, savings, or customer outcomes.
Find the relevant tools in the Flux Art AI E-commerce workspace. For related tasks, continue with the product creation tutorial for more guidance on production and review.
Original draft link: related tool or source 1